You are setting up mobile data, checking your travel apps, sorting maps and messages, then suddenly your iPhone shows a carrier lock setting that you’ve never seen before.
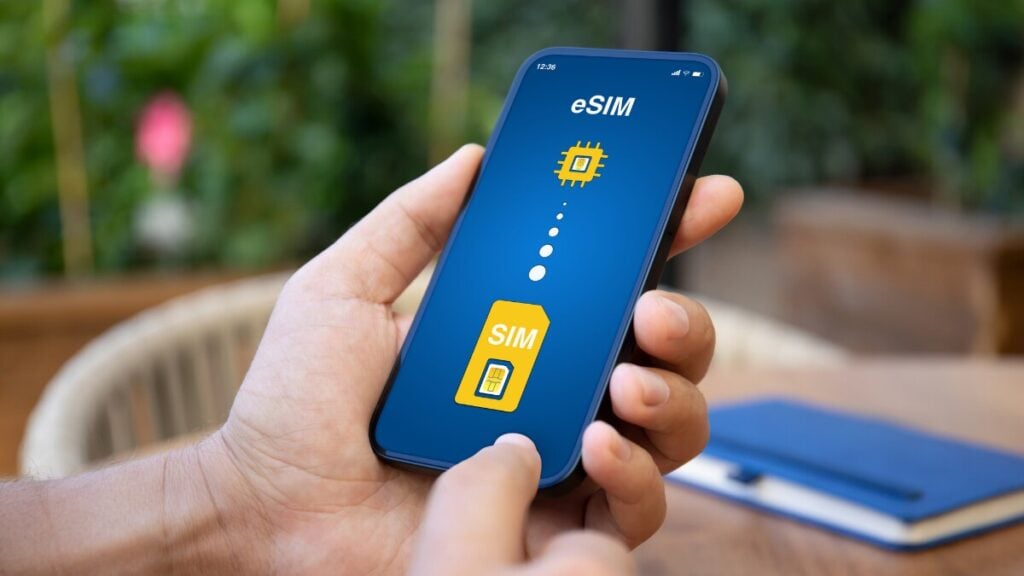
If you are a traveller planning to use a Travel eSIM, this is one of the first checks worth doing before departure. A travel eSIM can be a simple way to stay connected overseas, but your iPhone still needs to be able to accept a mobile plan from another provider.
The good news is that the check is quick. However, the downside is that if the phone is locked, the fix usually needs to come from your current mobile carrier, not from the eSIM provider. That is why it is better to find out at home than at the airport gate.
Quick Answer
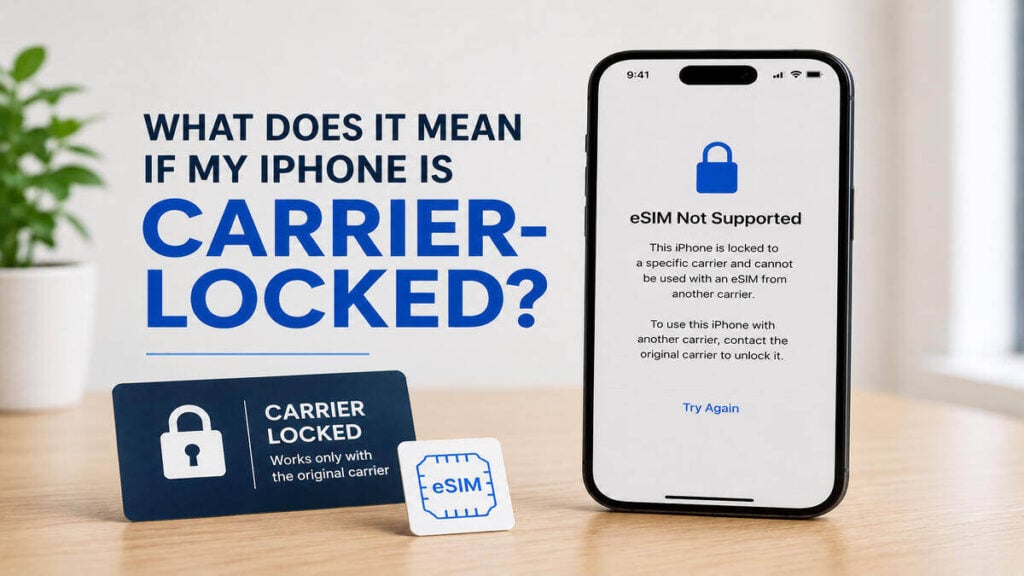
A carrier-locked iPhone is an iPhone that is restricted to one mobile provider. As such, it may not accept a travel eSIM, international eSIM, local SIM card, or overseas mobile network from another provider until the carrier removes that restriction.
This is not the same as your screen passcode, Face ID, Apple ID, or SIM PIN, but a mobile network restriction linked to the device.
If your iPhone shows a carrier restriction, contact your mobile provider before relying on an eSIM for mobile data overseas.
Carrier-Locked vs eSIM-Compatible
A common mistake is assuming that eSIM support and carrier unlock status are the same thing. They are not. An iPhone can support eSIM and still be carrier-locked.
That means the phone may have the technical ability to install an eSIM, but the carrier restriction may still stop another provider’s mobile plan from working. As such, the iPhone may allow you to start the eSIM setup process, but activation or connection can fail if the device is not allowed to use another network.
There are three separate checks to make:
- Is the iPhone unlocked?
This tells you whether the phone can use another provider. - Does the iPhone support eSIM?
This tells you whether the device can install a digital SIM. - Is the eSIM set up correctly?
This covers mobile data settings, roaming settings, activation timing, and product instructions.
If any one of these is wrong, your international eSIM may not work as expected.
How to Check Your iPhone’s Carrier Lock Status
To check whether your iPhone is unlocked, go to:
Settings > General > About > Carrier Lock
If your iPhone says No SIM restrictions, it is unlocked.
On some devices or regional settings, the wording may refer to carrier, network provider, or SIM restrictions. The key message you want to see is No SIM restrictions.
If the phone shows a carrier restriction instead, contact the mobile provider that supplied or locked the device. Only the carrier can usually unlock it, and it may take time, so this is best done before departure.
What to Do Before Departure
Before installing a TravelKon eSIM or any other data-only eSIM, run through this simple checklist.
1. Check the Carrier Lock Status
Start with the carrier lock check first. If the phone is locked, sort that out before spending time on eSIM setup.
Go to:
Settings > General > About > Carrier Lock
You want to see:
No SIM restrictions
If you do not see that, contact your carrier and ask whether the iPhone can be unlocked for international SIM or eSIM use.
2. Confirm Your iPhone Supports eSIM
Once the phone is unlocked, check whether your iPhone model supports eSIM. This is a separate step from checking whether the phone is carrier-locked.
If you are unsure, use our guide on how to check phone eSIM support before purchasing or installing a travel eSIM.
3. Read the eSIM Product Instructions
Check the destination, data allowance, validity period, activation timing, and setup instructions. Some eSIMs activate when installed. Others activate when they first connect to a supported network overseas.
This is important because installing too early, waiting too long, or deleting the eSIM after setup can create avoidable problems.
4. Install the eSIM on Stable Wi-Fi
A strong Wi-Fi connection makes eSIM setup easier. Install the eSIM before departure where possible, unless the product instructions say otherwise.
Once installed, do not delete it unless support tells you to. Many eSIMs cannot simply be reinstalled after removal.
5. Label Your SIM Lines Clearly
Use simple labels such as:
- Primary
- Australia SIM
- Travel eSIM
- Travel Data
Clear labels help avoid using the wrong line for mobile data or turning on data roaming for the wrong SIM.
6. Set Mobile Data to the Travel eSIM
When you are ready to use the plan, choose the travel eSIM as your mobile data line.
This is especially important if your normal Australian SIM remains active for calls or messages. Your iPhone needs to know which line should handle mobile data overseas.
7. Check Data Roaming on the Right Line
Many travel eSIMs require data roaming to be switched on for the eSIM line. That does not mean roaming should be turned on for every SIM.
Check the product instructions, then make sure roaming settings are applied to the travel eSIM, not accidentally to your regular Australian mobile plan.
8. Test the Connection After Arrival
When you arrive, turn off flight mode, wait a few minutes, and check whether your iPhone connects to a local network.
If nothing happens, restart the phone. Then check the mobile data line, data roaming setting, and any APN or app setup instructions provided with your eSIM.
What to Do if You Are Already Overseas

If you are already overseas and your eSIM is not working, start with the same three-part check.
First, check the carrier lock status. If the iPhone is locked, contact your Australian mobile provider. Some carriers may be able to help remotely, but this depends on the carrier, account status, and their unlocking process.
Second, check whether the eSIM is installed. If it is installed, do not delete it while troubleshooting unless support asks you to. Take screenshots of the settings first.
Third, check your mobile data settings. Make sure the travel eSIM is selected for mobile data and that data roaming is switched on for that eSIM line if the product requires it.
If the eSIM is installed, the phone is unlocked, and the settings look correct, contact TravelKon support with screenshots and trip details so the issue can be reviewed properly.
Common Mistakes to Avoid
The most common mistake is checking eSIM support but not checking the carrier lock status. Both are important.
Another mistake is assuming the eSIM has failed because it does not connect before travel. Some travel eSIMs are designed to connect only once you reach the destination country or region.
Deleting the eSIM too quickly can also make things harder. If there is an error, take screenshots first. Removing the eSIM may prevent reinstallation, depending on the product.
Be careful with data roaming as well. A travel eSIM may need roaming switched on, but your normal Australian SIM may not. Turning roaming on for the wrong line can lead to unwanted charges from your regular provider.
Last but not least, avoid waiting until the day of travel to check your lock status. If the iPhone carrier locked message appears, your carrier may need time to process an unlock request.
When to Contact TravelKon Support
Contact us when your iPhone is unlocked, eSIM-compatible, and the TravelKon eSIM still is not working after you have followed the setup instructions.
Before reaching out, collect the details that will make support faster:
- Your iPhone model
- Your destination country
- The TravelKon eSIM product was purchased
- A screenshot of the Carrier Lock section
- A screenshot of the installed eSIM
- A screenshot of your mobile data settings
- A screenshot of any error message
- Whether you are still in Australia or already overseas
- Whether the eSIM has been deleted
- Whether data roaming is on for the travel eSIM line
These details help separate device issues, carrier restrictions, setup errors, and destination network issues.
TravelKon Connectivity Tips for Locked and Unlocked iPhones
If your iPhone is carrier-locked, the next step is to contact your mobile provider. The lock sits at the carrier and device level, so an eSIM provider cannot usually remove it.
If the phone is unlocked but the eSIM will not install, check eSIM compatibility and the product setup instructions.
If the eSIM is installed but not connecting, check mobile data selection, roaming settings, destination coverage, and activation timing.
If those checks are complete and the service still is not working, TravelKon support can review the setup with you. Screenshots are useful because small settings, such as the selected data line, can make a big difference.
Takeaways
An iPhone carrier locked message can stop a travel eSIM from working, even if the phone supports eSIM. That is why the carrier lock check should happen before departure, not after landing.
Start with Settings > General > About > Carrier Lock. If the phone says No SIM restrictions, move on to checking eSIM compatibility and following the TravelKon eSIM setup instructions. If the phone is locked, contact your carrier first.
A few minutes of checking can prevent a lot of stress overseas. Once the iPhone is unlocked, compatible, and set up correctly, using mobile data overseas becomes much simpler.
FAQs
What Does iPhone Carrier Locked Mean?
iPhone carrier locked means the device is restricted to one mobile provider. It may not accept another provider’s SIM or eSIM until the carrier unlocks the phone.
Can I Use a Travel eSIM if My iPhone Is Carrier-Locked?
Usually, no. A carrier-locked iPhone may block a travel eSIM or international eSIM from working. Contact your mobile provider to ask whether the device can be unlocked.
Is Carrier-Locked the Same as eSIM-Compatible?
No. eSIM-compatible means the phone can support digital SIM technology. Carrier-unlocked means the phone can use another provider’s mobile plan. You need both for a travel eSIM to work properly.
Where Do I Check if My iPhone Is Unlocked?
Go to Settings > General > About > Carrier Lock. If it says No SIM restrictions, your iPhone is unlocked.
Can TravelKon Unlock My iPhone?
No. TravelKon can help with eSIM setup and troubleshooting, but carrier unlocking is handled by the mobile provider that locked the phone.