An iPad can be one of the best travel devices to keep connected. It has a bigger screen for maps, easier booking management, smoother work calls, and less phone battery stress during long travel days. However, before choosing a travel eSIM plan, the real question is simple but important. Can that specific iPad actually use mobile data overseas, or is it Wi-Fi only?
Will Your iPad Work with an eSIM When You Travel Abroad?
Yes, you can use an eSIM on an iPad while travelling if the iPad is a Wi-Fi + Cellular model that supports eSIM.
A Wi-Fi-only iPad cannot use a TravelKon eSIM because it has no mobile data hardware. So the iPad must support cellular data, have eSIM capability, run current software, and be set up with the correct travel plan for the destination.
What Actually Works With an iPad eSIM When Travelling
| iPad Type | Can Use Mobile Data? | Can Use a TravelKon eSIM? | Best Travel Option |
|---|---|---|---|
Wi-Fi-only iPad | No | No | Use Wi-Fi or phone hotspot |
Wi-Fi + Cellular iPad with eSIM | Yes | Usually yes | Install TravelKon eSIM directly |
eSIM-only iPad | Yes | Usually yes | Install TravelKon eSIM directly |
Older cellular iPad with physical SIM only | Yes | Not by eSIM | Use a compatible physical SIM if available |
iPad connected to iPhone hotspot | Yes, through phone | eSIM sits on iPhone | Good backup option |
iPad with unsupported region or model | Maybe | Check first | Confirm model and eSIM menu |
Work or school-managed iPad | Maybe | Maybe | Check device restrictions first |
The key point here is that the iPad in question must be a cellular-capable model. A travel eSIM cannot add mobile data hardware to a Wi-Fi-only iPad.
Which iPads Support Travel eSIM?
Calling it an iPad does not narrow things down much. iPad Pro, iPad Air, iPad mini, and the standard iPad all exist across different generations, and each one may be Wi-Fi-only or Wi-Fi + Cellular.
Use this as a practical guide, then confirm the exact model number in the iPad settings.
| iPad Family | eSIM Travel Support Guidance |
|---|---|
iPad Pro Wi-Fi + Cellular | Many 2018 and newer models support eSIM; check the exact model |
iPad Air Wi-Fi + Cellular | Many 2019 and newer models support eSIM; check the exact model |
iPad mini Wi-Fi + Cellular | Many recent models support eSIM; check the exact model |
Standard iPad Wi-Fi + Cellular | Many 7th-generation and newer models support eSIM; check the exact model |
eSIM-only iPad models | Suitable for travel eSIM use, but cannot use physical SIM cards |
Older cellular iPads | May support physical SIM, Apple SIM, eSIM, or a mix, depending on model |
Any Wi-Fi-only iPad | No eSIM or mobile data support |
As a broad guide, many Wi-Fi + Cellular iPad models from 2018–2019 onward support eSIM, but the exact model number will always have the final say. If the iPad does not show a Cellular Data or Mobile Data menu, it is not the right device for a direct TravelKon eSIM setup.
How to Check Whether Your iPad Supports eSIM
Start with the actual device in hand. Product names can be misleading because Apple has sold Wi-Fi-only, Wi-Fi + Cellular, nano-SIM, Apple SIM, eSIM, and eSIM-only iPad variants across different generations.
Check the iPad Model
On iPad, go to:
Settings > General > About
Check:
- Model Name
- Model Number
- EID
- Carrier Lock or network restrictions, where shown
- Cellular Data or Mobile Data menu
- Add eSIM or Add Cellular Plan option
The presence of an EID is one of the clearest signs that the iPad supports eSIM. If there is no Cellular or Mobile Data section and no EID listed, the device is most likely Wi-Fi only.
Check for the Cellular Data or Mobile Data Menu
Open:
Settings > Cellular Data
Depending on device language and region, this may appear as Mobile Data.
If the menu is missing completely, the iPad is probably Wi-Fi only. If the menu is present, check whether the iPad offers an option such as:
- Add eSIM
- Add Cellular Plan
- Use QR Code
- Find a New Plan
- Transfer from Another iPad
Apple’s iPad eSIM setup supports several activation paths, including carrier activation, transfer from another iPad, joining an existing iPhone mobile plan, finding a new plan, using a QR code, or using a provider app.
Check whether the iPad is Work or School Managed
If the iPad belongs to work, school, or another organisation, eSIM changes may be blocked by device management settings.
A missing Add eSIM option on a cellular iPad can be a management restriction, not a TravelKon issue. If the iPad is supervised by an organisation, the device owner or IT team may need to allow mobile data changes before travel.
Check the iPad SIM Type
Some iPad models support eSIM only. Newer Wi-Fi + Cellular iPad models, including recent iPad Pro, iPad Air, iPad mini, and standard iPad models, may rely on eSIM rather than a physical SIM tray.
Keep in mind that an eSIM-only iPad cannot accept a physical travel SIM. For those models, the travel data setup needs to happen digitally.
Check Region and Model Variants
Region can affect device behaviour. Some iPad models sold in different countries or regions may have different SIM arrangements, cellular bands, or activation options. Before buying a travel eSIM, check the exact model number rather than relying only on the name alone
Check Software Before Departure
Update iPadOS before travel where possible. Old software can hide eSIM options, create activation errors, or prevent the iPad from using the latest carrier settings.
Before leaving Australia:
- Update iPadOS.
- Restart the iPad.
- Check the Cellular Data or Mobile Data menu again.
- Make sure Wi-Fi is available for installation.
- Save the TravelKon QR code or setup details somewhere accessible.
For a broader device check, use our guide on how to check phone eSIM support. The same principle applies to iPads. Always confirm eSIM support before purchase, not after landing.
Should You Install the TravelKon eSIM on iPad or iPhone?
Install your TravelKon eSIM on the device that needs independent mobile data.
| Travel Need | Best Setup |
|---|---|
iPad needs data without the phone nearby | Install eSIM on a compatible cellular iPad |
Phone needs maps, rideshare, WhatsApp, banking, and daily travel data | Install eSIM on a compatible phone |
iPad is Wi-Fi only | Install eSIM on the phone and use hotspot where supported |
Laptop needs occasional data | Use phone or iPad hotspot if the plan and device allow |
Multiple devices need constant data | Check plan conditions before relying on hotspot |
A TravelKon eSIM should be treated as a plan for one installed device. As such, if the eSIM is installed on the iPad, the phone does not automatically get that same plan. If the phone needs data too, use hotspot where supported or choose the right device before installation.
TravelKon eSIM Setup Methods on iPad
Different iPad setup options can appear in Cellular Data or Mobile Data settings, but not every option applies to a travel eSIM.
| Setup Method | What It Means | TravelKon Relevance |
|---|---|---|
QR code | Scan the provider’s eSIM QR code | Common travel eSIM setup method |
Manual details / SM-DP+ | Enter activation details manually | Useful if QR scanning fails |
Install link | Open an activation link on the iPad | Use only if provided in the setup instructions |
Provider app | Install through a provider app | Only applies when the provider supports app setup |
Carrier activation | Carrier assigns a plan to the iPad | Usually for standard carrier mobile plans |
Transfer from another iPad | Move an existing cellular plan | Not always available for travel eSIMs |
Join iPhone Plan | Add iPad to an existing phone carrier account | Carrier-dependent, not the usual TravelKon setup path |
Find a New Plan | Select from available carrier plans | May not show TravelKon plans |
For most TravelKon iPad travel eSIM setups, QR code or manual installation details are the most relevant options. If QR scanning fails, enter the SM-DP+ address and activation code exactly as provided. Spacing, spelling, capitalisation, and copy-paste errors can stop manual activation from working.
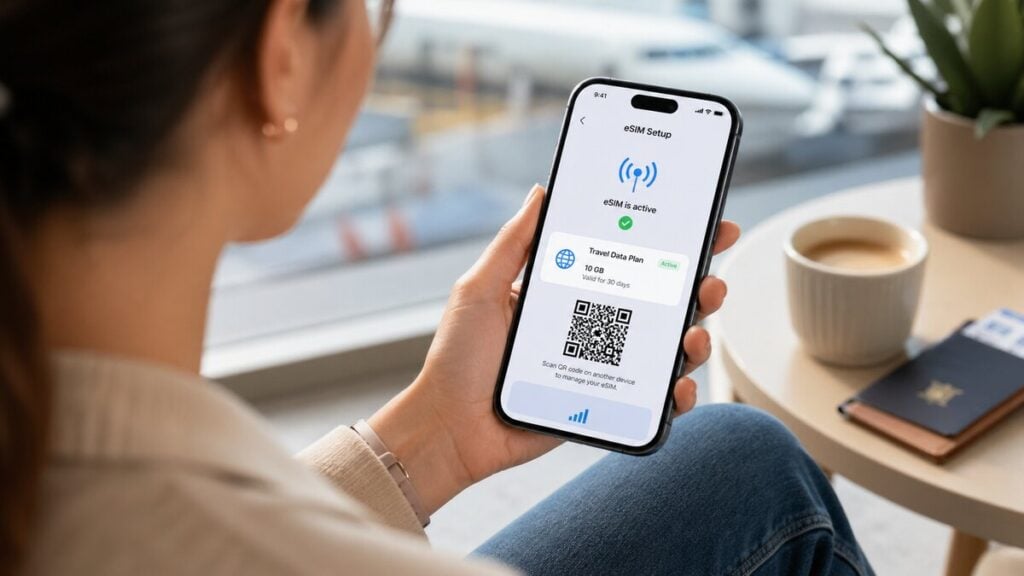
How to Install or Prepare a TravelKon eSIM on iPad
Travel eSIM setup is easiest when the main checks are finished before departure.
Before Buying
Check:
- The iPad is Wi-Fi + Cellular, not Wi-Fi only.
- The iPad supports eSIM.
- The destination is covered by the selected plan. If you’re heading across multiple countries, a Europe eSIM can simplify things without switching networks mid-trip.
- The iPadOS version is current.
- The iPad has Wi-Fi for installation.
- The plan’s activation timing is understood.
- Hotspot is checked if data sharing is needed.
- The iPad is not blocked by work, school, or device-management restrictions.
Before Departure
Once the right plan is purchased:
- Keep the QR code or setup details safe.
- Connect the iPad to a stable Wi-Fi.
- Go to Settings > Cellular Data or Settings > Mobile Data.
- Choose Add eSIM or Add Cellular Plan.
- Scan the TravelKon QR code or follow the manual setup instructions.
- Label the plan clearly, such as TravelKon Bali eSIM or TravelKon China eSIM.
- Check whether the plan starts on installation or first network connection.
- Do not delete the eSIM unless TravelKon support confirms it is safe.
Do not leave setup until airport arrival unless unavoidable. Airport Wi-Fi can be slow, unstable, login-gated, or unavailable when the QR code needs to be loaded.
On Arrival
After landing:
- Turn off Airplane Mode.
- Open Settings > Cellular Data or Settings > Mobile Data.
- Select the TravelKon eSIM for mobile data.
- Turn data roaming on for the TravelKon line if required.
- Check APN instructions if provided.
- Restart the iPad if it does not connect.
- Try manual network selection if automatic selection fails.
How Much Data Does an iPad Need for Travel?
An iPad can use data faster than a phone because the screen is larger, apps are often richer, and cloud syncing often runs in the background. That said, a plan that feels generous on a phone can disappear faster on a tablet.
| Usage Type | Typical Activities | Approx. Data Use |
|---|---|---|
Light use | Maps, email, bookings, messaging, browsing | 50 MB to 150 MB per day |
Medium use | Social apps, cloud documents, image-heavy sites, and video calls | 300 MB to 800 MB per day |
Heavy use | Streaming, hotspot, large downloads, work uploads, cloud photo/video sync | 1 GB to 3 GB+ per day |
To reduce data use while travelling:
- Turn off automatic app updates.
- Pause large iCloud sync tasks.
- Disable background app refresh for non-essential apps.
- Avoid video streaming on mobile data.
- Use hotel Wi-Fi for large downloads.
- Monitor data usage in iPad settings.
Common eSIM Mistakes on iPad

Most iPad travel eSIM issues come from a small group of setup mistakes.
Buying an eSIM for a Wi-Fi-Only iPad
A Wi-Fi-only iPad cannot use a TravelKon eSIM directly. Use a compatible phone hotspot or a cellular-capable iPad instead.
Installing the eSIM on the Wrong Device
If the phone is the device needed for maps, rideshare, banking, WhatsApp, and airport arrival data, install the eSIM on the phone. If the iPad needs independent mobile data, install it on the iPad.
Assuming One eSIM Covers Both iPhone and iPad
One eSIM installation should be treated as one device setup. Data sharing depends on hotspot support, not the eSIM automatically appearing on both devices.
Leaving Roaming Off for the Travel Line
Travel eSIMs often need data roaming enabled on the TravelKon line. Roaming settings should be checked on the travel eSIM, not just the main Australian plan.
Using Airport Wi-Fi That Blocks Setup
Some airport Wi-Fi networks use login pages, time limits, or weak connections. Install before departure on stable Wi-Fi where possible.
Deleting the eSIM Too Early
Do not delete the eSIM during troubleshooting unless our team confirms it is safe. Some eSIMs cannot be reinstalled after deletion.
Missing “Add eSIM” on a Managed iPad
A work or school iPad may block eSIM changes. If the device is managed, check restrictions before buying or installing the plan.
Limitations to Be Aware Of when Using Travel eSIM on an iPad
Physical SIM-Only iPads
Some older cellular iPads may support mobile data but not eSIM. Those devices need a compatible physical SIM, not a travel eSIM.
eSIM-Only iPads
Some newer iPads use eSIM only and do not have a physical SIM tray. These devices are well suited to travel eSIM use, but the setup must be digital.
Carrier-Locked or Restricted Devices
iPads are often sold unlocked, but restrictions can still appear through carrier-supplied devices, managed business devices, school devices, or enterprise profiles. If a cellular plan cannot be added, check whether the iPad is managed or restricted.
Data-Only Plans
Many travel eSIMs are data-only. That means mobile data works, but standard calls and SMS may not be included. Apps such as FaceTime, WhatsApp, Messenger, email, maps, browsers, rideshare apps, and booking platforms can still use mobile data.
Hotspot Use
Hotspot may work depending on the plan, destination, network, and device settings. Do not assume hotspot is included. Check the plan details before relying on an iPad to share data with a laptop, phone, or another traveller. For example, if you’re travelling with multiple devices across the United Kingdom, a UK eSIM with hotspot support can help keep everything connected without juggling separate plans.
Deleting or Transferring an eSIM
Do not delete a travel eSIM during troubleshooting unless support confirms it is safe. Some eSIMs cannot be reinstalled after deletion. Transfer rules also vary between devices, providers, and plans.
iPad Travel eSIM Troubleshooting Checklist
If the TravelKon eSIM is installed but mobile data is not working, check these items in order.
1. Confirm the iPad Is Cellular
Open Settings and check for Cellular Data or Mobile Data. If that menu is missing, the iPad is Wi-Fi only and cannot use eSIM.
2. Confirm the TravelKon eSIM Is Selected
Go to Settings > Cellular Data or Settings > Mobile Data and check that the TravelKon eSIM is selected for mobile data.
3. Turn On Data Roaming for the Travel Line
Travel eSIMs often need roaming enabled on the travel line. Make sure roaming is applied to the TravelKon eSIM, not another plan.
4. Check APN Settings
Some plans require a specific APN. If our support team provide you with specific APN instructions, enter them exactly.
5. Restart the iPad
A restart can clear a stuck activation, carrier settings issue, or network registration delay.
6. Toggle Airplane Mode
Turn Airplane Mode on for 15 seconds, then turn it off again. This forces the iPad to search for the network again.
7. Try Manual Network Selection
If automatic selection does not connect, manually choose a supported network in the destination.
8. Check for Captive Wi-Fi Confusion
Public Wi-Fi login pages can make it look like mobile data is failing. Turn Wi-Fi off briefly and test the TravelKon mobile data line directly.
9. Check whether the eSIM Was Deleted
If the eSIM was deleted, do not keep trying to reuse the same QR code until support confirms whether reinstalling is allowed.
10. Contact TravelKon Support
Contact TravelKon support with:
- Destination country.
- iPad model.
- iPadOS version.
- Screenshot of Cellular Data or Mobile Data settings.
- APN settings entered.
- Error message shown.
- Whether the eSIM has been deleted.
- Whether the iPad is personal, work-managed, or school-managed.
TravelKon Connectivity Tips Before You Fly
For the smoothest setup, treat the iPad as its own travel data device only if it has cellular hardware and eSIM support.
Best pre-flight setup:
- Check the exact iPad model.
- Confirm the Cellular Data or Mobile Data menu appears.
- Install the eSIM on stable Wi-Fi.
- Keep the QR code accessible offline.
- Label the travel plan clearly.
- Check activation timing.
- Turn roaming on only for the travel line when required.
- Keep a phone hotspot as a backup if possible.
Still unsure? Check the iPad model number before buying, or contact our support team with a screenshot of Settings > General > About and the Cellular Data or Mobile Data screen.
Why You Should Check iPad eSIM Compatibility Before the Trip
iPads can store eight or more eSIM profiles, which makes them useful for repeat travel, regional trips, and separating work data from personal mobile data. When everything from maps and bookings to banking codes and ride pickups depends on a working connection, even a small setup issue can slow you down.
The easiest win is to sort it before you go. A quick compatibility check at home, with stable Wi-Fi and time on your side, is far simpler than troubleshooting it at the airport or after you land.
FAQs
Can You Use an eSIM on iPad While Travelling?
Yes, if the iPad is a Wi-Fi + Cellular model that supports eSIM. A Wi-Fi-only iPad cannot use eSIM because it has no mobile data hardware.
Which iPads Support Travel eSIMs?
Many modern Wi-Fi + Cellular iPads support eSIM, including newer iPad Pro, iPad Air, standard iPad, and iPad mini models. The exact answer depends on the model number, region, and cellular configuration.
How Do You Check If an iPad Is Wi-Fi Only or Cellular?
Go to Settings and look for Cellular Data or Mobile Data. If there is no Cellular Data or Mobile Data menu, the iPad is likely Wi-Fi only. You can also check the model number under Settings > General > About.
What is an iPad Travel eSIM?
An iPad travel eSIM is a digital mobile data plan installed on a compatible cellular iPad for overseas use. It lets the iPad connect to mobile data without inserting a physical SIM card.
Can a Wi-Fi-Only iPad Use a TravelKon eSIM?
No. A Wi-Fi-only iPad cannot use a TravelKon eSIM directly. Use Wi-Fi or connect through a compatible phone hotspot instead.
Can You Use an eSIM on an iPad Without an iPhone?
Yes, a compatible Wi-Fi + Cellular iPad can use an eSIM without an iPhone. The iPhone is only needed if the iPad is Wi-Fi-only and must connect through hotspot, or if the traveller prefers to install the eSIM on the phone instead.
Can a TravelKon eSIM Work on both iPhone and iPad?
No. Treat one eSIM as one installed device setup. If the eSIM is installed on the iPad, it does not automatically work on the iPhone. Use hotspot where supported or choose the main travel device before installation.
Should the Travel eSIM go on the iPad or the iPhone?
Install it on the device that needs independent mobile data. If the iPad needs data without the phone nearby, install it on the compatible cellular iPad. If the phone is the main travel device, install it on the phone.
Can You Use Hotspot From an iPad With a Travel eSIM?
Hotspot may work depending on the iPad model, plan, destination, network, and TravelKon plan conditions. Check the plan details before relying on hotspot.
Does a TravelKon eSIM give an iPad a Phone Number?
Many travel eSIMs are data-only. The iPad can use mobile data for apps, browsing, maps, email, and internet-based calls, but standard phone calls and SMS may not be included.
Can You Install the eSIM Before Departure?
Yes, installation before departure is usually best when connected to stable Wi-Fi. Check the plan’s activation timing so the validity period does not start earlier than expected.
Should Data Roaming Be On or Off?
For many travel eSIMs, data roaming must be on for the travel line. Turn it on for the TravelKon eSIM if the setup instructions require it. Avoid changing unrelated SIM or plan settings unnecessarily.
Can You Delete and Reinstall an iPad Travel eSIM?
Do not delete the eSIM unless TravelKon support confirms that reinstalling is possible. Some eSIMs cannot be reused after deletion.
Why is the eSIM Installed but Not Working on my iPad?
Common causes include Wi-Fi-only hardware, wrong data line selected, roaming off, incorrect APN, unsupported network selection, old iPadOS, managed-device restrictions, or deleting the eSIM too early.
What is the Best Travel eSIM Australia Setup for iPad Users?
Use a compatible Wi-Fi + Cellular iPad with eSIM support, install the TravelKon eSIM on stable Wi-Fi before departure, keep setup details accessible, and check roaming settings on arrival. If the iPad is Wi-Fi only, use a compatible phone with hotspot instead.
Takeaways
Getting an iPad ready for travel is less about features and more about certainty. A few checks before departure can eliminate problems that tend to appear at the worst possible moment, when you need directions, confirmation codes, or a reliable connection.
The difference is easy to feel. One trip starts smoothly, the other begins with troubleshooting. A prepared setup lets the iPad do what it should. And if anything does not work as expected, reach out to our support team before or during your trip.