seo@agents.digital

how to make a phone call with data only esim

How to Make a Phone Call With a Data-Only eSIM

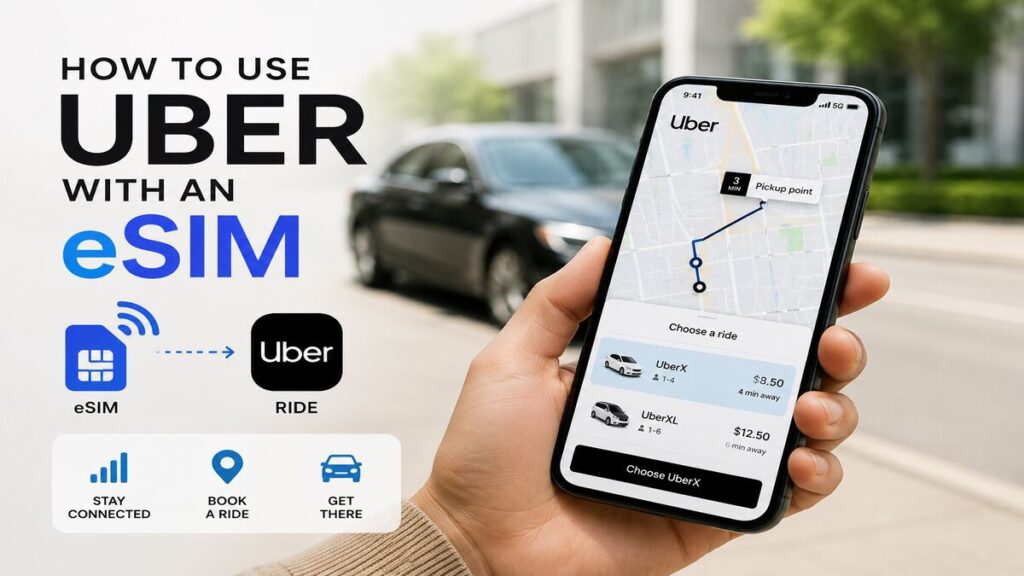
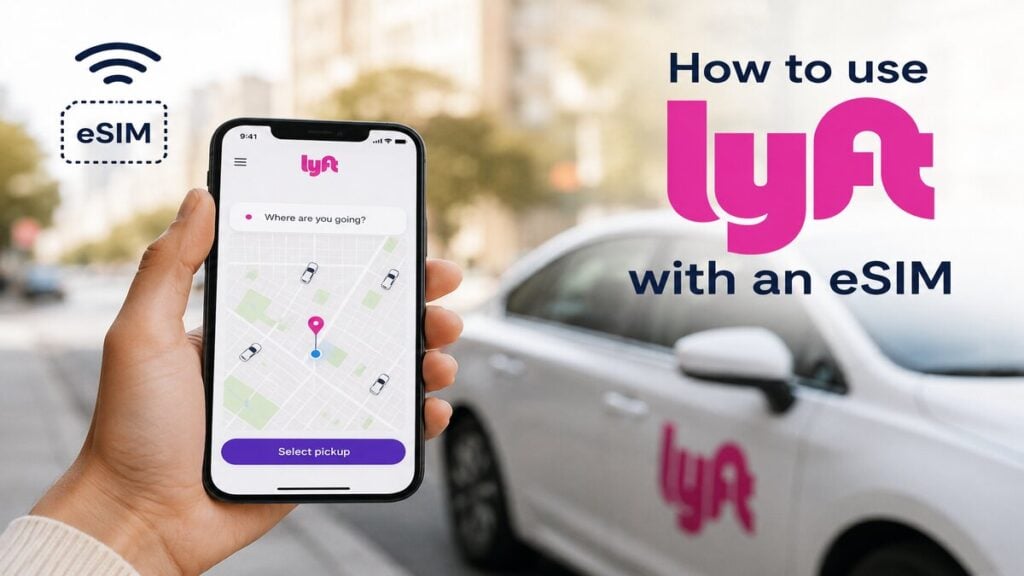
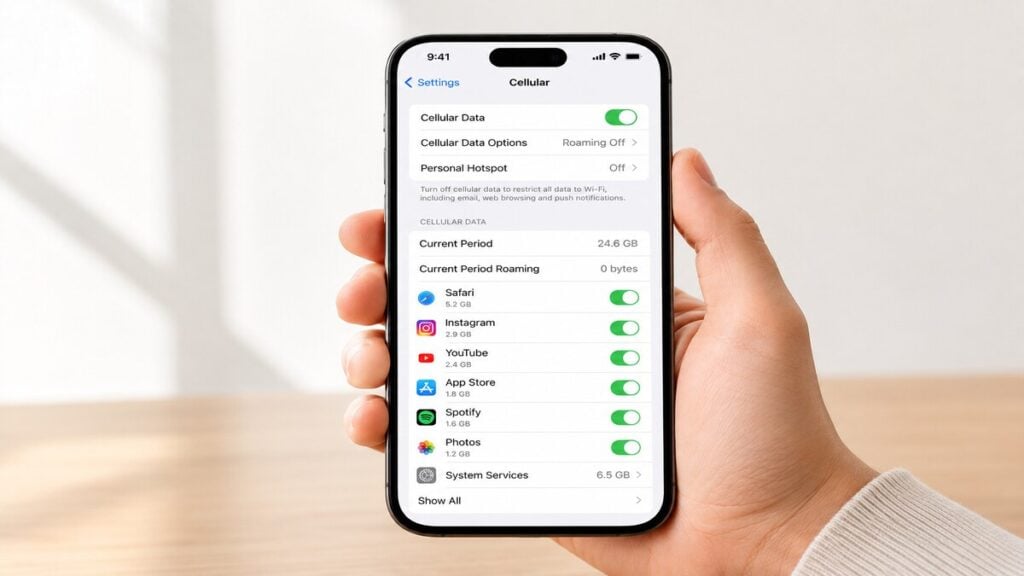
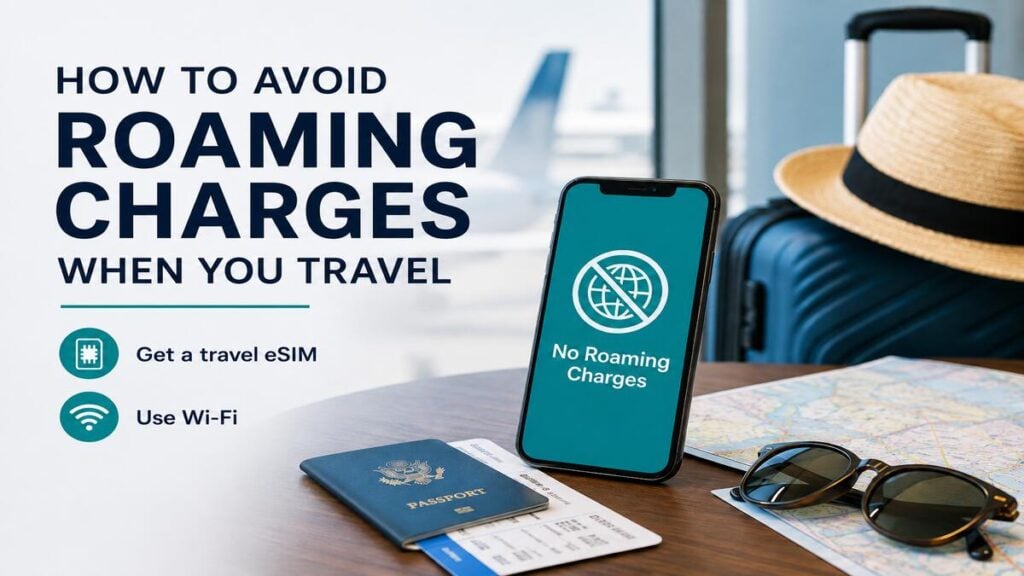
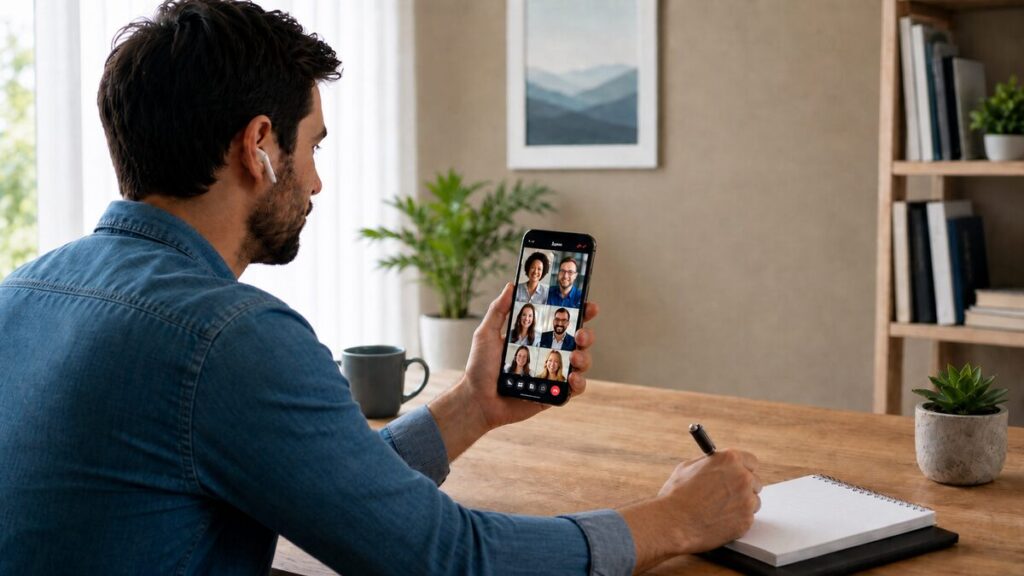
How do you make a phone call with a data-only eSIM? This is one of those questions that tends to appear when bags are packed, airport coffee is in hand, and one last thought about whether normal calls will still work overseas. For any traveller using a Travel eSIM, the answer depends on the type of call being made. A WhatsApp call is not the same as calling from the normal phone dial pad. FaceTime Audio, Messenger and similar apps also work differently from a standard mobile call. And that difference determines a lot, as you are about to find out. Quick Answer Yes, you can make a phone call with a data-only eSIM, but it will normally be through an internet calling app rather than the phone’s standard dial pad. A data-only eSIM gives your phone mobile data overseas. That means apps such as WhatsApp, FaceTime Audio, Messenger, Skype, Viber and WeChat can use that data connection for calls, provided the app is already set up and the eSIM is connected. What it usually does not provide is a new phone number for regular mobile calls and SMS. Some travel SIM or international eSIM products may include local calls or texts, but this depends on the exact plan. Check the product details before departure if standard calling, SMS verification or emergency calling matters for your trip. What a Data-Only eSIM Means A data-only eSIM, as the name suggests, is built for internet access. It is best thought of as a travel data connection, not a full replacement for your usual mobile service. Once active, it can power the apps that need internet access. That includes Google Maps, WhatsApp, FaceTime Audio, Messenger, email, web browsing, banking apps, rideshare apps and translation tools. If an app works over mobile data or Wi-Fi at home, it will usually work over travel eSIM data overseas. The confusion usually comes when you start thinking about making calls. A standard phone call uses a mobile network voice service and normally needs a phone number. This is the type of call made from the phone’s regular dial pad. An app-based call uses the internet. WhatsApp calls, FaceTime Audio calls and Messenger calls sit in this category. These calls do not need the travel eSIM to have its own phone number, but they do need working mobile data or Wi-Fi. That is the key point. A data-only eSIM can help you call people through apps, but it may not let you dial a standard number unless the plan includes calls. How to Make Calls on Different Apps With a Data-Only eSIM The simplest way to make a phone call with a data-only eSIM is to use an app that calls over the internet. Before travelling, open the apps you plan to use and make sure they are already logged in. WhatsApp, FaceTime, Messenger and similar apps can become frustrating if they ask for SMS verification after your home SIM is switched off, out of service or unable to receive messages overseas. For WhatsApp, keep your existing number active in the app. There is usually no need to change your WhatsApp number just because you are using an international eSIM for data. Once the TravelKon eSIM is connected to mobile data, WhatsApp can use that connection for messages and calls. For FaceTime Audio, check that FaceTime is enabled and allowed to use mobile data. This is especially important on iPhone, where one small setting can stop the app from using your travel data connection. For Messenger, make sure the app is updated, logged in and allowed to use mobile data. Messenger calls can work over mobile data, but they will use part of your data allowance. Wi-Fi Calling is different again. It depends on your home mobile carrier, device, plan and settings. Some Australian providers support Wi-Fi Calling overseas, while others may have limits or conditions. Set it up and test it before leaving Australia, then check any costs or restrictions with your mobile provider. What to Do Before You Leave for Your Trip Start by confirming that your phone is unlocked and eSIM compatible. Some older devices do not support eSIM, and some models vary by region. Install your eSIM using the instructions provided with your TravelKon eSIM. Keep Wi-Fi available during installation, as the first setup step usually needs an internet connection. Give your SIMs clear names. For example, label your home SIM as “Australia” and your travel eSIM as “TravelKon” or the destination name. This makes it easier to choose the right SIM for mobile data, calls and messages. Set mobile data to the travel eSIM. On iPhone, this is usually under Mobile or Cellular settings. On Android, look for SIM manager, mobile network or preferred SIM for mobile data. Turn data roaming on for the travel eSIM if the product instructions say it is required. Many travel eSIMs need roaming enabled to connect to the correct overseas network. Decide what to do with your home SIM. If avoiding roaming charges is the goal, turn off data roaming for the home SIM. If SMS codes are still needed, the home SIM may need to stay active, but any costs depend on your Australian carrier. Open WhatsApp, FaceTime Audio, Messenger or your preferred calling app before departure. Make a quick test call while still in Australia, so there are no login surprises later. Save important contacts inside your calling apps, not just in your phone contacts. Hotels, drivers, tour operators and restaurants often use WhatsApp, which can be easier than placing a standard international call. Do This After You Land Switch mobile data to your TravelKon eSIM and follow the product instructions. Some eSIMs connect automatically, while others may need manual network selection or APN settings. Check that your phone shows signal bars and a data symbol such as 4G, 5G or LTE. Then open a browser and load a simple webpage. This confirms that mobile data is working before troubleshooting individual apps. If WhatsApp

How to Make a Phone Call With a Data-Only eSIM Read More »

how to use uber with an esim

How to Use Uber With an eSIM

Landing overseas comes with a few small but important jobs, such as finding your luggage, checking your hotel address, working out the airport exit, and getting transport without wasting time. For many Australian travellers, Uber is the easiest option, particularly after a long flight. A Travel eSIM can make that first arrival feel much less stressful by giving your phone mobile data once you are away from airport Wi-Fi. That can be super helpful when rideshare pickup zones are busy, maps need to load, and your driver is trying to find you. Can You Use Uber With an eSIM? Yes, Uber can work with an eSIM as long as your phone has working mobile data and your Uber account is already set up. Uber needs an internet connection for booking rides, loading maps, confirming payment, receiving trip updates, messaging drivers, and tracking your journey. A data-only eSIM can provide that connection overseas, even though it usually does not include a local phone number. The possible issue is verification. If Uber asks for an SMS code while you are overseas, that message may go to the phone number already linked to your account. A data-only eSIM may not receive that text, so it is best to log in and check your account before you fly. How to Set Up Uber Before You Travel Using Uber with an eSIM is very easy. Simply, open the Uber app and make sure you are logged in. If you have not used it for a while, update the app and check that your account details are current. Your mobile number and email address should be correct, as they may be used for account recovery or verification. Next, review your payment methods. Remove expired cards, add a backup card if needed, and make sure your default payment option can be used overseas. Payment problems are annoying anywhere, but they are much worse when you are standing in an airport arrivals area with luggage and a low phone battery. Save your first accommodation address before you travel. Hotel names can sometimes point to the wrong entrance, especially in large cities, resorts, or areas with several buildings under similar names. Having the full street address ready makes booking quicker and reduces the chance of choosing the wrong destination. Also, check app permissions. Uber works best when location services, notifications, and mobile data are enabled. Notifications are useful if the driver changes position, sends a message, or arrives sooner than expected. Using a Data-Only eSIM With Rideshare Apps A data-only eSIM gives your phone internet access overseas. That connection allows Uber to load maps, send booking requests, show driver updates, and keep the trip active in the app. The eSIM does not usually replace the phone number connected to your Uber account. Your Uber profile may still use your Australian mobile number, even while your phone uses an international eSIM for mobile data. That is normal. Where travellers can run into trouble is with account verification. If Uber logs you out, detects a new device, or asks for a one-time password by SMS, the code may be sent to your usual Australian number. If your home SIM is turned off, removed, or unable to receive SMS overseas, the code may not arrive. A simple approach is to log in before leaving Australia, keep your account details up to date, and avoid signing out while travelling. If this is your first time using an eSIM, it is also worth understanding how international eSIMs work before your trip. Airport Arrival Checklist Airport arrivals are where mobile data matters most because Wi-Fi can be unreliable once you leave the terminal. Plus, many airports have separate rideshare areas away from the main taxi rank. Before booking your ride, run through these checks:  Pickup zones can be confusing. Some airports use numbered doors, car park levels, terminal zones, or specific rideshare bays. A few extra seconds checking the pickup point can save several minutes of walking in the wrong direction. Troubleshooting Uber With an eSIM Most Uber problems overseas come down to login, payment, mobile signal, or pickup location. Here is how to handle the common ones. Uber Will Not Load Check that your eSIM is connected to mobile data. Turn flight mode on and off, confirm the eSIM is selected for data, and check the roaming setting for that eSIM. If your phone is connected to weak airport Wi-Fi, switch Wi-Fi off and try mobile data only. Phones often stay connected to poor Wi-Fi even when mobile data would work better. The SMS Code Will Not Arrive Uber may send a verification code to the phone number already linked to your account. A data-only eSIM usually will not receive SMS. If you need to receive texts on your Australian number, your regular SIM may need to stay active for SMS while the eSIM handles mobile data. Check this with your mobile provider before travelling, as international roaming settings and charges vary. Payment Failed Try another saved card or digital wallet if available. It is also worth checking whether your bank has blocked the transaction because it appears unusual or international. This is why a backup payment method is useful before departure. Fixing payment settings is much easier at home than at a crowded airport pickup zone. The Driver Is in the Wrong Place Before cancelling, check the airport pickup instructions inside the app. The map pin may look close while actually being on another road level, across a car park, or outside a different terminal. Send the driver a simple message with your exact location, such as “Terminal 1 rideshare zone, bay B” or “outside Door 4 near the taxi signs”. The Signal Is Weak Move away from basement arrivals areas, thick concrete walls, or crowded indoor spaces. Airports and train stations can have patchy signal in certain spots. If needed, use airport Wi-Fi to place the booking, then keep the app open while moving to the pickup area. This is not

How to Use Uber With an eSIM Read More »

how to use lyft with an esim

How to Use Lyft With an eSIM

Landing after a long flight is never the best time to sort out app logins, payment errors, or patchy airport Wi-Fi. For Australian travellers heading to the US or Canada, the right Travel eSIM can make that first rideshare booking much easier by keeping mobile data available once airport Wi-Fi drops away. That does not change when using Lyft. The app relies on an internet connection for maps, pickup points, driver messages, payment screens, and trip tracking. The part that catches some travellers out is account verification. A data-only eSIM can give your phone mobile data overseas, but it does not always replace the phone number linked to your Lyft account. Can You Use Lyft With a Travel eSIM? Yes, Lyft can work with a travel eSIM if your phone has working mobile data and your Lyft account is already set up correctly. The eSIM provides the internet connection. Lyft uses that connection to load the map, confirm your pickup point, request the ride, show driver details, send in-app messages, and track the trip. The main thing to remember is that a data-only eSIM usually does not receive SMS for your Australian number. If Lyft asks you to verify your account by text message, you may still need access to your regular SIM or another recovery option. So the safest approach is to set up Lyft before you travel, stay logged in, and use the eSIM for mobile data once you arrive. How to Set Up Lyft Before You Travel To use Lyft with a TravelKon eSIM, begin by updating the Lyft app if it is out of date. Then log in and make sure the account opens normally. If the app asks for verification, it is far easier to handle that before departure than at a busy airport pickup zone. Next, check your payment method. Make sure your card is current, accepted, and suitable for overseas transactions. Adding a backup card is a smart move if the app allows it. A declined card after landing can turn a simple ride into an annoying delay. It also helps to save your first destination. Add your hotel, apartment, or meeting location to your maps app or notes. That way, you are not searching through emails while standing outside arrivals. Before departure, check: The less your phone has to sort out after landing, the smoother that first ride tends to be. Using a Data-Only eSIM With Rideshare Apps A data-only eSIM gives your phone internet access overseas. However, it usually does not give you a new local phone number for standard calls or SMS. For Lyft, that means the eSIM can support the app’s main functions, while your account remains linked to your existing number, email, and payment details. In normal use, that works well. The app simply needs internet access to operate. The possible issue is verification. If Lyft asks for an SMS code, that code normally goes to the phone number already attached to your account. A data-only eSIM will not usually receive it. That does not mean you need a local US number. It just means your account should be ready before you fly, and your regular SIM should remain available if you think a text code may be needed. For a clearer breakdown of the connection side, our blog on how international eSIMs work is a useful read before setting up your phone. How to Use Lyft With an eSIM After You Land Once you land, turn on your eSIM and set it as the line for mobile data. If the eSIM instructions say data roaming must be enabled, switch it on for the eSIM line only. Keep an eye on your Australian SIM settings. Unless you intend to use your home provider’s roaming, avoid letting your regular SIM handle mobile data overseas. Before opening Lyft, test the connection. Open your maps app and check whether your location loads. If maps are working, Lyft is more likely to load properly too. Then open Lyft, enter your destination, and check the pickup options. Airports often have dedicated rideshare pickup zones, which may be on a different level or outside the main arrivals area. Follow the app instructions and airport signs rather than guessing from the closest exit. Do not request the ride too early. Wait until you have your bags and are close to the pickup area. That gives the driver a better chance of finding you and avoids rushed messages while still walking through the terminal. A good arrival flow looks like this: Airport Arrival Checklist Airport arrivals are where mobile data overseas becomes genuinely useful. Wi-Fi may work near baggage claim, then disappear near the rideshare area. With a TravelKon eSIM, you can keep using maps, messages, and ride tracking while moving through the airport. Before booking your Lyft, check that: Once matched with a driver, check the vehicle details carefully. Busy airports often have several rideshare cars arriving at once, so match the name, car model, and number plate before getting in. Troubleshooting Lyft With a Travel eSIM Most Lyft issues overseas come down to login, SMS verification, payment, signal, or pickup location. App Login Issues If Lyft asks you to log in again after landing, check whether your normal number can receive SMS before changing account settings. Repeated failed attempts can make the situation more frustrating. This is why staying logged in before travel is helpful. If the app works before departure, there is less to fix once you arrive. SMS Verification Problems A data-only eSIM usually cannot receive SMS for your Australian number. If Lyft sends a code to that number, it will normally go to your regular SIM. Keep your usual SIM available where possible. You may not need it for mobile data, but it can still help with app logins, banking checks, and travel bookings. Payment Failures If the ride request fails at payment, try another saved card if one is available. Also check whether your bank has blocked the transaction

How to Use Lyft With an eSIM Read More »

how to use bolt with an esim

How to Use Bolt With an eSIM

That first airport ride can feel simple until the terminal Wi-Fi drops, the pickup bay is outside, and the driver is asking where you are while your luggage is still in one hand. If you are an overseas traveller, Travel eSIMs can make that moment much easier by keeping mobile data available once airport Wi-Fi stops being useful. That connection can particularly come in handy when opening Bolt, loading maps, choosing the right pickup point, messaging the driver, and tracking the trip to your accommodation. Quick Answer Bolt can work with a travel eSIM when your phone has active mobile data, and your Bolt account is already set up. The eSIM supplies the internet connection, while the Bolt account may still be linked to your existing phone number. That distinction is important. A data-only eSIM helps with maps, booking, driver messages, notifications, payment confirmation, and trip tracking. However, it may not receive SMS codes.  How to Set Up Bolt Before You Travel To use Bolt with an eSIM, start by installing or updating Bolt. Open the app, log in, and make sure your account is active. If Bolt asks for a phone number, email check, passcode, or SMS verification, complete it before the trip. Next, check your payment method. Add the card you plan to use overseas, remove expired cards, and keep a backup card available if possible. It is also worth checking your bank app for travel settings, because some banks may flag overseas payments as unusual. Then check the practical app settings. Bolt should have location access, notifications, and mobile data enabled. Save your hotel, apartment, or first destination in Bolt or your maps app. Taking a screenshot of the address and booking details is also useful in case the app, Wi-Fi, or mobile data takes a moment to load after landing. Using a Data-Only eSIM With Rideshare Apps A data-only eSIM gives your phone internet access overseas. It does not usually replace your normal mobile number. For Bolt, that usually works well once the account is ready. The app needs mobile data for live trip functions such as loading the map, finding nearby drivers, confirming the ride, sending messages, receiving alerts, and following the route. Your account, however, may still depend on the phone number used when it was created. As such, the eSIM can provide data, but if Bolt asks for an SMS code after arrival, that code may still go to your Australian number. Depending on your mobile provider and phone setup, you may need access to your primary SIM, roaming for SMS, or another verification option shown in the app. For a clearer breakdown of how eSIMs connect overseas, our guide to how international eSIMs work is a helpful companion before you fly. How to Use Bolt With an eSIM Overseas Once your eSIM is installed and active, using Bolt should feel much like using it at home. The key is making sure your phone is actually using the eSIM for mobile data. Before opening Bolt, check your mobile data settings. The travel eSIM should be selected as the data line. If the eSIM instructions say data roaming is required, turn roaming on for that eSIM only. Be careful with roaming on your Australian SIM unless you understand the charges. Open Bolt once your data connection is working. Enter your destination, then check the pickup point carefully before confirming. Airports often have dedicated rideshare areas, and the closest road on the map is not always the correct place to meet the driver. After booking, keep an eye on driver messages and movement in the app. If the driver asks where you are, give simple details like terminal, door number, pickup bay, car park level, or a nearby sign. Clear pickup messages can save a lot of walking around, especially after a long flight. Airport Arrival Checklist Airport Wi-Fi can help inside the terminal, but mobile data is more reliable once you move towards baggage claim, exits, car parks, or rideshare pickup areas. Before booking Bolt, check the following: A quick maps check can also help. Open your Maps app and see whether your location is showing correctly. If Maps cannot find you, Bolt may also struggle to place the pickup pin accurately. Troubleshooting Bolt with an eSIM App Login Issues If Bolt logs you out overseas, first check whether your eSIM data is actually working. Open a webpage or the Maps app. If nothing loads, the issue is likely the mobile connection rather than Bolt. Try switching between airport Wi-Fi and mobile data. If the app works on Wi-Fi but not mobile data, check that the eSIM is selected for data and roaming is set correctly. If the app works on mobile data but not airport Wi-Fi, the Wi-Fi network may be slow, overloaded, or restricted. SMS Verification Problems A data-only eSIM may not receive SMS. If Bolt sends a code to your Australian number, you may need to access your regular SIM or enable SMS roaming through your primary mobile provider. Check any roaming costs first. This is the main reason to complete app setup before travel. Once Bolt is already logged in, you are less likely to deal with verification during the airport pickup rush. Payment Failures If payment fails, try another saved card. Also, check whether your bank has blocked the transaction. Some travellers keep a backup card in the app and a small amount of local cash available, just in case another transport option is needed. Avoid waiting until the driver arrives to fix payment issues. A quick payment check before confirming the ride can prevent a cancelled booking. Weak Signal Underground arrivals areas, airport car parks, thick terminal walls, and crowded pickup zones can all affect signal. Move closer to an open area if the app is struggling to load or the driver’s location is not updating. Toggling flight mode on and off can sometimes help the phone reconnect to the local network. If your eSIM supports more

How to Use Bolt With an eSIM Read More »

how to check data usage on iphone

How to Check Your Data Usage on iPhone

How to check your data usage on iPhone is a practical question that matters most when travel data becomes limited, paid for upfront, or tied to a specific eSIM plan. It is one thing to use mobile data at home without thinking too much about it. But it is another thing entirely when maps, rideshare apps, hotel bookings, WhatsApp, email, and hotspot are all relying on the same travel data allowance. For Australian travellers using Travel eSIMs, checking iPhone data usage can help confirm whether the right mobile plan is being used overseas. It can also help spot apps that are using data in the background before they take a bigger bite out of the allowance. The main thing is knowing where to look, what the numbers actually mean, and which settings are most important when using an international eSIM. Quick Answer To check data usage on iPhone, go to Settings > Mobile Data or Settings > Cellular, then scroll down to view your usage for the current period and by individual app. Depending on your iPhone region and iOS version, the wording may say Mobile Data or Cellular. Both lead to the same general area. You can usually check: However, you should keep in mind that the iPhone’s Current Period does not always reset automatically at the start of a trip, billing cycle or eSIM plan. It only shows usage since the last manual reset. For travel, resetting statistics before departure makes the numbers much easier to trust. Also, iPhone data usage should be treated as a device-side guide. It is helpful for monitoring habits, but it may not always match the provider’s live usage records exactly. What Data Usage Means on iPhone Data usage is the amount of mobile data your iPhone has used through a SIM or eSIM. This includes browsing, messaging apps, emails, maps, social media, cloud backups, streaming, app updates and hotspot use. When travelling, the setup can become slightly more confusing because an iPhone may have more than one mobile plan installed on it. A regular Australian SIM may still be active for calls or SMS, while a TravelKon eSIM may be used as a data-only eSIM for mobile data overseas. That is why checking usage is not only about the total number of gigabytes used. You also need to check which line is using the data. If the wrong SIM is selected for mobile data, the travel eSIM may be installed correctly, but not actually do anything. If roaming settings are wrong, the eSIM may not connect properly. If a background app is active, data may disappear faster than expected, even when the phone is sitting in a pocket. How to Check Your Data Usage on iPhone Before or During Travel As previously stated, start with the general iPhone settings. These checks apply whether you are using a physical SIM, a local SIM, or an international eSIM. 1. Open Mobile Data Settings Go to: Settings > Mobile Data Or, depending on your iPhone: Settings > Cellular This is where your iPhone shows mobile plans, app data usage, roaming usage and mobile data controls. 2. Check Current Period Usage Scroll down until you see Current Period. The numbers you’ll see here show how much mobile data has been used since the last time the statistics were reset. If it has not been reset for months, the number may include old data from home, work, previous trips or other SIMs. Before travelling, scroll to the bottom of the page and tap Reset Statistics. Doing this just before departure, or just before switching to the travel eSIM, gives you a cleaner view of trip usage. 3. Check Per-App Data Usage On the same screen, scroll through the app list. Each app shows how much mobile data it has used during the current period. This is often the most useful part of the screen. It quickly shows whether data is being used by expected apps like Maps and WhatsApp, or by heavier apps like Instagram, TikTok, YouTube, cloud storage, or email attachments. If an app does not need mobile data while travelling, turn it off from this screen. The app will still work on Wi-Fi. 4. Check System Services Near the bottom of the app list, tap System Services if available. This can show data used by iPhone system features such as software services, push notifications, iCloud-related activity and other background functions. It is not always the main source of usage, but it is worth checking when data seems to be dropping faster than expected. 5. Check Current Period Roaming Look for Current Period Roaming on the same Mobile Data or Cellular screen. This will show you how much data has been used while roaming. When using a travel eSIM, roaming may be part of how the eSIM connects to local partner networks, depending on the product instructions. The key is to check roaming by line, not just assume all roaming is good or bad. TravelKon eSIM Checks Before You Fly Once the general iPhone usage screen has been checked, move on to the eSIM-specific checks. This is where the setup matters most. 1. Confirm Your iPhone Supports eSIM Before buying or installing an eSIM, check that your phone supports eSIM and is not locked to another provider. This is especially important for older iPhone models, imported devices, or phones purchased through a carrier plan. We have a guide on how to check phone eSIM support, which is a useful first step before setting up a TravelKon eSIM. 2. Label the eSIM Clearly After installing the eSIM, give it a practical name. Something like “TravelKon Japan”, “Europe eSIM” or “Travel Data” is much easier to manage than “Secondary”. This is particularly important when checking mobile data settings overseas. A clear label reduces the chance of selecting the wrong SIM by mistake. 3. Select the TravelKon eSIM for Mobile Data In Settings > Mobile Data or Settings > Cellular, check which line is selected for mobile data.

How to Check Your Data Usage on iPhone Read More »

how to avoid roaming charges

How to Avoid Roaming Charges When You Travel

International roaming charges have a way of appearing even when everything seems switched off, packed, and under control. For most travellers, the problem often starts before the plane lands. A phone connects to an overseas network, apps refresh in the background, or a roaming day pass is triggered without much thought. That is why sorting out your phone before departure is very important. With the right settings and a clear plan for mobile data, Travel eSIMs can make overseas travel much easier to manage. Quick Answer The safest way to avoid roaming charges is to stop your primary Australian SIM from using mobile data overseas and use a travel eSIM or another prepaid travel option for mobile data instead. Before leaving Australia, ensure you turn off data roaming on your Australian SIM, set your travel eSIM as the mobile data line, disable automatic mobile data switching, and check your carrier app for roaming pass settings. Once overseas, keep an eye on data usage, avoid large app updates, and use trusted Wi-Fi where it makes sense. If you need your normal Australian number for SMS or calls, you can usually keep it active, but make sure it is not allowed to use mobile data. Why Roaming Charges Happen Roaming charges happen when your phone connects to a mobile network outside your home carrier’s normal coverage area. That connection might be used for mobile data, calls, texts, voicemail, or an automatic roaming day pass. The tricky part is that your phone does not only use data when you open a browser. Email can sync, Maps can refresh, messaging apps can update conversations, and other system services can all use data in the background. That said, you may not be watching videos or scrolling social media, but your phone may still be running processes while connected to an overseas network. Roaming passes can also be triggered by small actions. Sending a text, answering a call, using mobile data for a few seconds, or letting the phone connect automatically may be enough, depending on your Australian carrier’s plan settings. Relying on not using the phone much is risky. A better approach is to decide before the trip which SIM is allowed to handle data and which one is not. Phone Settings to Check Before Departure The most important phone checks should be done while you are still in Australia, ideally after installing your travel eSIM but before boarding. It is much easier to sort this out with stable internet than at an airport gate, hotel lobby, or taxi rank after landing. iPhone Settings On iPhone, go to Settings, then Mobile or Cellular. Label each SIM clearly, such as “Australia” and “Travel eSIM”, so there is no guessing later. Set the travel eSIM as the mobile data line and keep data roaming off for the Australian SIM. If your phone has an option called Allow Mobile Data Switching, it is usually safer to turn this off while travelling. This helps stop the phone from switching back to your Australian SIM for data. It is also worth checking Wi-Fi Assist. This feature is designed to keep your connection stable when Wi-Fi is weak, but it can create confusion while travelling because your phone may use mobile data when Wi-Fi performs poorly. Turning it off gives you more control. Android Settings Android settings vary by brand, but the usual path is Settings, then Network & Internet, SIMs, or Connections and SIM Manager. Choose the travel eSIM as the default for mobile data and keep roaming off on the Australian SIM. Also, check whether your phone allows automatic data switching between SIMs. Unless you have a specific reason to keep this active, it is usually safer to turn it off while travelling. Before departure, also check app updates, cloud backup, photo sync, podcast downloads, offline playlists, and video app downloads. These are the silent data eaters. Set them to Wi-Fi only, pause them, or download what you need before leaving home. eSIM vs Roaming Pass vs Wi-Fi There is no single best option for every trip. The right choice depends on where you are going, how long you are travelling, whether your phone supports eSIM, and how much control you want over costs. Travel eSIM A travel eSIM is often the cleanest option for travellers who want mobile data overseas without relying on their Australian carrier’s roaming plan. It is installed digitally, usually by scanning a QR code or following app setup instructions, and can sit alongside your normal SIM on compatible phones. A travel eSIM is especially useful for arrival-day tasks such as opening maps, booking rideshare, messaging accommodation, checking transport routes, translating menus, finding booking confirmations, and using banking or travel apps. A TravelKon eSIM is commonly used as a data-only eSIM, meaning it provides mobile data rather than a standard phone number for calls and SMS. This works well for apps such as WhatsApp, Messenger, Maps, Gmail, Safari, Chrome, Uber, Grab, Google Translate, and airline apps. Hotspot support can depend on the plan, device, and network rules, so check the product details before relying on tethering for a laptop, tablet, or another traveller’s phone. If you’re new to eSIMs, you can have a look at our blog on how international eSIMs work to understand the basics before installing one. Carrier Roaming Pass A carrier roaming pass can be convenient because it keeps your normal mobile plan in use overseas. This may suit short trips or travellers who need their Australian number to be fully active. The trade-off is control and network performance. While a carrier pass keeps your number active, an international mobility study by independent analytics firm Opensignal shows that international roamers experience almost 60% less time connected to high-speed 5G networks compared to locals. And because home carriers often relegate roamers to older partner networks or route data all the way back through Australia to save bandwidth, your connection can feel incredibly sluggish right when you need it most. That said, before

How to Avoid Roaming Charges When You Travel Read More »

zoom data usage

How Much Data Does Zoom Use?

Zoom has a habit of feeling harmless until the meeting runs long, a reality shared by over 300 million active users worldwide. A quick call from a hotel lobby, an online class from a cafe, or a work check-in between flights can all pull from the same data plan. If you are using a Travel eSIM, Zoom is one of those apps worth understanding before it eats through more data than expected. This guide breaks down how Zoom data usage works, what uses the most data, and how to keep meetings manageable while travelling. Does Zoom Use a Lot of Data? Yes, Zoom can use between 500MB and 3GB of data per hour. The main reason for this is that Zoom is sending and receiving live data the entire time. Messaging apps might only use data when a message, photo, or file is sent. Maps may use short bursts while loading directions. Zoom keeps working continuously for the whole call. Audio-only Zoom calls are usually much lighter. Video meetings are heavier. Group video meetings, screen sharing, HD video, and long calls can become one of the biggest drains on a travel data plan. How Much Data Does Zoom Use per Hour? Zoom data usage depends on the type of call, video quality, screen sharing, number of people, and connection quality. As a practical guide, these are sensible approximate ranges: Zoom Activity Approximate Data Use per Hour Audio-only Zoom call 30 MB to 100 MB One-on-one video call 500 MB to 1.5 GB Group video meeting 800 MB to 2.5 GB Screen sharing 300 MB to 1.5 GB HD or higher-quality video meeting 1 GB to 3 GB+ That means a short audio call may barely touch your plan, while a long group video meeting can make a serious dent. If you are asking how much data Zoom uses per hour, the safest answer is that audio is light, standard video is moderate to heavy, and long group video calls can be very heavy. What Uses the Most Data on Zoom? The biggest Zoom data users are video, call length, and meeting complexity. Turning your camera on makes a major difference because Zoom has to upload your video feed while also downloading everyone else’s. Group meetings usually use more data than one-on-one calls because there are more video feeds, more movement, and more live information being processed. HD video can also increase usage quickly. A meeting may feel ordinary on screen, but higher-quality video can push data use much higher over an hour. Screen sharing can add another layer, particularly if slides, websites, software demos, or moving visuals are involved. Long meetings are the quiet killer. A 10-minute check-in is easy to manage. Three one-hour meetings in a day is a very different story. A weak connection can also make things messier. When signal quality drops, apps may work harder to keep the call stable. Add background apps, cloud syncing, email refreshes, and file uploads into the mix, and your mobile data can disappear faster than planned. Zoom Audio Calls vs Video Calls vs Screen Sharing: Which Uses More Data? Audio-only Zoom calls are usually the best option for saving mobile data. They still use data, but the usage is much lower because there is no live video stream. One-on-one video calls use more because your camera is sending video out while Zoom is receiving video from the other person. Group video meetings usually use more again, particularly when multiple cameras are active. Screen sharing sits somewhere in the middle to heavy range, depending on what is being shared. A static slide deck may be manageable. A fast-moving software demo, video playback, or shared browser session can use more. For travellers, the best way of saving data is to join by audio when the meeting does not need your face, keep your camera off when mobile data is limited, and save screen sharing for Wi-Fi whenever possible. How Much Data Does Zoom Use on a Travel Day? Zoom data use becomes easier to understand when it is tied to real travel habits. A 30-minute audio-only work check-in might use very little data. A one-hour one-on-one video call could use around half a gigabyte or more. A one-hour group meeting may use closer to 1 GB or 2 GB, depending on quality and how many people have cameras on. An online class can be heavier again if video, screen sharing, and chat are all active for a full session. A family video call at night might feel casual, but if it runs for an hour with video on, it can still use a noticeable chunk of your plan. For remote workers, students, and business travellers, Zoom should be treated as a planning item, not an afterthought. One short meeting is rarely a problem. Several video meetings a day can change how much travel data you need. Does Zoom Use More Data Than FaceTime, TikTok, Maps, or WhatsApp? Zoom can use more data than many everyday travel apps when video is enabled. Maps, email, browsing, and messaging are usually easier to manage because they tend to use data in smaller bursts. WhatsApp messages and audio calls are generally much lighter than Zoom video meetings. Video-heavy apps are a different story. TikTok, Instagram Reels, YouTube, Netflix, FaceTime, and Zoom video calls can all drain mobile data quickly because they rely on continuous video. The difference with Zoom is that it often runs for work, study, interviews, or appointments, so people may not think of it as heavy in the same way they think of streaming or social video. But from a data point of view, long Zoom video meetings can be just as important to manage. How to Use Less Data on Zoom While Travelling The best way to save data on Zoom is to reduce video wherever possible. As earlier mentioned, join by audio if the meeting does not need video. If you need to appear briefly, turn your camera on at

How Much Data Does Zoom Use? Read More »

youtube data usage

How Much Data Does YouTube Use?

You don’t usually plan to use much YouTube while travelling; it simply slips into spare moments. A quick video while waiting in line, another during a delay, then a few more in the evening. Before you notice it, those small moments turn into a steady stream of data use. And it rarely feels like heavy internet use in the moment, but for anyone using a Travel eSIM, YouTube can become one of the fastest ways to burn through mobile data. It is easy to see how it happens. With roughly 2.5 to 2.7 billion people logging into YouTube every single month, it is our default global entertainment. Does YouTube Use a Lot of Data? Yes, YouTube can use between 200MB and 3GB of data per hour, depending on the video quality settings in use. Messaging, maps, email, weather checks, basic browsing, and music streaming are usually much lighter. YouTube is different because it is built around video. Every minute of playback carries visual and audio data, and the higher the quality, the heavier that stream becomes. It is also easy to underestimate because YouTube does not always feel like streaming. A quick travel tip video, a restaurant review, a music clip, a tutorial, a few Shorts, or background content while getting ready can all add up. One video rarely feels like a problem. Ten videos on mobile data can be. How Much Data Does YouTube Use Per Hour? As a rough guide, YouTube can use anywhere from a few hundred megabytes per hour to several gigabytes per hour, depending on playback quality. Lower-quality streaming may use around 200MB to 500MB per hour. This can be manageable for occasional viewing, particularly if the screen is small and the video does not need to look perfect. Standard-definition streaming often sits closer to 500MB to 1GB per hour. This is where regular YouTube watching starts to matter on a limited travel plan. High-definition streaming can use roughly 1GB to 3GB per hour, depending on the resolution and compression. Watching at 720p or 1080p on mobile data can drain a small eSIM plan quickly. Very high-resolution viewing, such as 1440p or 4K, can use several gigabytes per hour. For most travellers, this is best left for hotel Wi-Fi. YouTube Shorts can be lighter per video, but heavier than expected per session. The danger is the scroll. A few minutes is fine. Half an hour of nonstop Shorts can turn into a surprisingly data-heavy habit. Livestreams can also use a lot of data because they run continuously. Unlike a short video, there is no natural stopping point. If the quality is high and the stream stays open, usage can climb fast. What Affects YouTube Data Usage? The biggest factor is video quality. Higher quality means more data. A video at 1080p will usually use much more than the same video at 360p or 480p. Watch time is another factor. A single five-minute video is not an issue, but a long session during a layover, train ride, or quiet night in the hotel room can quickly increase data usage. Also, long-form videos, music videos, livestreams, and background viewing usually use more data because they keep running. Shorts can feel lighter, but the endless feed makes it easy to watch far more than planned. YouTube’s autoplay function is equally data draining. Leave it on, and YouTube may keep serving videos after the one you came to watch. That is fine on Wi-Fi. On mobile data, it can waste a plan without much thought. Your phone settings and YouTube app settings also play a role. Some devices allow higher-quality playback on mobile data unless you tell them not to. Others may adjust automatically, but automatic does not always mean data-friendly. YouTube Streaming vs Downloading: Which Uses More Data? Streaming and downloading both use data if they happen on mobile data. The difference is control. Streaming uses data while the video plays. Watch one video, data is used once. Rewatch it later, data is used again. Keep watching through autoplay, and usage keeps climbing. Downloading uses data upfront. If the video is downloaded on mobile data, it can still use a lot of data. But if it is downloaded on Wi-Fi before heading out, it becomes one of the easiest ways to make YouTube travel-friendly. That is especially useful for flights, long train rides, airport waits, bus trips, ferry rides, or areas where coverage may be unreliable. Download before leaving the hotel, then watch without touching the travel data plan. For travellers, streaming on mobile data is convenient, but downloading on Wi-Fi is safer. How Much Data Does YouTube Use on a Travel Day? A light YouTube day might be a few Shorts while waiting for transport, one or two travel tip videos, and a quick restaurant review. If playback quality is low, that may be manageable at around 300MB of data per hour. A moderate YouTube day could include a few destination guides, music videos in the background, and a longer video during transit. This can start to eat into a small travel data plan, consuming over 1GB of data each hour. A heavy YouTube day is when things change quickly. Think airport delays, long train rides, livestreams, autoplay sessions, and night-time viewing without hotel Wi-Fi. At higher quality, this can use between 2GB and 3GB of data or even more per hour. This is why YouTube on mobile data is less about opening the app and more about the habit around it. Short, low-quality viewing is one thing. Long, high-quality sessions are another. Does YouTube Use More Data Than Netflix, Instagram, or FaceTime? YouTube can be lighter or heavier than Netflix, depending on quality and watch time. Netflix is usually associated with longer viewing sessions, but YouTube can catch up quickly if autoplay, HD, Shorts, or livestreams are involved. Compared with Instagram, YouTube can use more data when watching longer videos or high-quality streams. Instagram can still be data-heavy, especially with Reels, Stories, and video-heavy browsing,

How Much Data Does YouTube Use? Read More »

whatsapp data usage

How Much Data Does WhatsApp Use?

With more than 3.3 billion monthly active users, WhatsApp is one of those apps that can easily become part of almost every overseas travel. A quick message to family, a note to the hotel, a photo in the group chat, a call back home before bed. None of it feels especially heavy at the time, which is why WhatsApp data usage can catch people out when media and calls start adding up. That said, WhatsApp is usually much easier on mobile data than video-first apps. If you are using a limited plan or a travel eSIM, it is still worth knowing what uses almost nothing, what uses a moderate amount, and what can chew through data faster than expected. Does WhatsApp Use a Lot of Data? WhatsApp can use 1 MB to 400 MB of data per hour, depending on what you are doing. Text messages use very little data, so sending updates, confirming bookings, chatting with family, or messaging tour operators is unlikely to make a major dent in a travel plan. However, this can change when WhatsApp becomes more than a messaging app. Voice calls, video calls, photo sharing, video sharing, large group chats, automatic media downloads, and cloud backups can all increase usage up to 1GB for heavy usage. So, does WhatsApp use a lot of data? For text, not really. For calls and media, it can. How Much Data Does WhatsApp Use Per Hour? How much data WhatsApp uses depends on what you are doing inside the app. A quiet text chat is very different from a long video call or a group chat full of photos and videos. The figures below are best treated as practical ranges rather than exact numbers, because mobile data use can vary by phone, network, settings, file size, and call quality. Text Messaging Sending text messages through WhatsApp uses between 1KB and 1MB of data. Even frequent messaging throughout the day is usually manageable on a smaller travel plan. This is why WhatsApp is so useful overseas. You can confirm a hotel address, message a driver, check in with family, or coordinate plans without worrying too much about data. Sending Voice Notes Voice notes use more data than text, but are still usually fairly light, often ranging between 150KB and 200KB per minute. A short voice note is unlikely to matter much. Long back-and-forth voice notes throughout the day will use more, but they are still generally easier to manage than video calls or sending large clips. Sending and Receiving Photos Photos can use about 300KB to 1MB of data, depending on how many are sent and whether they download automatically. One or two photos will not usually be a problem. A busy family group chat, however, can turn into a steady stream of images from every meal, beach, hotel room, and boarding gate. That is when WhatsApp photo data use becomes more noticeable. Sending and Receiving Videos Videos are much heavier than photos or text and often use up to 20MB of data, depending on the quality of the video Sending one short clip may be fine, especially on a larger plan. Sending several travel videos over mobile data can quickly become one of the biggest WhatsApp data drains. Also, if videos auto-download while you are using mobile data, your plan can take the hit before you have even watched them. WhatsApp Voice Calls WhatsApp voice calls can use between 20MB and 60MB of mobile data in an hour. It uses more data than text or voice notes, but much less than most video calls. A short call to family, a hotel, or a tour provider should be easy to manage. Long daily calls can add up, especially on a smaller eSIM plan. WhatsApp Video Calls WhatsApp video call data usage is usually the heaviest common WhatsApp activity. A typical video call can use roughly 3–5 MB per minute, meaning a 1-hour WhatsApp video call might consume around 200MB to 400 MB of data, depending on call quality and network conditions.  A short video call may be fine, but longer calls back home can use a meaningful chunk of data. If your plan is small, video calls are best saved for Wi-Fi. What Uses the Most Data on WhatsApp? The biggest WhatsApp data users are video calls, videos, long voice calls, auto-downloaded media, and cloud backups. Text messages sit at the light end. They are simple, small, and easy to manage. Video calls sit at the other end. They stream audio and video continuously, which means data use keeps climbing for as long as the call continues. Videos are another major one. Sending or receiving clips can use much more data than sending photos or voice notes. This is especially relevant while travelling, because people naturally want to share short clips from beaches, food markets, hotels, trains, tours, and airports. Automatic media downloads can also cause trouble. If WhatsApp is set to download photos and videos over mobile data, group chats can start using data in the background of your day. You may not even notice until your allowance drops. Cloud backups over mobile data should be avoided on smaller plans. Backing up chats and media can involve large files, especially if your WhatsApp account stores lots of videos and photos. Messaging vs Voice Calls vs Video Calls: Which Uses More Data? Messaging is the lightest, voice calls sit in the middle, while video calls are usually the heaviest. That simple split is the easiest way to plan your WhatsApp use while travelling. Text-based chats are ideal for mobile data. They are fast, practical, and unlikely to cause issues unless you are also downloading lots of media. Voice calls are still reasonable, particularly for short conversations. They are a good alternative when you want to speak properly but do not need video. Video calls need more care. They are useful, personal, and sometimes worth it, but they can drain a smaller plan quickly if they become a daily

How Much Data Does WhatsApp Use? Read More »

tiktok data usage

How Much Data Does TikTok Use?

TikTok has a way of turning spare travel moments into surprisingly heavy data use. With the platform rapidly growing to reach 1.99 billion adult users worldwide, it is safe to say a massive chunk of us are guilty of that quick scroll. One look while waiting for coffee can turn into another at the airport, then a few clips in a rideshare, then an upload once you reach the hotel. Because every swipe loads video, the app can use mobile data far faster than it feels in the moment.  That is especially important if you are using a travel eSIM. TikTok is not off-limits overseas, but it is one of the first apps to watch when your data needs to last. Does TikTok Use a Lot of Data? Yes, TikTok can use between 800MB and 1.2GB of data in just an hour or even more in some cases. This is mainly because the app is almost entirely video-based. Messaging apps usually send small pieces of text, maps can be managed with cached routes, and light browsing often loads one page at a time. TikTok keeps serving video after video, often before you even decide whether you want to watch the next one. That is where TikTok mobile data usage can creep up. A short scroll can be harmless, but a 40-minute session at the airport, followed by another session on the train, then a few uploads later in the day, is a very different story. How Much Data Does TikTok Use Per Hour? The exact amount depends on video quality, connection speed, app settings, how quickly you scroll, and whether TikTok is preloading videos in the background. As a practical estimate, TikTok may use anywhere from a few hundred megabytes to over 1GB per hour. Here is a useful way to think about it. Casual Scrolling Light TikTok use may sit around 300MB to 700MB per hour, depending on video quality and how fast new videos load. This kind of use might include checking the app for 10 or 15 minutes a few times a day. For travellers, that can be manageable, but it still adds up faster than messaging, email, maps, or basic web browsing. Heavy Scrolling Longer TikTok sessions can easily reach 1GB per hour or more. This is where travellers often get caught. TikTok does not feel like watching a full movie or streaming a long YouTube video, but the app is still loading continuous video content. If you scroll for an hour during a layover, your data plan may feel it. Watching Higher-Quality Videos Higher-quality playback generally uses more data, often exceeding 1.2GB. If your connection is strong, TikTok may automatically load higher-quality videos for a smoother experience. However, this can trigger a data usage warning, as the app may consume significantly more data without clearly notifying you.  Uploading TikToks Uploading videos can use a noticeable amount of data, particularly if the clips are longer, high-resolution, or edited with multiple elements. Posting one short video may not be a major issue. Uploading several travel clips across the day can make a bigger dent, particularly on a small eSIM plan. Watching TikTok Live TikTok Live can be one of the heavier activities because it involves continuous streaming. A quick look at a livestream might be fine. Sitting through a long live session on mobile data is a much easier way to drain your plan. What Uses the Most Data on TikTok? The biggest data drivers on TikTok are video loading, video quality, uploads, livestreams, and repeated feed refreshes. The app is designed to keep content moving, which makes it fun to use but harder to control on mobile data. Continuous video scrolling is the main one. Every new video needs to load, and TikTok often prepares upcoming videos before you watch them. That means passive scrolling can still use a lot of data. Autoplay also plays a role. You do not have to press play each time. Videos start automatically, so data usage continues as long as the app is open and the feed keeps moving. Higher-quality playback can increase usage as well. Clearer videos are better to watch, but they come with a data cost. Uploading is another big factor. Travel videos are often filmed in high quality, and uploading them on mobile data can use far more than expected. TikTok Live is also worth treating carefully. Livestreams behave more like continuous video streaming than normal browsing. Background app activity may also contribute in smaller ways, depending on your phone settings. It is not usually the main issue, but reducing background refresh can still help when every megabyte matters. TikTok Scrolling vs Uploading vs Livestreams: Which Uses More Data? Normal scrolling can already be data-heavy because TikTok is built around video. Even if each clip is short, the app keeps loading new content, and a long session can use a surprising amount of mobile data. Uploading can use more data in bursts. The larger and higher-quality the video, the more data it needs to send. If you are posting travel clips throughout the day, uploads can become one of the main drains on your plan. Livestreams are often the heaviest when watched for long periods. Unlike normal scrolling, where videos change quickly, a livestream keeps running continuously. That makes TikTok Live risky on mobile data if you are trying to make a small travel plan last. In simple terms: short scrolling is manageable, long scrolling adds up, uploads can spike usage, and livestreams can drain data quickly. How Much Data Does TikTok Use on a Travel Day? A normal travel day can make TikTok data usage climb without feeling excessive. You might open TikTok over breakfast while planning the day. Then again in an Uber, at the airport, on a train, or while waiting for hotel check-in. Later, you might upload a clip from sightseeing, check comments, scroll through travel recommendations, and watch videos before bed. None of those moments feels huge on its own.

How Much Data Does TikTok Use? Read More »