The Pixel 9 family is built for modern dual SIM use, but compatibility is still not a blind yes for every traveller. The exact model, region, carrier lock status, Android version, activation timing and data-line settings can all affect whether the eSIM connects smoothly overseas.
If your phone shows an EID, has an eSIM setup option, is unlocked, and the chosen TravelKon plan covers the destination, the Pixel 9 should be ready for travel eSIM setup. For any traveller looking to use travel eSIMs, one missed compatibility check can turn airport arrival into a scramble for Wi-Fi, roaming settings, screenshots and support messages.
Does Google Pixel 9 Support eSIM?
Yes, the Google Pixel 9 supports eSIM. The Pixel 9, Pixel 9 Pro, Pixel 9 Pro XL and Pixel 9 Pro Fold are generally eSIM compatible and can usually use a TravelKon eSIM for mobile data overseas.
Before buying or scanning a QR code, check five things:
| Compatibility Check | What to Confirm |
|---|---|
| Pixel model | The phone is a Pixel 9, Pixel 9 Pro, Pixel 9 Pro XL or Pixel 9 Pro Fold. |
| EID number | The phone shows an EID in settings. |
| Carrier lock | The phone is unlocked and can use SIMs from other providers. |
| Android version | The phone has the latest available Android update. |
| TravelKon plan | The plan covers the destination and matches the trip dates. |
Pixel 9 eSIM Compatibility Table
| Google Pixel 9 Model | eSIM Support | TravelKon Readiness Check |
|---|---|---|
| Google Pixel 9 | Yes | Check EID, unlock status, Android updates and destination coverage. |
| Google Pixel 9 Pro | Yes | Check EID, unlock status, Android updates and destination coverage. |
| Google Pixel 9 Pro XL | Yes | Check EID, unlock status, Android updates and destination coverage. |
| Google Pixel 9 Pro Fold | Yes | Check EID, unlock status, Android updates and destination coverage. |
Always remember that a compatible model is only the first step. A locked phone, missing EID, old software version, unsupported destination or incorrect roaming setup can still stop the eSIM from working properly.
What The Latest Statistics Say You Need To Know
Australian residents recorded 1,092,380 short-term overseas trip returns in April 2026, 19.2% above the April 2019 level. More travellers are leaving with phones that need maps, rideshare apps, airline updates, banking approvals, WhatsApp and email from the moment they land.
Travel eSIM use is also growing quickly, with global travel eSIM provisioning expected to pass 280 million by 2030, up from about 70 million in 2024.
That growth gives travellers more choice, but also more plan differences. Activation timing, hotspot support, APN details, data-only rules and supported networks can vary by destination and plan.
Before You Buy a TravelKon eSIM
Use this short checklist before checkout.
| Before Buying | Why It is Important |
|---|---|
| Confirm the destination | A country or regional plan must cover every stop on the trip. |
| Check the validity period | Some of our plans start after installation, while others start after connecting overseas. |
| Confirm data allowance | Maps and messaging need less data than video, hotspot use or laptop work. |
| Check hotspot support | Hotspot is plan dependent and can use data quickly. |
| Check whether calls/SMS are included | Many travel eSIMs are data-only. |
| Keep the QR code secure | A QR code can be linked to one installation. |
For a deeper device check before buying, our guide on how to check phone eSIM support can help you get started.
How to Check eSIM Support on Your Google Pixel 9
Step 1: Check the Exact Pixel 9 Model
Open Settings > About Phone and confirm the model name.
The phone should show one of these:
- Google Pixel 9
- Google Pixel 9 Pro
- Google Pixel 9 Pro XL
- Google Pixel 9 Pro Fold
This is important because imported, refurbished, replacement or carrier-sold devices can behave differently. A phone can look like a standard Pixel 9 and still have carrier restrictions or regional differences.
Step 2: Confirm the Phone Has an EID
Open Settings > About Phone > SIM Status and look for EID.
An EID is the eSIM identifier. If the phone has an EID, the eSIM hardware is available at system level.
A second check is to open the phone dialler and enter:
*#06#
Many Android phones show IMEI and EID details from this screen. If no EID appears after a restart and software update, check with the original carrier or TravelKon support before buying.
Step 3: Check for the eSIM Setup Option
Open:
Settings > Network & Internet > SIMs > Add SIM
A Pixel 9 that is ready for eSIM setup should show an option to download or set up an eSIM.
If the option is missing, the cause may be:
- Old software
- Carrier restrictions
- Regional firmware
- Device management controls
- A phone that has not been fully unlocked
Step 4: Confirm the Phone Is Unlocked
eSIM compatibility and network unlock status are not the same thing.
A locked Pixel 9 can show an EID and still reject a TravelKon eSIM. The safest check is to test a SIM from another provider or ask the current carrier to confirm the phone is unlocked for other networks.
Do this before departure. Fixing a carrier lock while overseas can involve account checks, identity verification and carrier processing times.
Step 5: Update Android Before Installation
Install available Android updates before scanning the TravelKon QR code. Then restart the phone.
This reduces the chance of missing setup options, stalled installation, old carrier settings or network registration issues after arrival.
How to Install a TravelKon eSIM on Pixel 9
Use this eSIM setup guide when the phone has passed the compatibility checks.
Step 1: Open the Pixel 9 SIM Settings
Go to:
Settings > Network & Internet > SIMs > Add SIM
Choose the eSIM setup option.
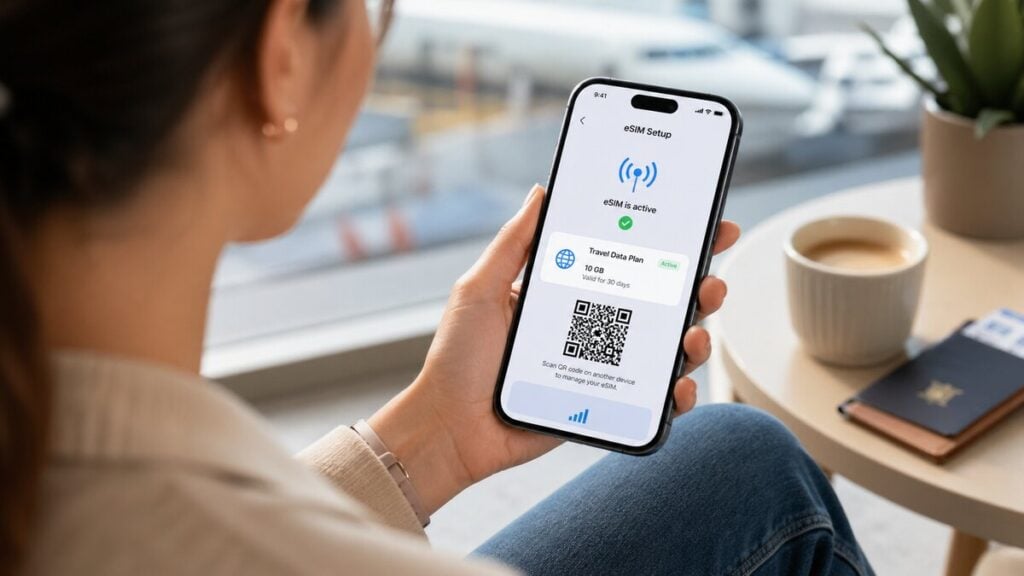
Step 2: Scan the TravelKon QR Code
Display the TravelKon QR code on another screen, such as a laptop, tablet or another phone. Scan it with the Pixel 9 camera when prompted.
Keep the QR code safe. Do not post it publicly, forward it casually or delete the purchase email.
Step 3: Label the eSIM Clearly
After installation, label the eSIM with the destination or region.
Examples:
This helps avoid choosing the wrong SIM for mobile data later.
Step 4: Follow the Plan’s Activation Timing
Check the TravelKon product instructions before turning the eSIM on.
Some plans may start after installation. Others may start when the phone connects to a supported overseas network. If the plan starts immediately after installation, wait until closer to travel.
Step 5: Set the TravelKon eSIM as the Mobile Data Line
When ready to connect overseas, open:
Settings > Network & Internet > SIMs
Then:
- Select the TravelKon eSIM.
- Turn the eSIM on.
- Turn Mobile Data on for the TravelKon line.
- Turn Data Roaming on for the TravelKon line.
- Keep calls and SMS on the Australian SIM if needed.
- Restart the phone if the network does not appear.
For most travel eSIMs, roaming must be on because the plan connects through partner networks in the destination country. This does not mean roaming needs to be on for the Australian SIM.
How to Keep the Australian SIM Under Control
Dual SIM is useful, but it can also cause expensive mistakes if the wrong line handles data.
Use this setup for most overseas trips:
| Function | Suggested Setting |
|---|---|
| Mobile data | TravelKon eSIM |
| Calls | Australian SIM, if calls are needed |
| SMS | Australian SIM, if banking codes or messages are needed |
| Roaming | On for TravelKon eSIM, off for Australian SIM unless required |
Before take-off or on arrival, check that mobile data is assigned to the TravelKon eSIM. The most common setup mistake is having the travel eSIM installed, but the phone continues using the home SIM for data.
What to Do If the QR Code Does Not Work
If the Pixel 9 will not scan the QR code, do not delete anything straight away.
Try these checks first:
- Display the QR code on a larger screen.
- Increase brightness on the screen showing the QR code.
- Make sure the full QR code is visible.
- Clean the Pixel camera lens.
- Connect to stable Wi-Fi.
- Restart the phone and try again.
- Check whether manual setup details were supplied.
- Use the SM-DP+ address and activation code if the plan provides them.
If the eSIM partly installs, treat it as installed and contact our support team before deleting it. Some eSIMs cannot be reinstalled after deletion.
Why Your Pixel 9 Shows No Service After eSIM Installation
A “No service” message does not always mean the eSIM has failed. In many cases, the eSIM is installed correctly but not yet connected to the destination network.
Use this checklist in order:
| Step | What to Check |
|---|---|
| 1 | Confirm the TravelKon eSIM is turned on under Settings > Network & Internet > SIMs. |
| 2 | Confirm Mobile Data is set to the TravelKon eSIM. |
| 3 | Turn Data Roaming on for the TravelKon eSIM. |
| 4 | Turn Airplane Mode on for 30 seconds, then turn it off. |
| 5 | Restart the Pixel 9. |
| 6 | Check whether the plan activates only after arrival in the destination. |
| 7 | Check the APN instructions on the TravelKon product page. |
| 8 | Add the APN manually if required. |
| 9 | Try manual network selection and choose a supported local network. |
| 10 | Confirm the phone is unlocked. |
Note: Do not delete the eSIM as a first troubleshooting step. Deletion can turn a simple settings issue into a support case.
Before You Contact TravelKon Support
Our team can help faster when the right details are ready.
Send:
- Order number
- Destination country
- Pixel model
- Screenshot of Settings > About Phone
- Screenshot showing the EID, if visible
- Screenshot of the SIM settings page
- Screenshot of the APN screen, if relevant
- Screenshot of any error message
- Confirmation that the phone is unlocked
This helps us easily identify whether the issue is compatibility, setup, activation timing, APN, roaming settings or local network selection.
Common Limitations and Edge Cases
Locked Phones
A carrier-locked Pixel 9 may not accept a TravelKon eSIM even if the device supports eSIM. The original carrier needs to unlock the phone.
Imported or Region-Specific Models
Imported or refurbished Pixel 9 devices may have different network band support, firmware behaviour or carrier settings. For travel eSIM Australia searches, this is one of the details that can separate a smooth setup from a failed connection overseas.
Dual eSIM Behaviour
Pixel 9 models can support dual SIM setups, including eSIM use. Some setups may allow two active eSIM profiles, but carrier support and device settings determine everything at the end of the day.
For most travellers, the easiest setup is:
- Australian SIM for calls and SMS
- TravelKon eSIM for mobile data
Data-Only Plans
Many travel eSIMs are data-only. That means mobile data works, but standard calls and SMS may not be included unless the product page clearly says they are.
Apps such as WhatsApp, Messenger, FaceTime, Google Maps, Uber, airline apps and email can work over mobile data.
Hotspot Rules
Hotspot may be supported on some of our travel eSIM plans, but it is plan dependent. Check the product page before relying on hotspot for laptops, tablets or family sharing.
Hotspot can also use data quickly. Laptop updates, cloud backup and video streaming can burn through a small data plan fast.
eSIM Deletion and Transfer Limits
Again, do not delete or transfer a travel eSIM unless the instructions or TravelKon support confirm it is safe.
Some eSIMs cannot be reinstalled after deletion. And others cannot be moved to another phone after activation. If the eSIM appears in Pixel settings, troubleshoot the connection before removing it.
Not Using a Pixel 9? Check First
If the phone is not a Pixel 9 model, check support before buying.
Older Pixel devices can have different eSIM rules, and some models or regional versions may not support eSIM in the same way. The safest check is still the same: look for an EID, check for the eSIM setup option, confirm the phone is unlocked and make sure the plan supports the destination.
TravelKon Checks Before Checkout
Before choosing a plan, match the eSIM to the real trip.
Check:
- Country or region coverage
- Data allowance
- Validity period
- Activation timing
- Hotspot support
- APN instructions
- Whether the plan is data-only
- Support instructions for manual network selection
The best travel eSIM is not always the largest data plan. It is the plan that matches the destination, dates, phone settings and actual usage.
FAQs
Is the Google Pixel 9 eSIM Compatible?
Yes, the Google Pixel 9 is generally eSIM compatible. Check that the phone shows an EID, is unlocked, has the latest available Android update and that the TravelKon plan supports the destination.
Does the Pixel 9 Pro Support eSIM?
Yes, the Pixel 9 Pro supports eSIM. The same checks still apply: EID, unlock status, Android version, destination coverage, activation timing and roaming settings.
Does the Pixel 9 Pro XL Support eSIM?
Yes, the Pixel 9 Pro XL supports eSIM. Before buying a travel eSIM, confirm the phone is unlocked and that the selected plan covers every country on the itinerary.
Does the Pixel 9 Pro Fold Support eSIM?
Yes, the Pixel 9 Pro Fold supports eSIM. Check the EID, unlock status, mobile data settings, roaming settings and TravelKon plan instructions before departure.
Can a Google Pixel 9 Use Two eSIMs at Once?
A Pixel 9 can support dual SIM setups, and some configurations can allow two eSIM profiles. Carrier support and device settings still matter, so check the active SIM options on the phone before relying on two eSIMs overseas.
For most trips, using the Australian SIM for calls/SMS and the TravelKon eSIM for mobile data is simpler.
Should a TravelKon eSIM Be Installed Before Departure?
Yes, when the plan instructions allow it. Install on stable Wi-Fi before departure, label the eSIM clearly, and check whether the plan starts on installation or only after connection overseas.
If the product page says activation starts immediately after installation, wait until closer to travel.
Does a TravelKon eSIM Give the Pixel 9 a Phone Number?
Many travel eSIMs are data-only. That means mobile data works, but standard calls and SMS may not be included unless the product page clearly says they are.
Keep the Australian SIM active for SMS codes only if roaming charges and carrier rules are understood.
Can a Pixel 9 Use Hotspot With a TravelKon eSIM?
Hotspot can work on many plans, but it depends on the product. Check the TravelKon plan details before relying on hotspot for laptop work, tablets or sharing data with another traveller.
Why Does the Pixel 9 Say No Service After Installing an eSIM?
The most common causes are wrong mobile data line selection, roaming turned off, missing APN details, manual network selection needed, a locked phone, or the plan waiting for arrival in the destination country.
Start with data line, roaming, restart, APN and manual network checks before deleting the eSIM.
Is It Safe to Delete a Travel eSIM?
No, not unless the setup instructions or TravelKon support confirm it is safe. Some travel eSIMs cannot be reinstalled after deletion.
Can a Travel eSIM Be Transferred to Another Pixel 9?
Not always. Transfer rules vary by eSIM and plan. If a phone change is needed, check with TravelKon support before deleting the eSIM from the first device.
What Is the Fastest Way to Check: Does My Phone Support eSIM?
On a Pixel 9, open Settings > About Phone > SIM Status and look for an EID. Then open Settings > Network & Internet > SIMs > Add SIM and check whether the phone offers eSIM setup. If both appear and the phone is unlocked, the device is usually ready.
Takeaways
The Google Pixel 9 family generally supports eSIM. The real check is whether the exact phone is unlocked, updated, showing an EID and matched with the right TravelKon plan before departure.
Do that before airport arrival. Set the TravelKon eSIM as the mobile data line, turn roaming on for the TravelKon line, keep the Australian SIM controlled, and avoid deleting the eSIM during troubleshooting.
If the result is unclear, reach out to our support team before scanning the QR code. Send the Pixel model, EID screen, SIM settings, destination, order number and any error message so the issue can be checked quickly.