seo@agents.digital

how to avoid roaming charges

How to Avoid Roaming Charges When You Travel

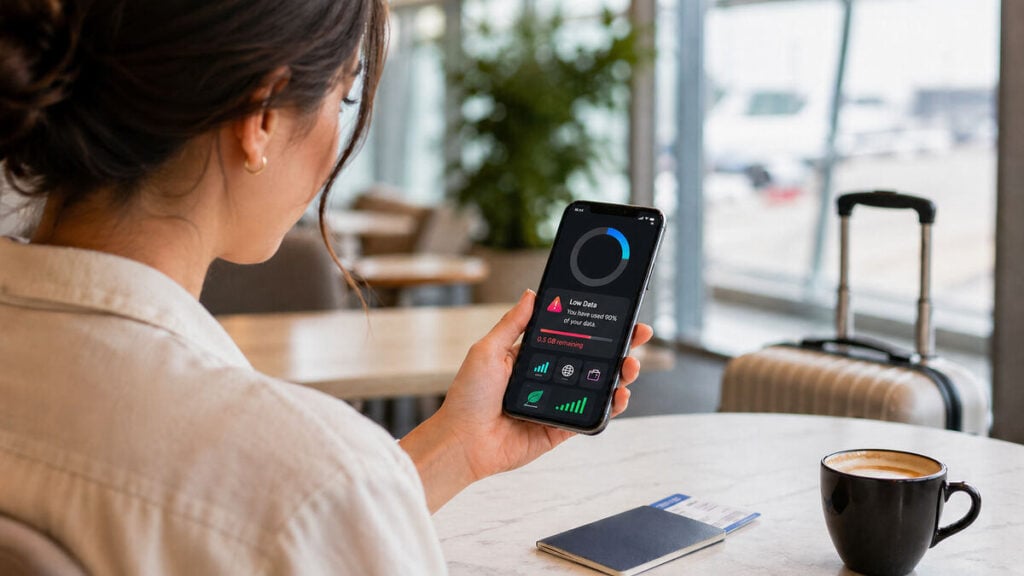
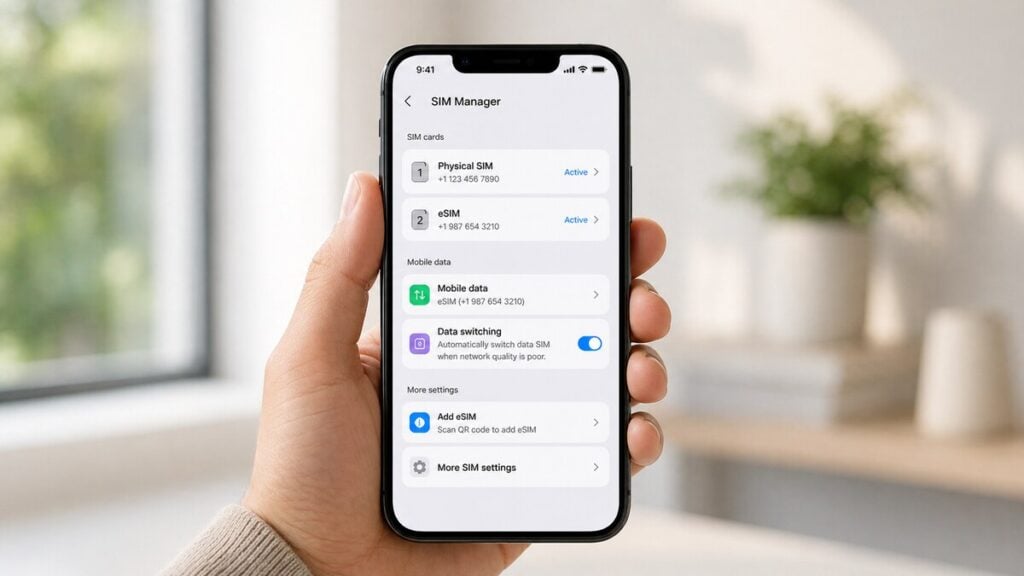
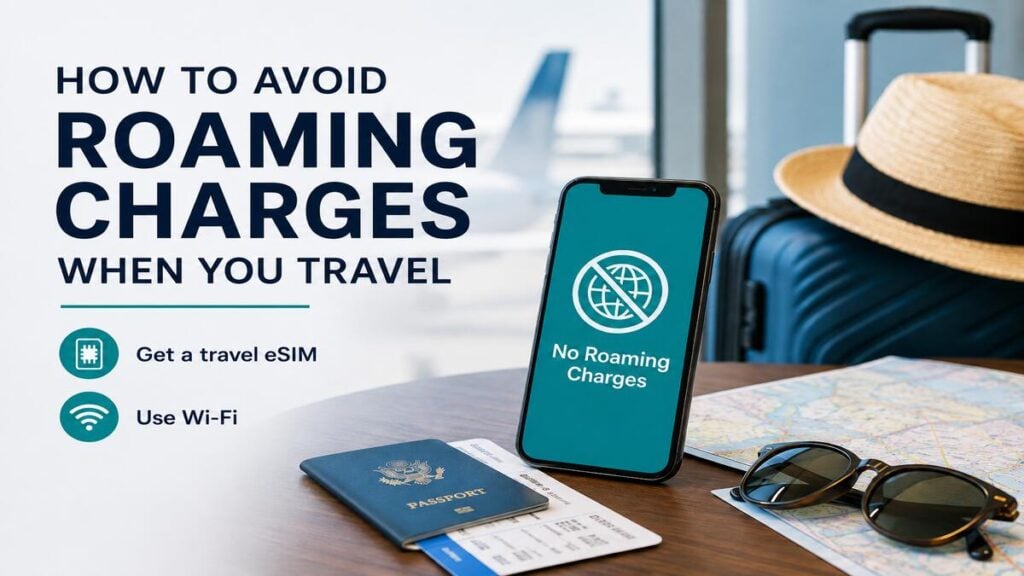
International roaming charges have a way of appearing even when everything seems switched off, packed, and under control. For most travellers, the problem often starts before the plane lands. A phone connects to an overseas network, apps refresh in the background, or a roaming day pass is triggered without much thought. That is why sorting out your phone before departure is very important. With the right settings and a clear plan for mobile data, Travel eSIMs can make overseas travel much easier to manage. Quick Answer The safest way to avoid roaming charges is to stop your primary Australian SIM from using mobile data overseas and use a travel eSIM or another prepaid travel option for mobile data instead. Before leaving Australia, ensure you turn off data roaming on your Australian SIM, set your travel eSIM as the mobile data line, disable automatic mobile data switching, and check your carrier app for roaming pass settings. Once overseas, keep an eye on data usage, avoid large app updates, and use trusted Wi-Fi where it makes sense. If you need your normal Australian number for SMS or calls, you can usually keep it active, but make sure it is not allowed to use mobile data. Why Roaming Charges Happen Roaming charges happen when your phone connects to a mobile network outside your home carrier’s normal coverage area. That connection might be used for mobile data, calls, texts, voicemail, or an automatic roaming day pass. The tricky part is that your phone does not only use data when you open a browser. Email can sync, Maps can refresh, messaging apps can update conversations, and other system services can all use data in the background. That said, you may not be watching videos or scrolling social media, but your phone may still be running processes while connected to an overseas network. Roaming passes can also be triggered by small actions. Sending a text, answering a call, using mobile data for a few seconds, or letting the phone connect automatically may be enough, depending on your Australian carrier’s plan settings. Relying on not using the phone much is risky. A better approach is to decide before the trip which SIM is allowed to handle data and which one is not. Phone Settings to Check Before Departure The most important phone checks should be done while you are still in Australia, ideally after installing your travel eSIM but before boarding. It is much easier to sort this out with stable internet than at an airport gate, hotel lobby, or taxi rank after landing. iPhone Settings On iPhone, go to Settings, then Mobile or Cellular. Label each SIM clearly, such as “Australia” and “Travel eSIM”, so there is no guessing later. Set the travel eSIM as the mobile data line and keep data roaming off for the Australian SIM. If your phone has an option called Allow Mobile Data Switching, it is usually safer to turn this off while travelling. This helps stop the phone from switching back to your Australian SIM for data. It is also worth checking Wi-Fi Assist. This feature is designed to keep your connection stable when Wi-Fi is weak, but it can create confusion while travelling because your phone may use mobile data when Wi-Fi performs poorly. Turning it off gives you more control. Android Settings Android settings vary by brand, but the usual path is Settings, then Network & Internet, SIMs, or Connections and SIM Manager. Choose the travel eSIM as the default for mobile data and keep roaming off on the Australian SIM. Also, check whether your phone allows automatic data switching between SIMs. Unless you have a specific reason to keep this active, it is usually safer to turn it off while travelling. Before departure, also check app updates, cloud backup, photo sync, podcast downloads, offline playlists, and video app downloads. These are the silent data eaters. Set them to Wi-Fi only, pause them, or download what you need before leaving home. eSIM vs Roaming Pass vs Wi-Fi There is no single best option for every trip. The right choice depends on where you are going, how long you are travelling, whether your phone supports eSIM, and how much control you want over costs. Travel eSIM A travel eSIM is often the cleanest option for travellers who want mobile data overseas without relying on their Australian carrier’s roaming plan. It is installed digitally, usually by scanning a QR code or following app setup instructions, and can sit alongside your normal SIM on compatible phones. A travel eSIM is especially useful for arrival-day tasks such as opening maps, booking rideshare, messaging accommodation, checking transport routes, translating menus, finding booking confirmations, and using banking or travel apps. A TravelKon eSIM is commonly used as a data-only eSIM, meaning it provides mobile data rather than a standard phone number for calls and SMS. This works well for apps such as WhatsApp, Messenger, Maps, Gmail, Safari, Chrome, Uber, Grab, Google Translate, and airline apps. Hotspot support can depend on the plan, device, and network rules, so check the product details before relying on tethering for a laptop, tablet, or another traveller’s phone. If you’re new to eSIMs, you can have a look at our blog on how international eSIMs work to understand the basics before installing one. Carrier Roaming Pass A carrier roaming pass can be convenient because it keeps your normal mobile plan in use overseas. This may suit short trips or travellers who need their Australian number to be fully active. The trade-off is control and network performance. While a carrier pass keeps your number active, an international mobility study by independent analytics firm Opensignal shows that international roamers experience almost 60% less time connected to high-speed 5G networks compared to locals. And because home carriers often relegate roamers to older partner networks or route data all the way back through Australia to save bandwidth, your connection can feel incredibly sluggish right when you need it most. That said, before

How to Avoid Roaming Charges When You Travel Read More »

zoom data usage

How Much Data Does Zoom Use?

Zoom has a habit of feeling harmless until the meeting runs long, a reality shared by over 300 million active users worldwide. A quick call from a hotel lobby, an online class from a cafe, or a work check-in between flights can all pull from the same data plan. If you are using a Travel eSIM, Zoom is one of those apps worth understanding before it eats through more data than expected. This guide breaks down how Zoom data usage works, what uses the most data, and how to keep meetings manageable while travelling. Does Zoom Use a Lot of Data? Yes, Zoom can use between 500MB and 3GB of data per hour. The main reason for this is that Zoom is sending and receiving live data the entire time. Messaging apps might only use data when a message, photo, or file is sent. Maps may use short bursts while loading directions. Zoom keeps working continuously for the whole call. Audio-only Zoom calls are usually much lighter. Video meetings are heavier. Group video meetings, screen sharing, HD video, and long calls can become one of the biggest drains on a travel data plan. How Much Data Does Zoom Use per Hour? Zoom data usage depends on the type of call, video quality, screen sharing, number of people, and connection quality. As a practical guide, these are sensible approximate ranges: Zoom Activity Approximate Data Use per Hour Audio-only Zoom call 30 MB to 100 MB One-on-one video call 500 MB to 1.5 GB Group video meeting 800 MB to 2.5 GB Screen sharing 300 MB to 1.5 GB HD or higher-quality video meeting 1 GB to 3 GB+ That means a short audio call may barely touch your plan, while a long group video meeting can make a serious dent. If you are asking how much data Zoom uses per hour, the safest answer is that audio is light, standard video is moderate to heavy, and long group video calls can be very heavy. What Uses the Most Data on Zoom? The biggest Zoom data users are video, call length, and meeting complexity. Turning your camera on makes a major difference because Zoom has to upload your video feed while also downloading everyone else’s. Group meetings usually use more data than one-on-one calls because there are more video feeds, more movement, and more live information being processed. HD video can also increase usage quickly. A meeting may feel ordinary on screen, but higher-quality video can push data use much higher over an hour. Screen sharing can add another layer, particularly if slides, websites, software demos, or moving visuals are involved. Long meetings are the quiet killer. A 10-minute check-in is easy to manage. Three one-hour meetings in a day is a very different story. A weak connection can also make things messier. When signal quality drops, apps may work harder to keep the call stable. Add background apps, cloud syncing, email refreshes, and file uploads into the mix, and your mobile data can disappear faster than planned. Zoom Audio Calls vs Video Calls vs Screen Sharing: Which Uses More Data? Audio-only Zoom calls are usually the best option for saving mobile data. They still use data, but the usage is much lower because there is no live video stream. One-on-one video calls use more because your camera is sending video out while Zoom is receiving video from the other person. Group video meetings usually use more again, particularly when multiple cameras are active. Screen sharing sits somewhere in the middle to heavy range, depending on what is being shared. A static slide deck may be manageable. A fast-moving software demo, video playback, or shared browser session can use more. For travellers, the best way of saving data is to join by audio when the meeting does not need your face, keep your camera off when mobile data is limited, and save screen sharing for Wi-Fi whenever possible. How Much Data Does Zoom Use on a Travel Day? Zoom data use becomes easier to understand when it is tied to real travel habits. A 30-minute audio-only work check-in might use very little data. A one-hour one-on-one video call could use around half a gigabyte or more. A one-hour group meeting may use closer to 1 GB or 2 GB, depending on quality and how many people have cameras on. An online class can be heavier again if video, screen sharing, and chat are all active for a full session. A family video call at night might feel casual, but if it runs for an hour with video on, it can still use a noticeable chunk of your plan. For remote workers, students, and business travellers, Zoom should be treated as a planning item, not an afterthought. One short meeting is rarely a problem. Several video meetings a day can change how much travel data you need. Does Zoom Use More Data Than FaceTime, TikTok, Maps, or WhatsApp? Zoom can use more data than many everyday travel apps when video is enabled. Maps, email, browsing, and messaging are usually easier to manage because they tend to use data in smaller bursts. WhatsApp messages and audio calls are generally much lighter than Zoom video meetings. Video-heavy apps are a different story. TikTok, Instagram Reels, YouTube, Netflix, FaceTime, and Zoom video calls can all drain mobile data quickly because they rely on continuous video. The difference with Zoom is that it often runs for work, study, interviews, or appointments, so people may not think of it as heavy in the same way they think of streaming or social video. But from a data point of view, long Zoom video meetings can be just as important to manage. How to Use Less Data on Zoom While Travelling The best way to save data on Zoom is to reduce video wherever possible. As earlier mentioned, join by audio if the meeting does not need video. If you need to appear briefly, turn your camera on at

How Much Data Does Zoom Use? Read More »

youtube data usage

How Much Data Does YouTube Use?

You don’t usually plan to use much YouTube while travelling; it simply slips into spare moments. A quick video while waiting in line, another during a delay, then a few more in the evening. Before you notice it, those small moments turn into a steady stream of data use. And it rarely feels like heavy internet use in the moment, but for anyone using a Travel eSIM, YouTube can become one of the fastest ways to burn through mobile data. It is easy to see how it happens. With roughly 2.5 to 2.7 billion people logging into YouTube every single month, it is our default global entertainment. Does YouTube Use a Lot of Data? Yes, YouTube can use between 200MB and 3GB of data per hour, depending on the video quality settings in use. Messaging, maps, email, weather checks, basic browsing, and music streaming are usually much lighter. YouTube is different because it is built around video. Every minute of playback carries visual and audio data, and the higher the quality, the heavier that stream becomes. It is also easy to underestimate because YouTube does not always feel like streaming. A quick travel tip video, a restaurant review, a music clip, a tutorial, a few Shorts, or background content while getting ready can all add up. One video rarely feels like a problem. Ten videos on mobile data can be. How Much Data Does YouTube Use Per Hour? As a rough guide, YouTube can use anywhere from a few hundred megabytes per hour to several gigabytes per hour, depending on playback quality. Lower-quality streaming may use around 200MB to 500MB per hour. This can be manageable for occasional viewing, particularly if the screen is small and the video does not need to look perfect. Standard-definition streaming often sits closer to 500MB to 1GB per hour. This is where regular YouTube watching starts to matter on a limited travel plan. High-definition streaming can use roughly 1GB to 3GB per hour, depending on the resolution and compression. Watching at 720p or 1080p on mobile data can drain a small eSIM plan quickly. Very high-resolution viewing, such as 1440p or 4K, can use several gigabytes per hour. For most travellers, this is best left for hotel Wi-Fi. YouTube Shorts can be lighter per video, but heavier than expected per session. The danger is the scroll. A few minutes is fine. Half an hour of nonstop Shorts can turn into a surprisingly data-heavy habit. Livestreams can also use a lot of data because they run continuously. Unlike a short video, there is no natural stopping point. If the quality is high and the stream stays open, usage can climb fast. What Affects YouTube Data Usage? The biggest factor is video quality. Higher quality means more data. A video at 1080p will usually use much more than the same video at 360p or 480p. Watch time is another factor. A single five-minute video is not an issue, but a long session during a layover, train ride, or quiet night in the hotel room can quickly increase data usage. Also, long-form videos, music videos, livestreams, and background viewing usually use more data because they keep running. Shorts can feel lighter, but the endless feed makes it easy to watch far more than planned. YouTube’s autoplay function is equally data draining. Leave it on, and YouTube may keep serving videos after the one you came to watch. That is fine on Wi-Fi. On mobile data, it can waste a plan without much thought. Your phone settings and YouTube app settings also play a role. Some devices allow higher-quality playback on mobile data unless you tell them not to. Others may adjust automatically, but automatic does not always mean data-friendly. YouTube Streaming vs Downloading: Which Uses More Data? Streaming and downloading both use data if they happen on mobile data. The difference is control. Streaming uses data while the video plays. Watch one video, data is used once. Rewatch it later, data is used again. Keep watching through autoplay, and usage keeps climbing. Downloading uses data upfront. If the video is downloaded on mobile data, it can still use a lot of data. But if it is downloaded on Wi-Fi before heading out, it becomes one of the easiest ways to make YouTube travel-friendly. That is especially useful for flights, long train rides, airport waits, bus trips, ferry rides, or areas where coverage may be unreliable. Download before leaving the hotel, then watch without touching the travel data plan. For travellers, streaming on mobile data is convenient, but downloading on Wi-Fi is safer. How Much Data Does YouTube Use on a Travel Day? A light YouTube day might be a few Shorts while waiting for transport, one or two travel tip videos, and a quick restaurant review. If playback quality is low, that may be manageable at around 300MB of data per hour. A moderate YouTube day could include a few destination guides, music videos in the background, and a longer video during transit. This can start to eat into a small travel data plan, consuming over 1GB of data each hour. A heavy YouTube day is when things change quickly. Think airport delays, long train rides, livestreams, autoplay sessions, and night-time viewing without hotel Wi-Fi. At higher quality, this can use between 2GB and 3GB of data or even more per hour. This is why YouTube on mobile data is less about opening the app and more about the habit around it. Short, low-quality viewing is one thing. Long, high-quality sessions are another. Does YouTube Use More Data Than Netflix, Instagram, or FaceTime? YouTube can be lighter or heavier than Netflix, depending on quality and watch time. Netflix is usually associated with longer viewing sessions, but YouTube can catch up quickly if autoplay, HD, Shorts, or livestreams are involved. Compared with Instagram, YouTube can use more data when watching longer videos or high-quality streams. Instagram can still be data-heavy, especially with Reels, Stories, and video-heavy browsing,

How Much Data Does YouTube Use? Read More »

whatsapp data usage

How Much Data Does WhatsApp Use?

With more than 3.3 billion monthly active users, WhatsApp is one of those apps that can easily become part of almost every overseas travel. A quick message to family, a note to the hotel, a photo in the group chat, a call back home before bed. None of it feels especially heavy at the time, which is why WhatsApp data usage can catch people out when media and calls start adding up. That said, WhatsApp is usually much easier on mobile data than video-first apps. If you are using a limited plan or a travel eSIM, it is still worth knowing what uses almost nothing, what uses a moderate amount, and what can chew through data faster than expected. Does WhatsApp Use a Lot of Data? WhatsApp can use 1 MB to 400 MB of data per hour, depending on what you are doing. Text messages use very little data, so sending updates, confirming bookings, chatting with family, or messaging tour operators is unlikely to make a major dent in a travel plan. However, this can change when WhatsApp becomes more than a messaging app. Voice calls, video calls, photo sharing, video sharing, large group chats, automatic media downloads, and cloud backups can all increase usage up to 1GB for heavy usage. So, does WhatsApp use a lot of data? For text, not really. For calls and media, it can. How Much Data Does WhatsApp Use Per Hour? How much data WhatsApp uses depends on what you are doing inside the app. A quiet text chat is very different from a long video call or a group chat full of photos and videos. The figures below are best treated as practical ranges rather than exact numbers, because mobile data use can vary by phone, network, settings, file size, and call quality. Text Messaging Sending text messages through WhatsApp uses between 1KB and 1MB of data. Even frequent messaging throughout the day is usually manageable on a smaller travel plan. This is why WhatsApp is so useful overseas. You can confirm a hotel address, message a driver, check in with family, or coordinate plans without worrying too much about data. Sending Voice Notes Voice notes use more data than text, but are still usually fairly light, often ranging between 150KB and 200KB per minute. A short voice note is unlikely to matter much. Long back-and-forth voice notes throughout the day will use more, but they are still generally easier to manage than video calls or sending large clips. Sending and Receiving Photos Photos can use about 300KB to 1MB of data, depending on how many are sent and whether they download automatically. One or two photos will not usually be a problem. A busy family group chat, however, can turn into a steady stream of images from every meal, beach, hotel room, and boarding gate. That is when WhatsApp photo data use becomes more noticeable. Sending and Receiving Videos Videos are much heavier than photos or text and often use up to 20MB of data, depending on the quality of the video Sending one short clip may be fine, especially on a larger plan. Sending several travel videos over mobile data can quickly become one of the biggest WhatsApp data drains. Also, if videos auto-download while you are using mobile data, your plan can take the hit before you have even watched them. WhatsApp Voice Calls WhatsApp voice calls can use between 20MB and 60MB of mobile data in an hour. It uses more data than text or voice notes, but much less than most video calls. A short call to family, a hotel, or a tour provider should be easy to manage. Long daily calls can add up, especially on a smaller eSIM plan. WhatsApp Video Calls WhatsApp video call data usage is usually the heaviest common WhatsApp activity. A typical video call can use roughly 3–5 MB per minute, meaning a 1-hour WhatsApp video call might consume around 200MB to 400 MB of data, depending on call quality and network conditions.  A short video call may be fine, but longer calls back home can use a meaningful chunk of data. If your plan is small, video calls are best saved for Wi-Fi. What Uses the Most Data on WhatsApp? The biggest WhatsApp data users are video calls, videos, long voice calls, auto-downloaded media, and cloud backups. Text messages sit at the light end. They are simple, small, and easy to manage. Video calls sit at the other end. They stream audio and video continuously, which means data use keeps climbing for as long as the call continues. Videos are another major one. Sending or receiving clips can use much more data than sending photos or voice notes. This is especially relevant while travelling, because people naturally want to share short clips from beaches, food markets, hotels, trains, tours, and airports. Automatic media downloads can also cause trouble. If WhatsApp is set to download photos and videos over mobile data, group chats can start using data in the background of your day. You may not even notice until your allowance drops. Cloud backups over mobile data should be avoided on smaller plans. Backing up chats and media can involve large files, especially if your WhatsApp account stores lots of videos and photos. Messaging vs Voice Calls vs Video Calls: Which Uses More Data? Messaging is the lightest, voice calls sit in the middle, while video calls are usually the heaviest. That simple split is the easiest way to plan your WhatsApp use while travelling. Text-based chats are ideal for mobile data. They are fast, practical, and unlikely to cause issues unless you are also downloading lots of media. Voice calls are still reasonable, particularly for short conversations. They are a good alternative when you want to speak properly but do not need video. Video calls need more care. They are useful, personal, and sometimes worth it, but they can drain a smaller plan quickly if they become a daily

How Much Data Does WhatsApp Use? Read More »

tiktok data usage

How Much Data Does TikTok Use?

TikTok has a way of turning spare travel moments into surprisingly heavy data use. With the platform rapidly growing to reach 1.99 billion adult users worldwide, it is safe to say a massive chunk of us are guilty of that quick scroll. One look while waiting for coffee can turn into another at the airport, then a few clips in a rideshare, then an upload once you reach the hotel. Because every swipe loads video, the app can use mobile data far faster than it feels in the moment.  That is especially important if you are using a travel eSIM. TikTok is not off-limits overseas, but it is one of the first apps to watch when your data needs to last. Does TikTok Use a Lot of Data? Yes, TikTok can use between 800MB and 1.2GB of data in just an hour or even more in some cases. This is mainly because the app is almost entirely video-based. Messaging apps usually send small pieces of text, maps can be managed with cached routes, and light browsing often loads one page at a time. TikTok keeps serving video after video, often before you even decide whether you want to watch the next one. That is where TikTok mobile data usage can creep up. A short scroll can be harmless, but a 40-minute session at the airport, followed by another session on the train, then a few uploads later in the day, is a very different story. How Much Data Does TikTok Use Per Hour? The exact amount depends on video quality, connection speed, app settings, how quickly you scroll, and whether TikTok is preloading videos in the background. As a practical estimate, TikTok may use anywhere from a few hundred megabytes to over 1GB per hour. Here is a useful way to think about it. Casual Scrolling Light TikTok use may sit around 300MB to 700MB per hour, depending on video quality and how fast new videos load. This kind of use might include checking the app for 10 or 15 minutes a few times a day. For travellers, that can be manageable, but it still adds up faster than messaging, email, maps, or basic web browsing. Heavy Scrolling Longer TikTok sessions can easily reach 1GB per hour or more. This is where travellers often get caught. TikTok does not feel like watching a full movie or streaming a long YouTube video, but the app is still loading continuous video content. If you scroll for an hour during a layover, your data plan may feel it. Watching Higher-Quality Videos Higher-quality playback generally uses more data, often exceeding 1.2GB. If your connection is strong, TikTok may automatically load higher-quality videos for a smoother experience. However, this can trigger a data usage warning, as the app may consume significantly more data without clearly notifying you.  Uploading TikToks Uploading videos can use a noticeable amount of data, particularly if the clips are longer, high-resolution, or edited with multiple elements. Posting one short video may not be a major issue. Uploading several travel clips across the day can make a bigger dent, particularly on a small eSIM plan. Watching TikTok Live TikTok Live can be one of the heavier activities because it involves continuous streaming. A quick look at a livestream might be fine. Sitting through a long live session on mobile data is a much easier way to drain your plan. What Uses the Most Data on TikTok? The biggest data drivers on TikTok are video loading, video quality, uploads, livestreams, and repeated feed refreshes. The app is designed to keep content moving, which makes it fun to use but harder to control on mobile data. Continuous video scrolling is the main one. Every new video needs to load, and TikTok often prepares upcoming videos before you watch them. That means passive scrolling can still use a lot of data. Autoplay also plays a role. You do not have to press play each time. Videos start automatically, so data usage continues as long as the app is open and the feed keeps moving. Higher-quality playback can increase usage as well. Clearer videos are better to watch, but they come with a data cost. Uploading is another big factor. Travel videos are often filmed in high quality, and uploading them on mobile data can use far more than expected. TikTok Live is also worth treating carefully. Livestreams behave more like continuous video streaming than normal browsing. Background app activity may also contribute in smaller ways, depending on your phone settings. It is not usually the main issue, but reducing background refresh can still help when every megabyte matters. TikTok Scrolling vs Uploading vs Livestreams: Which Uses More Data? Normal scrolling can already be data-heavy because TikTok is built around video. Even if each clip is short, the app keeps loading new content, and a long session can use a surprising amount of mobile data. Uploading can use more data in bursts. The larger and higher-quality the video, the more data it needs to send. If you are posting travel clips throughout the day, uploads can become one of the main drains on your plan. Livestreams are often the heaviest when watched for long periods. Unlike normal scrolling, where videos change quickly, a livestream keeps running continuously. That makes TikTok Live risky on mobile data if you are trying to make a small travel plan last. In simple terms: short scrolling is manageable, long scrolling adds up, uploads can spike usage, and livestreams can drain data quickly. How Much Data Does TikTok Use on a Travel Day? A normal travel day can make TikTok data usage climb without feeling excessive. You might open TikTok over breakfast while planning the day. Then again in an Uber, at the airport, on a train, or while waiting for hotel check-in. Later, you might upload a clip from sightseeing, check comments, scroll through travel recommendations, and watch videos before bed. None of those moments feels huge on its own.

How Much Data Does TikTok Use? Read More »

digital nomad visa bali

Bali Digital Nomad Visa: How to Apply and What Remote Workers Need to Know

If you have been thinking about how to get a Bali digital nomad visa, you are probably already picturing what a longer stay could look like. Maybe you want more time in Bali without rushing through a short holiday, or maybe you want to work remotely from Bali while keeping your employer, clients, and income outside Indonesia. Either way, it helps to clear up one thing early. Bali does not have a separate visa system of its own.  What People Mean When They Search for a Bali Digital Nomad Visa As mentioned above, the phrase gets used a lot because Bali is the place readers care about, but the visa rules sit at Indonesia level. In practice, most people searching for a Bali visa for remote workers want to know whether they can stay in Bali while working online for an employer or business based overseas.  The Remote Worker Visa ( E33G) is designed for that, and allows you to carry out assignments from an overseas company, travel to and from Indonesia, and stay for up to one year. However, those under this visa are prohibited from selling goods or services in Indonesia or receiving compensation from individuals or companies in Indonesia, which is why the visa is best understood as a remote work pathway tied to offshore income rather than local employment. Who This Bali Remote Work Visa Is Best For As the name implies, this Bali remote work visa path is most relevant for remote employees and some contractors whose work arrangement clearly sits outside Indonesia. It may also suit some founders or consultants, but the current official document requirements specifically include an employment contract with a company established outside Indonesian territory.  That means anyone with a less standard setup should check the fit carefully before applying. If your plan involves local clients, local billing, or taking work inside Indonesia, this is where you need to be cautious. Bali Digital Nomad Visa Eligibility and Requirements Before looking at how to apply for the Bali digital nomad visa, it helps to get clear on the current eligibility points and Bali visa requirements. For the E33G route, Immigration currently lists a passport with at least six months of passport validity, a personal bank statement showing at least US$2,000 over the last three months, a recent photograph, a CV, a travel itinerary, proof of income worth at least US$60,000 per year, and an employment contract with a company established outside Indonesia.  Additionally, the visa must be used to enter Indonesia within 90 days from the date of issue, while the stay itself is listed as up to one year. In a nutshell, your application needs to show who you are, that you can support yourself, and that your work arrangement is genuinely offshore. That is the core of the current Indonesia digital nomad visa pathway. The easiest way to make the process feel manageable is to gather the documents needed before you begin the online form. You also need an account on the eVisa portal, and should prepare electronic files in PDF or JPEG format before submitting the application. Beyond the formal visa paperwork, it is also smart to sort the practical parts of the move early. That can include your first accommodation details, your flight timing, any health insurance you want in place before departure, and your general arrival preparation. Even where those items are not the core documents listed on the visa page, having them organised makes the move far smoother. How to Apply for a Bali Digital Nomad Visa Step by Step 1. Start with the official Indonesia eVisa portal To apply for the Bali digital nomad visa, start with the official Indonesia eVisa system rather than a third-party summary. Bali may be the destination, but the visa sits under Indonesia’s national Immigration framework. The government portal sets out the basic flow clearly: apply, pay, then download the visa once it is approved. 2. Choose the correct visa category The Indonesian Immigration pages currently identify E33G as the remote worker option for people carrying out tasks from a foreign company while staying in Indonesia, so ensure you choose that if it’s what you need. 3. Create your account and upload your documents All applicants must have an account on the eVisa platform before applying. Once you are logged in, you can start the form and upload the required files. Your name, passport details, and supporting documents should all match cleanly across the application. 4. Pay the visa fee For the current E33G route, the official pages list a one-year stay and a fee of 7,000,000 IDR. The Immigration listing also shows the related fee lines attached to the visa. Because official fees can change, it is always worth checking the live government page again before paying. 5. Allow enough time for processing Currently, processing of the E33G visa takes five working days after payment is received. That gives you a useful baseline for planning, but it is still better not to leave your application until the week of departure. 6. Download the approved visa and prepare for arrival Once approved, the eVisa portal says the visa can be downloaded from the link sent to your email. Keep digital copies in more than one place before you travel. This is also the point to finish your arrival preparation, confirm your airport transfer and first accommodation, and make sure you understand the broader Bali entry requirements before departure.  Keep in mind that travellers are required to submit an arrival card within three days before arrival. If you want a broader pre-trip checklist, our guide to Bali entry requirements can help you get started. 7. Keep the visa validity and stay period separate in your mind This is an easy detail to miss. The visa must be used to enter Indonesia within 90 days from the date of issue. However, the visa duration or validity period is different from the period of stay. For E33G, you have a stay period

Bali Digital Nomad Visa: How to Apply and What Remote Workers Need to Know Read More »

bali expat life

Bali Expat Life: Cost of Living Guide for Long-Stay Travellers and Remote Workers

Bali still looks affordable from a distance. The trouble starts when people budget for the version of Bali they imagine rather than the one they are actually likely to live in. Rent in popular areas has climbed, convenience spending adds up fast, and the gap between a lean setup and a comfortable one is much wider than many first-time movers expect.  This Bali expat life cost of living guide will help you price Bali properly before you commit to a move, a few months abroad, or a longer remote-work stint.  Who This Bali Cost of Living Guide Is For This guide is written for remote workers, digital nomads, long-stay travellers, and anyone comparing living in Bali as an expat with staying put or choosing another base in Asia. It is also useful for couples trying to work out shared costs, and for solo travellers who want a realistic view of the Bali cost of living for singles rather than backpacker maths.  The point is not to sell Bali as cheap. But rather show where the money actually goes once you move beyond short-stay tourist spending and start building a real Bali monthly budget. Is Bali Still Affordable for Expats? This destination still works well for expats, but the real cost of living in Bali depends less on fantasy and more on housing choices, visa planning, transport habits, and whether your daily routine leans local or imported. Current travel guides still place a modest solo lifestyle around the lower end of the market, while a comfortable setup for remote workers lands much higher once private accommodation, gym spend, coworking, health cover, and a mix of local and Western dining are added.  Bali.com places mid-range living for digital nomads and remote workers at roughly USD 1,200 to USD 1,800 per month, while most guides put modest solo living closer to USD 900 to USD 1,200 and a more comfortable expat setup around USD 1,800 to USD 2,500. The point is not the exact number. It is that the Bali expat cost of living changes quickly once you stop living like a short-term visitor and start paying for privacy, convenience, and consistency. Average Bali Remote Worker Budget A good way to think about Bali living costs is by lifestyle tier rather than chasing one magic number. At the lower end, people usually keep costs down with a simple room or guesthouse, local meals, scooter transport, and a base outside the busiest strips. In the middle, which is where many remote workers land, the spend rises because you are paying for a private place, a better location, more café meals, stronger Wi-Fi, and a more stable routine.  That mid-range band is the most common setup for digital nomads, with private accommodation, mixed dining, scooter or ride-app transport, and regular fitness or social spend included in the picture. That is why a realistic Bali digital nomad budget is best treated as a range, not a neat one-line promise. Accommodation Is the Biggest Budget Variable If one line item decides your budget, it is housing. Bali accommodation costs move more than almost anything else, depending on where you stay, how long you commit to, how much privacy you want, and whether you are happy with a room, co-living, apartment, or full villa. Current mid-range living rates put private apartments, simple villas, or co-living options around USD 500 to USD 1,000 per month. However, a more comfortable expat setup with a private villa in areas such as Sanur, Ubud outskirts, or Pererenan can push the monthly budget much higher. That is why Bali rent prices can swing your total harder than food, transport, or coworking. A cheaper room in a practical area can keep the whole month under control. A private villa in a high-demand pocket can change the entire budget on its own. As you can see, area choice matters as much as the property itself. If you want to compare neighbourhoods before you decide, you can have a look at some of the best locations to stay in Bali. Your choice affects not just rent, but how often you use transport, how much you spend on cafés, and whether your daily routine quietly drifts into premium territory. Cost of Food and Groceries in Bali Bali food costs are where a lot of people either save money without trying or lose control of their budget without noticing. You can get an inexpensive restaurant meal at about Rp46,778, a meal for two at a mid-range restaurant at about Rp431,229, and a cappuccino at about Rp36,106. Those numbers tell you that eating local can still be very manageable, but a steady cafe routine in expat-heavy areas changes the picture. In practice, food spending comes down to where you choose to eat. If you are happy eating at warungs most days and using supermarkets for basics, daily expenses in Bali stay fairly reasonable. If you prefer Western brunches, imported groceries, wine, and delivery, your spending starts to look very different. This is one of the biggest reasons two people can talk about the cost of living in Bali as if they are describing two completely different islands. Transport Costs in Bali Depend on Convenience Bali transport costs usually sit well below rent, but they still deserve attention because convenience tends to inflate them. Scooter or ride-app transport is roughly USD 80 to USD 150 per month. That feels manageable until you factor in what happens when you live slightly too far from your usual cafes, gym, beach, or workspace and start leaning on ride apps several times a day. And that is why transport is really more of a location question. A scooter and a sensible base can keep your transport spending light. A lovely villa that is just far enough away from everything can make even short trips feel like a recurring tax on your week. For anyone building a Bali budget by lifestyle, transport should be priced alongside accommodation rather than treated as a separate afterthought.

Bali Expat Life: Cost of Living Guide for Long-Stay Travellers and Remote Workers Read More »

esim data 101

eSIM Data 101: How to Track Usage, Top Up Smart, and Make Your Data Last Longer

You do not usually notice travel data until it is nearly gone. One morning, you are using maps, replying to messages, checking restaurant reviews and uploading a few holiday photos, and by the afternoon, you are staring at an eSIM low data warning in the middle of a city you do not know. And that is exactly where this eSIM data 101 guide can come in handy. It is built for travellers who want to check remaining eSIM data quickly, understand where it is going, and make better decisions before they need an urgent top-up. Whether you are using your first Travel eSIM or trying to make your current plan last until the end of a trip, the goal is to track usage early, cut obvious waste, and top up before it becomes stressful. Why Travel eSIM Data Runs Out Faster Than You Expect Most travellers do not burn through data because of one big mistake. It usually happens through a pile-up of small habits that feel harmless on their own. Live maps stay open for hours, Instagram uploads in the background, your phone starts syncing photos, a hotel Wi-Fi connection drops out, then your laptop uses your hotspot for software updates. By the time you notice, your travel eSIM data usage is much higher than expected. That is why the best way to manage mobile data while travelling is not to wait until you are almost out. You need to check your balance early, understand the biggest drains, and make a few setting changes from day one. What eSIM Data Actually Covers A travel eSIM usually covers mobile data rather than traditional calls and texts, although inclusions can vary by plan. In practical terms, that means every app using the internet over cellular can chip away at your allowance. Maps, messaging apps, video calls, social media, cloud backups, music streaming, email attachments and hotspot use all count. If you are wondering why eSIM data runs out fast, the answer is often simple: modern phones are doing far more in the background than most people realise. How to Check Your eSIM Data Balance If you want to know how to track eSIM data properly, use more than one method. Device-level figures and provider-level balances are both useful, but they do not always refresh at exactly the same time. Treat them as two helpful reference points rather than expecting a perfect match. There are three main ways to check remaining eSIM data: How to Check eSIM Data Usage on iPhone To check eSIM data usage on an iPhone, the fastest path is through cellular settings. Go to Settings > Mobile Service or Cellular, then look for your active eSIM line. From there, you can usually see total cellular usage and which apps are consuming the most data. This is one of the easiest ways to spot hidden drains, such as cloud storage, social apps or streaming platforms. Useful iPhone controls include: On iPhone, a good habit is to reset your cellular statistics just before your trip or just after your eSIM activates. That gives you a cleaner view of travel-only usage rather than a mix of old and new data. How to Check eSIM Data Usage on Android Android menus vary slightly by brand, but the main path is usually Settings > Network & Internet, Connections or SIM Manager, then Data Usage or Mobile Data Usage. Once you are in the right area, you can normally see how much data has been used overall and which apps are responsible. This is where Android is especially useful for travellers. You can often set a warning threshold, a hard limit, or both. That means your phone can alert you before you run low, rather than after you have already used most of your allowance. The most useful Android controls for travel are: How Much Travel Data Do You Actually Need? The answer to this depends less on trip length and more on how you use your phone each day. Light use suits travellers who mostly use messaging, email, occasional map checks and basic browsing. If you mostly stay on Wi-Fi and do not stream much, a smaller plan may be enough. Moderate use suits travellers who use maps regularly, scroll social media daily, upload some photos and rely on mobile data for a decent part of the day. This is where many people underestimate their needs. Heavy use suits travellers using hotspot, video calls, regular video streaming, frequent uploads, or long navigation sessions. If that sounds like your trip, a bigger plan is usually cheaper and less stressful than repeated emergency top-ups. A simple rule is that if your phone is doing more than maps, messages and quick searches, you are probably not a light user. When You Should Top Up Your eSIM If you are trying to decide how to top up eSIM data at the right time, do not wait until you are down to your final sliver of allowance. That is when travellers make rushed choices, buy the wrong pack, or discover their plan rules are different from what they assumed. You should usually think about a top-up when: The practical approach is to top up while you still have enough data to do it comfortably. Waiting until you are almost disconnected is rarely worth it. How eSIM Top-Ups Usually Work Top-up rules vary by destination and provider, so the smartest move is to check the details before paying. If you want to top up travel eSIM data without surprises, look at three things first. If you are travelling across multiple countries, also check whether the top-up follows the same regional coverage as your existing plan. How to Use Less Data While Travelling If your goal is to use less data while travelling, small habits make a bigger difference than most people expect. You do not need to baby your phone all day, but you do need to stop the obvious waste. Best Phone Settings to Make Your Data

eSIM Data 101: How to Track Usage, Top Up Smart, and Make Your Data Last Longer Read More »

esim phone support

Does My Phone Support eSIM? How to Check If Your Device Is eSIM Compatible

Does my phone support eSIM? This is a common question among those planning overseas travels. The short answer is that many newer phones do support eSIM, but not every device does. Compatibility can depend on your phone model, the country or region it was made for, your software version, and whether the device is locked to a carrier.  With the help of this guide, you’ll get a better understanding of how you can pair your phone to an eSIM for the best service. And if you are still new to the basics, it may also help to read our what is a travel eSIM blog before moving on to compatibility. What Does eSIM Compatible Mean? An eSIM-compatible phone has built-in support for a digital SIM. That means you can download and activate a mobile plan without inserting a physical SIM card. That sounds simple, but there are a few catches. A phone can be fairly new and still need checking. Some models support eSIM only in certain regions, some need the latest software, and some carrier-locked phones may not let you use a different provider’s eSIM straight away.  How to Check If Your Phone Supports eSIM If you want the fastest way to check if your phone supports eSIM, start here. First, look in your phone settings for an option to add an eSIM, mobile plan, or cellular plan. If that option appears, that is usually the clearest sign your phone supports eSIM. Second, check your exact model against the manufacturer’s specifications. This is important because support can vary even within the same phone range. Third, make sure your phone is unlocked and that eSIM is supported for your regional model. A phone may technically support eSIM but still run into problems if it is carrier-locked or sold in a market with different SIM features. If you want a broader reference point, you can also review our list of eSIM-compatible phones and devices. How to Check eSIM Compatibility on iPhone and Android Before setting anything up, it helps to know exactly where to look on your iPhone or Android to confirm whether eSIM is supported and ready to use. iPhone On iPhone, checking is usually quite straightforward. Go to Settings, then Mobile Data or Cellular. Look for an option such as Add eSIM, Add Cellular Plan, or Convert to eSIM. If you can see one of those options, your iPhone likely supports eSIM. Most newer iPhones support eSIM, but it is still worth checking the exact model and region. Some features vary by market, and a carrier-locked phone may limit what you can do even if the hardware supports eSIM. Android Android can take a bit more checking because support varies more between brands and models. Start by opening Settings and going to Network & Internet, Connections, Mobile Network, or a similar menu. Then look for options such as SIM Manager, Add eSIM, Download SIM, or Mobile Plan. If you find one of those, your phone may support eSIM. After that, check the exact model on the manufacturer’s site or official product page. With Android, two phones that look almost identical can still have different eSIM support depending on the region or carrier version. Does My Phone Have eSIM or Just Dual SIM? Dual SIM does not always mean eSIM support. Some phones have dual SIM through two physical SIM slots. Others use one physical SIM and one eSIM. Some newer devices support multiple eSIM profiles as well. So if you see dual SIM mentioned in your phone specs, do not assume that means eSIM is available. You still need to confirm the exact type of SIM support your phone has. What Can Stop an eSIM From Working Even If the Phone Supports It? A phone can support eSIM and still not work properly during setup. One common reason is carrier lock. If your phone is locked to one network, it may not accept another provider’s eSIM. Another issue is regional model restrictions. Some devices are sold with different SIM capabilities depending on where they were made. Software can also get in the way. If your phone is not updated, the eSIM option may not appear, or the setup may fail. Then there are basic setup problems. Sometimes the phone supports eSIM, but the wrong line is selected for mobile data, the QR code was scanned incorrectly, or the plan was installed but not turned on properly. What to Do If Your Phone Does Not Support eSIM If your phone is not eSIM compatible, you still have options. You may be able to use a physical SIM instead, depending on where you are travelling. You can also check whether your provider offers roaming that makes sense for a short trip. If you already have another unlocked device that supports eSIM, using that phone may be the easiest fix. The important thing is to check before you buy. It saves time, avoids refund requests, and helps you choose the right option from the start. What to Do Next If Your Phone Does Support eSIM Once you have confirmed compatibility, the next step is simple. Choose a plan that suits your trip, install the eSIM, and follow the setup instructions on your device. At that point, you are no longer asking, “Will an eSIM work on my phone?” You are simply choosing the right plan and getting ready to use it. Final Thoughts Before you rely on an eSIM, it is worth confirming your phone actually supports it and that it is unlocked for international use. Once that box is ticked, the convenience becomes obvious. A TravelKon eSIM keeps things simple by getting you connected as soon as you land, without the usual hassle of swapping SIM cards or risking roaming charges.  For travellers moving between countries, it offers a straightforward way to stay online while keeping data costs predictable and under control. FAQs Does my phone support eSIM? Many newer phones do, but not all of them. The best way

Does My Phone Support eSIM? How to Check If Your Device Is eSIM Compatible Read More »

facetime data usage

How Much Data Does FaceTime Use?

When travelling, staying connected often comes down to how you use your phone rather than whether you can use it at all. Video calls, messaging, and background apps all draw from the same pool of data, and it is easy to lose track of how quickly it is being used once you are on the move.  Calls over apps like FaceTime are a big part of that when switching between Wi-Fi and mobile data abroad. Knowing how these services behave, particularly when using a travel eSIM, can help you avoid surprises and keep your connection steady throughout the trip. Does FaceTime Use a Lot of Data? A FaceTime video uses between 180 MB and 420 MB of data per hour. A short audio call to confirm an arrival time or check in with home is unlikely to trouble most plans. However, a 30-minute or 1-hour video call every day is a different story. That is where travellers start noticing their allowance dropping faster on smaller eSIM plans.  Industry estimates vary, but they point in the same direction: FaceTime audio is the lighter option, while video is a moderate to heavy drain depending on call quality and connection strength. How Much Data Does FaceTime Use Per Minute and Per Hour? The most useful way to look at FaceTime data usage is by splitting it into audio and video. FaceTime audio data use Again, FaceTime audio is usually the safer choice on mobile data. A sensible planning estimate is roughly 1 to 2 MB per minute, or around 60 to 120 MB per hour. Some published estimates push a little higher, but this range is a fair guide for travellers who just want to know whether a quick call is harmless or not. In practical terms, that makes audio calls light enough for occasional use on most travel plans.  FaceTime video call data use FaceTime video is where things take a different turn. A workable estimate is roughly 3 to 7 MB per minute, or about 180 to 420 MB per hour, with higher-quality connections often sitting toward the upper end. Some estimates go even higher for HD or group calling, which means long video chats can chew through a modest plan faster than many people expect. That is why FaceTime video call data use feels reasonable in short bursts but expensive when it becomes routine.  What Affects FaceTime Data Usage? Call type is the biggest factor, but it is not the only one. Other factors, such as call length and connection quality, also have an impact on data usage. A stronger, cleaner connection can support higher video quality, which may mean more data use. Group calls can also be heavier than one-to-one calls.  On top of that, background app activity can eat into the same plan while a call is happening. Apple’s iPhone settings let users see cellular usage by app, which is useful when FaceTime on mobile data seems to be costing more than expected. How Much Data Does FaceTime Use on a Travel Day? This is where planning gets easier. A 10-minute FaceTime audio call may only use around 10 to 20 MB. A 30-minute video call could land somewhere around 90 to 210 MB. A full 1-hour video call may take 180 to 420 MB, and possibly more on a strong connection or group call.  That means a traveller on a 5 GB plan could get by comfortably with occasional short calls, but daily long video chats would take a proper chunk out of the allowance. As you can see, the real answer is that one hour of video can represent a meaningful share of a smaller travel eSIM. FaceTime vs WhatsApp vs Zoom: Which Uses More Data? FaceTime generally sits in the same broad category as other calling apps: audio is fairly light, video is where the data goes. The exact winner changes with settings, resolution, network quality, and whether the call is one-to-one or a group session.  For most travellers, the bigger point is not whether FaceTime is dramatically worse than every alternative, but whether video calling itself fits the size of the plan. In other words, the app matters less than the habit. A few short check-ins are one thing, but frequent long video calls are another. How To Use Less Data on FaceTime While Travelling The easiest fix is to save longer video chats for Wi-Fi and use audio when video is not necessary. That one change can stretch a plan much further. It also helps to keep calls shorter on mobile data, shut down unnecessary background activity, and turn on Low Data Mode on iPhone when trying to reduce mobile usage overall.  Apple says Low Data Mode is designed to restrict background network use, which makes it a sensible setting for travel days when every gigabyte counts. You can also opt for unlimited eSIM data plans, but this may depend on whether the region you are visiting supports such plans. Is FaceTime Safe to Use on a Travel eSIM? Yes, FaceTime on eSIM can be perfectly fine, provided the plan matches the way the phone is actually used. For light users, short audio calls and occasional video check-ins are usually no problem. For heavier users, that is, anyone calling family every night on video, it makes sense to budget for that upfront.  FaceTime while travelling is not something to avoid. You just need to factor in the same way maps, browsing, uploads, and social apps use the available data. How Much Travel Data Should You Budget for FaceTime? That depends on the trip and the habit. A traveller mostly using maps, messages, and the occasional audio call may be fine on a smaller plan. However, if you rely on regular FaceTime video chats, ensure you think and budget more generously.  If usage starts rising faster than expected, noticing that early is very important. A data usage warning can be the difference between adjusting behaviour in time and burning through the plan too

How Much Data Does FaceTime Use? Read More »