seo@agents.digital

motorola esim compatibility

Motorola eSIM Compatibility Guide for Travellers

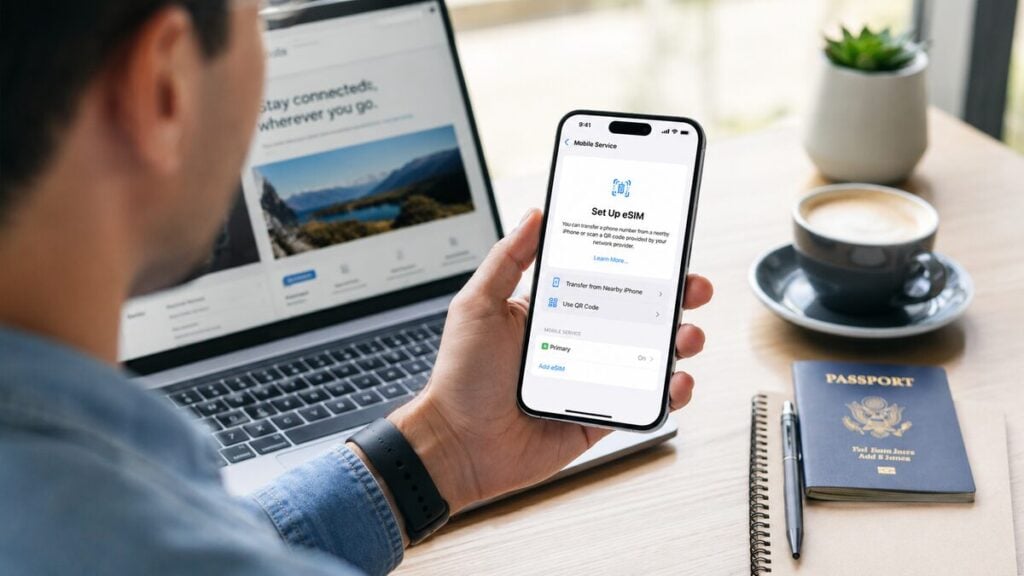
A Motorola phone can be a reliable travel companion when you are moving through long days and unfamiliar places. The battery tends to last, Android gives you practical control, and there is usually enough storage to keep maps, banking, rideshare, messaging, and hotel apps running without constant juggling. When it comes to using a travel eSIM, the focus shifts a bit. The real question is whether your specific Motorola model supports eSIM in your destination, and if the setup matches how you plan to stay connected once you arrive.  Are Motorola Phones eSIM-Compatible? Some Motorola phones are eSIM-compatible, but not all of them. Recent Motorola Razr and Motorola Edge models are the most likely to support eSIM. Some newer Moto G models also support eSIM, but compatibility is more model-specific and region-specific in the Moto G range. Quick overview: Note: Before buying a TravelKon eSIM, check the exact Motorola model, EID, Android version, carrier lock status, and SIM settings. Motorola eSIM Compatible Models Motorola model names can be confusing. Moto G, Edge, and Razr include many generations, regional variants, and carrier versions. The model family gives a clue, but the exact model number is the source of truth. Use this split when the model name is not enough. Category Motorola Devices What to Do Strong candidates Recent Razr, recent Edge, ThinkPhone, selected higher-end Moto G models Check EID and Add eSIM before purchase Check carefully Moto G Power, Moto G Play, Moto G Stylus, Moto G54 5G, Moto G34, carrier-branded models Confirm exact model, region, EID, and carrier lock Less likely Older Moto G, Moto E, and older budget Motorola models Expect physical SIM only unless settings prove otherwise Blocked despite hardware Carrier-locked or work-managed phones Unlock or remove restrictions before travel The most reliable answer always comes from the phone in hand. If the phone shows an EID and offers Add eSIM or Download eSIM, it is a much stronger candidate for travel eSIM setup. How to Check Whether Your Motorola Supports eSIM Before you get too far into setup, it helps to confirm whether your Motorola actually supports eSIM in the first place.  Check for an EID Open the Phone app and dial: *#06# Look for an EID number. An EID is the embedded SIM identifier. If the EID appears, the Motorola phone has eSIM hardware. However, if there is no EID, the phone may not support eSIM. On some Motorola phones, EID may also appear under: This is one of the most useful checks before purchase because it avoids confusion around similar model names. Check the SIM Settings On many Motorola phones, go to: Settings > Network & Internet > SIMs or: Settings > Network & Internet > SIMs & Mobile Network Look for an option such as: Note: Menu names vary by Android version and Motorola model. If the option is visible, the phone is a strong candidate for travel eSIM setup. Check the Exact Model Number Go to: Settings > About Phone Check: Two Motorola phones with similar names may not have the same eSIM support. A Motorola Edge model sold unlocked may behave differently from a carrier-branded version. Similarly, a Moto G model in one region may not match another region’s version. Check Carrier Lock Status A travel eSIM needs the Motorola phone to accept a mobile plan from another provider. If the phone is locked to a carrier, a TravelKon eSIM may not install or connect. Carrier lock checks can vary by Android version and network provider. Useful signs include: Ensure that you check this before departure because carrier unlocks can take time, and airport arrival is the worst time to discover a lock. Update Android Before Departure Old software can hide eSIM options, break QR code scanning, or prevent carrier settings from updating correctly. Before leaving Australia: For a more thorough compatibility check, follow our guide on how to check phone eSIM support. It walks you through the key settings to review so you can confirm support in just a few minutes.  Using TravelKon eSIM with an Australian SIM on a Motorola Many Australian travellers keep their normal Australian SIM active while using a travel eSIM for mobile data overseas. That setup can work well when the Motorola phone supports dual SIM behaviour, but the settings need to be clear. Setting Recommended Travel Use Mobile data Set to the TravelKon eSIM Calls Keep on Australian SIM if needed, or use apps over data SMS Keep your Australian SIM active if banking codes or SMS are needed Data roaming Turn on the TravelKon eSIM if required Australian SIM roaming Leave off unless needed, to reduce roaming risk Automatic data switching Review carefully so the phone does not jump to the wrong line The goal is to use TravelKon for travel mobile data while keeping the Australian SIM available only when needed. If the Australian SIM is left active overseas, check roaming settings carefully to avoid unwanted charges. Already Confirmed Compatible? Go Straight to Setup Once the Motorola phone shows EID, has Add eSIM or Download eSIM, and is unlocked, the setup path is simple: How to Install or Prepare a TravelKon eSIM on Motorola Travel eSIM setup is easiest when compatibility checks are complete before departure. Before Buying Check: Before Departure Once the right plan is purchased: Avoid leaving installation until airport arrival. Airport Wi-Fi can be slow, login-gated, unstable, or unavailable exactly when the QR code needs to load. On Arrival After landing: TravelKon eSIM Setup Methods on Motorola Different Motorola models and Android versions may show slightly different setup wording. Setup Method What It Means TravelKon Relevance QR code Scan the provider’s eSIM QR code Common travel eSIM setup method Manual details / SM-DP+ Enter activation details manually Useful if QR scanning fails Download eSIM Motorola downloads the eSIM profile through Android settings Common Android setup path Add mobile network Older wording for adding a mobile plan May appear on some models Carrier activation Carrier assigns an eSIM to the

Motorola eSIM Compatibility Guide for Travellers Read More »

japan summer festivals

Japan Summer Festivals eSIM Guide: Data, Maps and Travel Tips

Japan is one of the easiest countries to travel through when you have reliable mobile data, and one of the most frustrating without it. Trains fill up, station exits crowd over, the heat builds, and a small wrong turn can spiral into a long, uncomfortable detour. With a record 1,058,300 Australians visiting Japan in 2025, sorting out mobile data before departure is no longer a minor detail.  As such, having the right Japan eSIM plan can help keep maps, translation, taxi apps, ticket pages, hotel details, weather alerts, transport updates, and messaging available once airport Wi-Fi ends and the real trip begins. Do You Need an eSIM for Japan Summer Festivals? Yes. A travel eSIM is useful because festival travel depends heavily on live phone access. You may need maps for station exits, translation for signs and menus, taxi apps after late events, weather alerts during humid summer days, ticket pages at entry points, and messaging if your group gets separated. The safest setup is to install the eSIM before departure, save the instructions offline, check your roaming settings, and switch the eSIM on for mobile data after arrival in Japan. If you want a clearer picture of how eSIMs work across a single country or multiple regions, take a look at our guide on how international eSIMs work before choosing a plan. It breaks down what to expect, how plans behave as you move, and the small details that can make a big difference once you are on the ground.  What You Need to Sort Before You Fly Before departure, complete these while still on reliable home Wi-Fi: Also check whether your bank, airline, email, or travel apps need SMS verification. If your Australian SIM is needed for SMS, keep it available, but do not allow it to use mobile data roaming unless that is intentional. Japan Summer Festival Connectivity Planner Festival dates, routes, and ticketing details can change, so always check official event pages before booking. Use this table to plan around the moments when mobile data is most useful. Festival or Period Main Location Typical Timing Connectivity Problem What to Prepare Gion Matsuri Kyoto July Crowded central streets, busy station exits, long walking routes Offline Kyoto map, hotel address in Japanese, saved station exits, return route Tenjin Matsuri Osaka 24–25 July River crowds, fireworks traffic, late-night movement Final train screenshot, taxi app setup, Osaka map, group meeting point Aomori Nebuta Aomori 2–7 August Regional travel pressure, high hotel demand, parade crowds Accommodation screenshots, parade route, return route, cash backup Sendai Tanabata Sendai 6–8 August Busy shopping arcades, central station crowds Saved hotel route, meeting point, live maps, weather alerts Awa Odori Tokushima Mid-August Obon overlap, regional transport, crowd control Booked transport, offline tickets, cash, train/bus backup Summer Sonic Tokyo and Osaka Mid-August Ticket checks, venue movement, late returns, heavy phone use Ticket QR codes, power bank, eSIM data, taxi app, final train route Obon Travel Period Nationwide Mid-August Domestic travel rush, booked trains, busy airports, higher hotel pressure Early bookings, train screenshots, backup routes, luggage plan How Much Data to Buy for a Japan Festival Trip During festival travel in Japan, streets may be closed, pedestrian routes may become one-way, and Taxis may be harder to find near event areas. Additionally, restaurants may be full and the weather patterns can change quickly. In large Japanese stations, the wrong exit can add 10–15 minutes of walking. After fireworks, do not assume a taxi will be easy to hail near the event area. If you are travelling with others, pick a meeting point outside the densest part of the festival, not directly under a landmark everyone else is using. The point is not to stay online all day for entertainment. The point is to have mobile data available for the small decisions that keep the trip moving. Here’s a rough estimate of the amount of data that you may need: Trip Type Sensible Starting Range 3–5 days, light use 3–5GB 1 week, normal use 5–10GB 2 weeks, festival-heavy 10–20GB 3 weeks or hotspot/video use 20GB+ Note: Actual data usage depends on hotspot, video, cloud backups, app updates, streaming, social posting, and how often hotel Wi-Fi is used.  Maps, transport searches, messaging, ticket checks, translation, taxi apps, restaurant searches, weather updates, and light browsing are usually manageable with moderate data. Video uploads, video calls, hotspot sharing, cloud backup, and streaming are the main data drains. Connectivity Gets More Important Outside Tokyo and Osaka Tokyo and Osaka have plenty of stations, shops, hotels, cafes, and public spaces where travellers may find Wi-Fi. That does not make Wi-Fi a reliable travel plan. Regional festival cities can make mobile data more important, not less. Aomori, Sendai, Tokushima, smaller towns, side trips, rural train routes, and late-night returns all leave less room for improvising without data. Mobile data is especially useful when you need to find the correct platform on a regional route, check a delayed connection, show a taxi driver the hotel address in Japanese, message accommodation about a late arrival, find an ATM, translate food stall signs, or check whether a return route is still running. A Japan tourist guide that only focuses on Tokyo and Kyoto misses this point. Summer festivals often push travellers into regional areas, and regional travel is where phone preparation earns its keep. What to Do After Landing in Japan Before leaving Narita, Haneda, Kansai, Chitose, Fukuoka, or any other airport, take five minutes to check the phone properly. Use this arrival sequence: Do not wait until standing on a train platform with luggage to test mobile data. If something feels wrong, fix it while still inside the airport, where seating, charging points, Wi-Fi, and help are easier to access. When to Go and What to Plan Around Japan’s summer festival season runs heavily through July and August. Festival / Event Location Dates Key Details Gion Matsuri Kyoto Throughout July (main processions: 17 & 24 July) One of Japan’s most significant festivals, with large processions and

Japan Summer Festivals eSIM Guide: Data, Maps and Travel Tips Read More »

ipad esim travel

Can I Use eSIM on iPad While Travelling?

An iPad can be one of the best travel devices to keep connected. It has a bigger screen for maps, easier booking management, smoother work calls, and less phone battery stress during long travel days. However, before choosing a travel eSIM plan, the real question is simple but important. Can that specific iPad actually use mobile data overseas, or is it Wi-Fi only? Will Your iPad Work with an eSIM When You Travel Abroad?  Yes, you can use an eSIM on an iPad while travelling if the iPad is a Wi-Fi + Cellular model that supports eSIM. A Wi-Fi-only iPad cannot use a TravelKon eSIM because it has no mobile data hardware. So the iPad must support cellular data, have eSIM capability, run current software, and be set up with the correct travel plan for the destination. What Actually Works With an iPad eSIM When Travelling  iPad Type Can Use Mobile Data? Can Use a TravelKon eSIM? Best Travel Option Wi-Fi-only iPad No No Use Wi-Fi or phone hotspot Wi-Fi + Cellular iPad with eSIM Yes Usually yes Install TravelKon eSIM directly eSIM-only iPad Yes Usually yes Install TravelKon eSIM directly Older cellular iPad with physical SIM only Yes Not by eSIM Use a compatible physical SIM if available iPad connected to iPhone hotspot Yes, through phone eSIM sits on iPhone Good backup option iPad with unsupported region or model Maybe Check first Confirm model and eSIM menu Work or school-managed iPad Maybe Maybe Check device restrictions first The key point here is that the iPad in question must be a cellular-capable model. A travel eSIM cannot add mobile data hardware to a Wi-Fi-only iPad. Which iPads Support Travel eSIM? Calling it an iPad does not narrow things down much. iPad Pro, iPad Air, iPad mini, and the standard iPad all exist across different generations, and each one may be Wi-Fi-only or Wi-Fi + Cellular.  Use this as a practical guide, then confirm the exact model number in the iPad settings. iPad Family eSIM Travel Support Guidance iPad Pro Wi-Fi + Cellular Many 2018 and newer models support eSIM; check the exact model iPad Air Wi-Fi + Cellular Many 2019 and newer models support eSIM; check the exact model iPad mini Wi-Fi + Cellular Many recent models support eSIM; check the exact model Standard iPad Wi-Fi + Cellular Many 7th-generation and newer models support eSIM; check the exact model eSIM-only iPad models Suitable for travel eSIM use, but cannot use physical SIM cards Older cellular iPads May support physical SIM, Apple SIM, eSIM, or a mix, depending on model Any Wi-Fi-only iPad No eSIM or mobile data support As a broad guide, many Wi-Fi + Cellular iPad models from 2018–2019 onward support eSIM, but the exact model number will always have the final say. If the iPad does not show a Cellular Data or Mobile Data menu, it is not the right device for a direct TravelKon eSIM setup. How to Check Whether Your iPad Supports eSIM Start with the actual device in hand. Product names can be misleading because Apple has sold Wi-Fi-only, Wi-Fi + Cellular, nano-SIM, Apple SIM, eSIM, and eSIM-only iPad variants across different generations. Check the iPad Model On iPad, go to: Settings > General > About Check: The presence of an EID is one of the clearest signs that the iPad supports eSIM. If there is no Cellular or Mobile Data section and no EID listed, the device is most likely Wi-Fi only.  Check for the Cellular Data or Mobile Data Menu Open: Settings > Cellular Data Depending on device language and region, this may appear as Mobile Data. If the menu is missing completely, the iPad is probably Wi-Fi only. If the menu is present, check whether the iPad offers an option such as: Apple’s iPad eSIM setup supports several activation paths, including carrier activation, transfer from another iPad, joining an existing iPhone mobile plan, finding a new plan, using a QR code, or using a provider app. Check whether the iPad is Work or School Managed If the iPad belongs to work, school, or another organisation, eSIM changes may be blocked by device management settings. A missing Add eSIM option on a cellular iPad can be a management restriction, not a TravelKon issue. If the iPad is supervised by an organisation, the device owner or IT team may need to allow mobile data changes before travel. Check the iPad SIM Type Some iPad models support eSIM only. Newer Wi-Fi + Cellular iPad models, including recent iPad Pro, iPad Air, iPad mini, and standard iPad models, may rely on eSIM rather than a physical SIM tray. Keep in mind that an eSIM-only iPad cannot accept a physical travel SIM. For those models, the travel data setup needs to happen digitally. Check Region and Model Variants Region can affect device behaviour. Some iPad models sold in different countries or regions may have different SIM arrangements, cellular bands, or activation options. Before buying a travel eSIM, check the exact model number rather than relying only on the name alone Check Software Before Departure Update iPadOS before travel where possible. Old software can hide eSIM options, create activation errors, or prevent the iPad from using the latest carrier settings. Before leaving Australia: For a broader device check, use our guide on how to check phone eSIM support. The same principle applies to iPads. Always confirm eSIM support before purchase, not after landing. Should You Install the TravelKon eSIM on iPad or iPhone? Install your TravelKon eSIM on the device that needs independent mobile data. Travel Need Best Setup iPad needs data without the phone nearby Install eSIM on a compatible cellular iPad Phone needs maps, rideshare, WhatsApp, banking, and daily travel data Install eSIM on a compatible phone iPad is Wi-Fi only Install eSIM on the phone and use hotspot where supported Laptop needs occasional data Use phone or iPad hotspot if the plan and device allow Multiple devices need constant data Check plan conditions before

Can I Use eSIM on iPad While Travelling? Read More »

indonesia sim card vs esim

Indonesia SIM Card vs eSIM: Best Option for July Travel, Bali Events and Island Trips

With over 331 million mobile connections, 230 million internet users and 80.5% penetration, Indonesia runs on mobile, something travellers feel in everything from QR menus and ride-hailing to ferry updates, bookings, translation apps and live location sharing.  As such, the first hour after landing in Denpasar is often when your phone is most needed. That becomes even more important during July’s cultural calendar. Bali Arts Festival continues into July, Penglipuran Village Festival brings day-trip traffic into Bangli, and the dry season keeps tourists moving between Canggu, Ubud, Uluwatu, Nusa Penida, Lombok and Jakarta.  Before departure, the cleanest starting point is to choose an Indonesia eSIM plan and decide whether a physical Indonesia SIM card is still needed for local calls, SMS or a longer stay. Should July Travellers Choose an Indonesia SIM Card or eSIM? Choose an Indonesia eSIM if the main need is mobile data for maps, WhatsApp, Grab, Gojek, hotel messages, browsing, translation, payment confirmations and ferry coordination. It can be installed before departure and used soon after landing, which is exactly what most short-stay travellers need. You can go for a physical Indonesia SIM card if the trip depends on local calls, local SMS, local app verification, a local Indonesian phone number or longer-term local use. That is the real decision. An eSIM is usually better for speed and convenience. A physical SIM is better when local phone-number functions matter. A data-only eSIM may not include a local phone number or SMS. That is fine for most travel tasks, but it can be a problem if a booking platform, delivery app, bank or local service asks for Indonesian SMS verification. Best Choice for Most July Travellers For most July travellers, choose an Indonesia eSIM first. Add a physical Indonesia SIM card only if a local Indonesian number, SMS or voice calls are genuinely needed. Traveller Need Best Option Bali, Jakarta, Lombok or Nusa Penida travel Indonesia eSIM Bali-only holiday Bali eSIM Indonesia plus Singapore, Malaysia, Thailand or Vietnam Southeast Asia eSIM Local SMS, calls or Indonesian phone number Indonesia SIM card Older phone without eSIM support Indonesia SIM card Before choosing an eSIM, check that your phone is unlocked and eSIM-compatible. Many recent iPhone, Google Pixel and Samsung Galaxy models support eSIM, but older devices may need a physical SIM card for Indonesia. Which TravelKon Option Should You Choose? The best option depends on how your trip is structured, not just where it starts. If you are staying in Bali, our Bali eSIM plans are enough. The right product depends on the route, not just the destination name. Once the itinerary expands to places like Jakarta, Lombok, Nusa Penida, Yogyakarta or Komodo, it makes more sense to compare broader Indonesia eSIM plans.  Travelling across borders into Singapore, Malaysia, Thailand or Vietnam calls for regional coverage instead, making our Southeast Asia eSIM category the most ideal choice. And for those who still prefer physical SIM cards for multi-country trips, especially for flexibility. Taking a moment to match your plan to your actual route helps avoid paying for the wrong coverage or running out of data mid-trip.  What is the Difference Between an Indonesia SIM Card and eSIM? An Indonesia SIM card is a removable plastic SIM inserted into the phone. It is usually bought before travel or after arrival and may need registration before use. An Indonesia eSIM is a digital SIM profile installed on an eSIM-compatible phone. There is no plastic card. The traveller scans a QR code or follows installation instructions, then activates the plan when ready. Feature Indonesia eSIM Indonesia SIM Card Setup Install before travel, activate on arrival Insert the physical SIM and complete setup Airport time No SIM counter required May require queueing or staff help Local phone number Often data-only, no local number Often includes a local number, depending on the plan SMS Usually not included on data-only plans May be included Best for Short trips, Bali events, multi-island data use Longer stays, calls, SMS and local number needs Registration friction Usually lower for travel eSIMs Can involve passport and device checks Dual SIM use Can keep home SIM active on compatible phones May require removing the home SIM on single-SIM phones This is why the Indonesia SIM card vs eSIM tourists comparison should not be reduced to price. A cheaper local SIM is not useful if it costs the first hour of the trip, creates registration confusion, removes access to the home SIM, or leaves the traveller offline at the airport pickup point. Is an eSIM Better for Bali Arts Festival and Penglipuran Day Trips? Yes, for most July travellers, an eSIM is better for the Bali Arts Festival and Penglipuran day trips because the main need is fast mobile data. Bali Arts Festival runs from 13 June to 11 July 2026 in Denpasar. That creates a real travel-data problem. A traveller may spend the day in Canggu, Ubud or Sanur, then head into Denpasar for evening performances. Plans shift. Drivers ask for live location. Pickup points are not always obvious. Group messages keep changing. At festival time, mobile data helps with: Penglipuran Village Festival runs from 9 July to 11 July 2026 in Bangli Regency. That is a different connectivity use case. It is a rural day-trip setting where data matters before arrival, during the visit and on the way back. For Penglipuran, the phone is useful for driver coordination, maps, translation, cashless logistics and live location sharing. A driver may ask for a pin instead of a written address. A villa host may message while the traveller is still on the road. A return pickup may change because of traffic, weather or crowd movement. The same applies across Bali in July. Canggu traffic makes real-time pickup coordination more useful. Ubud day trips often involve drivers waiting at different entrances or side streets. Uluwatu beach access can be confusing for first-time visitors. Nusa Penida ferries add another layer because hotel pickup, harbour transfers and boat schedules may be handled

Indonesia SIM Card vs eSIM: Best Option for July Travel, Bali Events and Island Trips Read More »

apple watch travel esim

Apple Watch eSIM for Travel: What Works and What Does Not

An Apple Watch on its own, fully connected in a foreign country, feels like the ultimate travel upgrade. You land, skip SIM card queues, leave your phone behind, and head out with just your watch handling calls, messages, and data.  That promise draws travellers in, as it suggests a lighter, simpler way to get around without the usual tech hassles. However, with it comes a practical question. Can an Apple Watch use a travel eSIM in the same way an iPhone can? Can an Apple Watch Use a Travel eSIM? No, a travel eSIM cannot be installed directly on an Apple Watch. That said, a TravelKon eSIM should be installed on a compatible iPhone and not the watch. eSIM travel plans are carrier-provisioned through the Watch app on the paired iPhone. Plus, a standard travel eSIM QR code is designed for compatible phones, tablets, and other supported eSIM devices, not direct Apple Watch activation. The safest travel setup should be: Apple Watch vs iPhone eSIM Compatibility Device or Setup Can Use Mobile Data? Can Use TravelKon eSIM Directly? Best Travel Use iPhone XS, XR or later, unlocked and eSIM-compatible Yes Yes, when supported Main TravelKon setup GPS-only Apple Watch No independent mobile data No Works near iPhone or Wi-Fi GPS + Cellular Apple Watch Yes, with a supported carrier plan Usually no Carrier watch roaming only Apple Watch paired to iPhone using TravelKon eSIM Yes, through a nearby iPhone or Wi-Fi eSIM sits on iPhone Best practical setup Wi-Fi-only iPad No mobile data No Wi-Fi only Cellular iPad with eSIM support Yes Yes, when supported Travel data on a tablet The key point: iPhone eSIM compatibility and Apple Watch eSIM compatibility are not the same thing. Why Apple Watch Cannot Usually Use Travel eSIM QR Codes Directly Most travel eSIMs are installed by scanning a QR code or entering manual activation details on a compatible phone or tablet. However, the Apple Watch cellular system works differently.  The watch cellular plan is usually added through: Watch app > Mobile / Cellular > Set Up Mobile That setup normally sends the user into the carrier’s activation flow on the paired iPhone. As such, the Apple Watch is designed to share or connect with the iPhone’s mobile service arrangement, rather than accept any standard third-party travel eSIM QR code. And as mentioned earlier, this is why a TravelKon eSIM can work well on the iPhone, while the Apple Watch cannot be activated directly with that same eSIM. What Works and What Does Not Travel Scenario What Happens iPhone has TravelKon eSIM and Apple Watch is nearby Apple Watch can use the iPhone connection iPhone has TravelKon eSIM and Apple Watch is on Wi-Fi Apple Watch can use supported internet features iPhone is at the hotel and Apple Watch is outside Watch needs its own supported cellular roaming plan Apple Watch is GPS-only No independent mobile data Standard travel eSIM QR code is scanned into the Watch app Usually not supported Home carrier does not support Apple Watch roaming Independent watch cellular may not work overseas Australian SIM is switched off Watch cellular may lose access to the carrier watch plan Can You Leave Your iPhone at the Hotel? Not if the plan is to rely on the iPhone’s TravelKon eSIM connection. If the iPhone stays at the hotel, the Apple Watch cannot use the iPhone’s mobile data while away from it. The watch will need either Wi-Fi or its own active Apple Watch cellular roaming plan through the home carrier. This is the main practical difference: How to Check Whether Your iPhone Supports eSIM Before you choose a travel plan, it helps to confirm your iPhone is actually eSIM-compatible.  Check the iPhone Model For iPhone, travel eSIM use starts with model support. iPhone XS, iPhone XS Max, iPhone XR, and later models generally support eSIM, with some regional exceptions. On iPhone, go to: Settings > General > About Check for: The EID is a strong sign that the device has eSIM hardware. The Add eSIM option in mobile settings is equally important. For extra help before buying, use our guide on how to check phone eSIM support. A quick check now can save you trouble later.  Check Whether the iPhone Is Unlocked A travel eSIM needs the iPhone to accept a plan from another provider. On iPhone, go to: Settings > General > About > Carrier Lock If the phone shows No SIM restrictions, it is unlocked. If it shows a carrier restriction, the current carrier must unlock it before a TravelKon eSIM can be used. Do this before departure. Carrier unlocks can take time, and airport Wi-Fi is not the place to discover the phone is locked. Check Region Variants Device region can affect eSIM support. Some iPhone models sold in specific markets have different SIM arrangements. Apple Watch has an extra layer of complexity. Cellular Apple Watch models are sold in regional versions, and there is no single worldwide Apple Watch cellular model that supports every mobile band globally.  It is for this reason that an Apple Watch bought in Australia may not behave the same way as one bought in the United States, mainland China, or another region. How to Check Whether Your Apple Watch Is Cellular Only GPS + Cellular Apple Watch models can use mobile data without the iPhone nearby. A GPS-only Apple Watch cannot use independent mobile data, even when paired with an eSIM-compatible iPhone. Check these details: Do not rely on appearance alone. GPS-only and GPS + Cellular Apple Watch models can look very similar. For international roaming, Apple Watch support also depends on: Apple Watch Carrier Plan Blockers Many Apple Watch travel problems are not caused by the travel eSIM. They are caused by the home carrier’s watch-plan rules. Common blockers include: A TravelKon eSIM on the iPhone does not create a separate Apple Watch mobile plan. It gives the iPhone travel data. Common Support Confusion Apple Watch travel eSIM issues often come from

Apple Watch eSIM for Travel: What Works and What Does Not Read More »

telkomsel bali sim card

Telkomsel Bali SIM Card: What Tourists Should Know Before Sharing Passport Details

Before uploading your passport to buy a Telkomsel Bali SIM, stop and check who will actually handle that data. That small moment at the airport, in a local shop, or on a third-party Bali SIM website can involve more than choosing a data plan. For short Bali holidays centred on mobile data usage, choosing our Bali eSIM options eliminates the need for last-minute airport logistics, ensuring you are connected the moment you land. Besides, you’ll need data to access maps after landing at Ngurah Rai, WhatsApp for a villa host in Canggu or Seminyak, Grab or Gojek for transport, an Ubud pin saved in Google Maps, ferry details for Nusa Penida, tour pickup messages, booking confirmations and sometimes bank OTPs. The question isn’t just which SIM is the cheapest, but how much personal data you must surrender to get online. Should You Buy a Telkomsel Bali SIM? A Telkomsel Bali SIM can be a legitimate option, especially through official operator channels, airport counters or reputable stores where activation happens in person. The concern is not Telkomsel itself, but rather the unnecessary passport sharing required through extra upload forms, resellers, delivery partners, WhatsApp checks, or manual verification steps when all you need is mobile data. That isn’t the case with our TravelKon Bali eSIMs, which don’t require local passport registration. Plus, they can be set up before you travel, ensuring your phone is ready for maps, rideshare apps, WhatsApp, and booking confirmations the moment you arrive. However, the phone still needs to be unlocked and eSIM-compatible. Why Buying a Bali SIM Can Involve Sensitive Personal Data Buying a Bali Telkomsel SIM is not the same as buying a bottle of water at the airport. SIM registration can involve identity checks, passport details, passport scans, phone numbers, and, depending on the local SIM route or device process, device or IMEI-related checks. We can all agree that a passport is not like an email address. It is a primary identity document which if mishandled, copied too widely or stored poorly, can contribute to identity-verification problems later. In Australia, organisations and agencies reported 1,113 data breaches in 2024, up 25% from 2023. In the second half of 2024, malicious or criminal attacks accounted for 69% of notifications. Those numbers should mean something to overseas travellers because travel SIM buying often happens fast. A tired traveller lands, opens a website, uploads a passport, sends an image over chat, or hands documents to a counter without checking the privacy policy, seller identity, storage period or deletion process. The Bali SIM card passport issue is not just whether passport details are required, but rather how many parties touch them. What Happens When You Buy a Telkomsel SIM in Bali? A Telkomsel tourist SIM Bali purchase usually follows a simple path. Choose a plan, provide the details required for registration, complete activation, and then test data before leaving the counter. The official foreigner SIM offer has included 25GB of data, 25 minutes of local voice calls, 25 minutes of international calls, 30-day validity and a price of Rp100,000, with pick-up available in Bali and Mandalika. That is a useful option for travellers who want a local number, have a non-eSIM phone,want an in-person setup, or are staying long enough to compare local prepaid plans. The safest practical habit is simple: when choosing a local SIM, prefer official counters, provider stores or reputable outlets. Test mobile data before walking away, keep passport handling visible, and avoid sending identity documents through casual channels unless the seller gives a clear reason and a clear privacy process. Airport Telkomsel SIM, Local Shop, Third-Party Website, and TravelKon eSIM Option Best For Passport or Device Handling Setup Confidence Support Privacy Confidence Main Watch-Out Telkomsel SIM at airport/operator counter Travellers who want in-person setup straight after landing Passport and device details may be required High, because setup can be tested before leaving Counter support at purchase Stronger when handled through official/operator channels Arrival time is spent at a counter; airport pricing may be higher Telkomsel SIM from a local shop Longer stays or travellers wanting local plan choice Passport and device handling is may still be required Varies by shop Varies by seller Depends on shop reputation and process Requires confidence choosing a reputable store Third-party Bali SIM website Travellers arranging a local SIM before arrival Passport or device uploads may be requested Varies by seller and delivery process Depends on seller Depends on privacy policy, storage and deletion practices More parties may touch the data TravelKon eSIM Short-stay Australian travellers who mainly need mobile data No local passport activation Set up before travel; plan starts when connected to a supported network Australian-based support Stronger for data minimisation Requires an unlocked, eSIM-compatible phone; many travel eSIMs are data-only Why Third-Party SIM Websites Deserve Extra Caution A third-party Bali SIM website can be convenient. That convenience can also add more data handlers. One upload form might pass through a seller, payment provider, delivery partner, support inbox, WhatsApp chat, manual activation team or cloud storage system. That does not mean every reseller is unsafe. However, every extra step increases the number of parties that must be trusted with passport data. Before uploading anything, check: If those answers are unclear, the cleanest move is to avoid unnecessary passport upload altogether. What the Law and Data-Breach History Tell You Indonesia has a personal data protection framework. The PDP Law was enacted on 17 October 2022, and data breach notification rules can require notice within 72 hours. Administrative fines can reach up to 2% of annual income or revenue for certain violations. That is a positive step. Still, it does not remove the traveller’s responsibility to choose trusted data handlers. Laws reduce risk after systems and processes are tested but better buying choices reduce risk before passport data leaves the traveller’s control. The caution is not theoretical. Indonesia has faced an alleged SIM-registration data leak involving 1.3 billion registration details. Separate reporting described an alleged 87GB dataset listed for

Telkomsel Bali SIM Card: What Tourists Should Know Before Sharing Passport Details Read More »

google pixel 9 esim compatibility

Google Pixel 9 eSIM Compatibility Guide

The Pixel 9 family is built for modern dual SIM use, but compatibility is still not a blind yes for every traveller. The exact model, region, carrier lock status, Android version, activation timing and data-line settings can all affect whether the eSIM connects smoothly overseas. If your phone shows an EID, has an eSIM setup option, is unlocked, and the chosen TravelKon plan covers the destination, the Pixel 9 should be ready for travel eSIM setup. For any traveller looking to use travel eSIMs, one missed compatibility check can turn airport arrival into a scramble for Wi-Fi, roaming settings, screenshots and support messages. Does Google Pixel 9 Support eSIM? Yes, the Google Pixel 9 supports eSIM. The Pixel 9, Pixel 9 Pro, Pixel 9 Pro XL and Pixel 9 Pro Fold are generally eSIM compatible and can usually use a TravelKon eSIM for mobile data overseas. Before buying or scanning a QR code, check five things: Compatibility Check What to Confirm Pixel model The phone is a Pixel 9, Pixel 9 Pro, Pixel 9 Pro XL or Pixel 9 Pro Fold. EID number The phone shows an EID in settings. Carrier lock The phone is unlocked and can use SIMs from other providers. Android version The phone has the latest available Android update. TravelKon plan The plan covers the destination and matches the trip dates. Pixel 9 eSIM Compatibility Table Google Pixel 9 Model eSIM Support TravelKon Readiness Check Google Pixel 9 Yes Check EID, unlock status, Android updates and destination coverage. Google Pixel 9 Pro Yes Check EID, unlock status, Android updates and destination coverage. Google Pixel 9 Pro XL Yes Check EID, unlock status, Android updates and destination coverage. Google Pixel 9 Pro Fold Yes Check EID, unlock status, Android updates and destination coverage. Always remember that a compatible model is only the first step. A locked phone, missing EID, old software version, unsupported destination or incorrect roaming setup can still stop the eSIM from working properly. What The Latest Statistics Say You Need To Know  Australian residents recorded 1,092,380 short-term overseas trip returns in April 2026, 19.2% above the April 2019 level. More travellers are leaving with phones that need maps, rideshare apps, airline updates, banking approvals, WhatsApp and email from the moment they land. Travel eSIM use is also growing quickly, with global travel eSIM provisioning expected to pass 280 million by 2030, up from about 70 million in 2024. That growth gives travellers more choice, but also more plan differences. Activation timing, hotspot support, APN details, data-only rules and supported networks can vary by destination and plan. Before You Buy a TravelKon eSIM Use this short checklist before checkout. Before Buying Why It is Important Confirm the destination A country or regional plan must cover every stop on the trip. Check the validity period Some of our plans start after installation, while others start after connecting overseas. Confirm data allowance Maps and messaging need less data than video, hotspot use or laptop work. Check hotspot support Hotspot is plan dependent and can use data quickly. Check whether calls/SMS are included Many travel eSIMs are data-only. Keep the QR code secure A QR code can be linked to one installation. For a deeper device check before buying, our guide on how to check phone eSIM support can help you get started. How to Check eSIM Support on Your Google Pixel 9 Step 1: Check the Exact Pixel 9 Model Open Settings > About Phone and confirm the model name. The phone should show one of these: This is important because imported, refurbished, replacement or carrier-sold devices can behave differently. A phone can look like a standard Pixel 9 and still have carrier restrictions or regional differences. Step 2: Confirm the Phone Has an EID Open Settings > About Phone > SIM Status and look for EID. An EID is the eSIM identifier. If the phone has an EID, the eSIM hardware is available at system level. A second check is to open the phone dialler and enter: *#06# Many Android phones show IMEI and EID details from this screen. If no EID appears after a restart and software update, check with the original carrier or TravelKon support before buying. Step 3: Check for the eSIM Setup Option Open: Settings > Network & Internet > SIMs > Add SIM A Pixel 9 that is ready for eSIM setup should show an option to download or set up an eSIM. If the option is missing, the cause may be: Step 4: Confirm the Phone Is Unlocked eSIM compatibility and network unlock status are not the same thing. A locked Pixel 9 can show an EID and still reject a TravelKon eSIM. The safest check is to test a SIM from another provider or ask the current carrier to confirm the phone is unlocked for other networks. Do this before departure. Fixing a carrier lock while overseas can involve account checks, identity verification and carrier processing times. Step 5: Update Android Before Installation Install available Android updates before scanning the TravelKon QR code. Then restart the phone. This reduces the chance of missing setup options, stalled installation, old carrier settings or network registration issues after arrival. How to Install a TravelKon eSIM on Pixel 9 Use this eSIM setup guide when the phone has passed the compatibility checks. Step 1: Open the Pixel 9 SIM Settings Go to: Settings > Network & Internet > SIMs > Add SIM Choose the eSIM setup option. Step 2: Scan the TravelKon QR Code Display the TravelKon QR code on another screen, such as a laptop, tablet or another phone. Scan it with the Pixel 9 camera when prompted. Keep the QR code safe. Do not post it publicly, forward it casually or delete the purchase email. Step 3: Label the eSIM Clearly After installation, label the eSIM with the destination or region. Examples: This helps avoid choosing the wrong SIM for mobile data later. Step 4: Follow the Plan’s Activation Timing

Google Pixel 9 eSIM Compatibility Guide Read More »

iphone17 esim compatibility

iPhone 17 eSIM Compatibility and Setup Guide

A travel data plan can be ready before departure, but the device you are using still has to pass the right checks first: model, region, carrier lock, mobile data settings and activation timing. If you have used a travel eSIM before, you must be aware that the safest setup starts before the QR code is scanned, not after the airport arrival screen says No Service. Does iPhone 17 Support eSIM? Yes. An Australian-bought iPhone 17, iPhone 17 Pro or iPhone 17 Pro Max supports eSIM and can use a TravelKon eSIM when the phone is unlocked, updated and set up correctly. The key detail is that iPhone 17 does not provide enough information by itself. Your region is equally important. Australian models support nano-SIM and eSIM, while models bought in some overseas markets are eSIM-only. Mainland China, Hong Kong and Macao models need extra checking before buying any travel eSIM. Use this quick rule before purchase: Device Situation TravelKon eSIM Readiness What to Check iPhone 17 bought in Australia Strong EID, No SIM Restrictions, iOS version and destination plan iPhone 17 Pro or Pro Max bought in Australia Strong Same checks, plus dual SIM settings iPhone Air bought in Australia Strong, but eSIM-only No physical SIM fallback, so install carefully iPhone 17 bought in the US or selected overseas markets Strong, but eSIM-only Unlock status and QR code setup details iPhone 17 bought in mainland China Not safe to assume Confirm EID and eSIM support before buying iPhone 17 bought in Hong Kong or Macao Needs extra checking Check EID, model number and SIM type An iPhone 17 eSIM setup is usually straightforward for Australian travellers, but only after the phone passes the region, lock and settings checks. Is iPhone 17 eSIM-Only? It depends where the iPhone 17 was bought. In Australia, iPhone 17, iPhone 17 Pro and iPhone 17 Pro Max support both nano-SIM and eSIM. That means an Australian traveller can usually keep a physical Australian SIM active and use a TravelKon eSIM for mobile data overseas. In selected overseas markets, iPhone 17 models are eSIM-only. Current SIM rules place iPhone 17, iPhone 17 Pro, iPhone 17 Pro Max, iPhone 17e and iPhone Air models bought in 12 markets into the eSIM-only group: the United States, United States Virgin Islands, Canada, Mexico, Japan, Guam, United Arab Emirates, Saudi Arabia, Bahrain, Kuwait, Qatar and Oman. For Australian travellers, the important point is simple: an Australian iPhone 17 is not eSIM-only, but many overseas iPhone 17 models are. iPhone 17 eSIM Compatibility by Region Where the iPhone 17 Was Bought SIM Type TravelKon eSIM Compatibility Australia nano-SIM + eSIM Yes, if unlocked United States eSIM-only Yes, if unlocked Canada, Japan, Mexico and selected Gulf markets eSIM-only Yes, if unlocked United States Virgin Islands and Guam eSIM-only Yes, if unlocked Mainland China iPhone 17, 17 Pro and 17 Pro Max should not be assumed eSIM-ready Check EID and eSIM settings before purchase Hong Kong and Macao Model-dependent; some models use two physical SIMs Check EID and model details before purchase Other countries Usually nano-SIM + eSIM Confirm model number and EID Do not confuse iPhone 17 with iPhone 17e or iPhone Air. SIM and eSIM rules can differ by model and region. Whether you are planning a trip to a nearby hub like Europe or further afield, always verify your model’s regional support first.  Australian iPhone 17 Model Numbers to Check For an Australian-bought device, these are the key model numbers to check in Settings > General > About. Australian Model Model Number SIM Support iPhone 17 A3520 nano-SIM + eSIM; Dual eSIM support iPhone 17 Pro A3523 nano-SIM + eSIM; Dual eSIM support iPhone 17 Pro Max A3526 nano-SIM + eSIM; Dual eSIM support If the model number is different, the phone may still support eSIM, but the region rules should be checked before buying a travel eSIM. An Australian iPhone 17 is a good match for a TravelKon eSIM when the device shows EID, says No SIM Restrictions, and the TravelKon plan covers the destination. The main setup risk is not the iPhone 17 itself. It is usually carrier lock, overseas model variation, wrong mobile data line, roaming being off, or scanning the QR code at the wrong time. Why This Matters for Australian Travellers Australian residents recorded 12,261,080 short-term overseas returns in 2024–25. Holidays made up 60.0% of those trips, with a median trip length of 15 days. The eSIM market is growing quickly too. Global eSIM shipments reached 605 million in 2025, and consumer eSIM profile downloads rose 43%. That growth makes eSIM compatibility a normal pre-travel check, not a technical afterthought. How to Check Whether Your iPhone 17 Supports eSIM Start with the phone in hand. Do not rely only on the box, a marketplace listing or the words “unlocked iPhone” in a reseller description. Check the Model and Region Go to Settings > General > About and review: The EID is the clearest quick sign that the phone has eSIM hardware available to iOS. If the EID does not appear, stop and confirm the exact model before buying a travel eSIM. Check the Carrier-Lock Status Under Settings > General > About, look for Service Provider Lock or Carrier Lock. The safe result is No SIM Restrictions. If the phone is locked to a carrier, a TravelKon eSIM may not activate or connect, even when the iPhone itself supports eSIM. Carrier unlocking must be handled by the original provider. Update iOS Before Departure Install the latest available iOS update before travel. An outdated iOS version can affect eSIM installation screens, transfer options and mobile service behaviour. Avoid major system updates during a layover or at airport arrival unless the phone has stable Wi-Fi, battery and time. Use the EID Check Before Buying For the fastest “does my phone support eSIM” check: If EID is visible and the phone shows No SIM Restrictions, the device is usually ready for a TravelKon eSIM, subject to destination coverage

iPhone 17 eSIM Compatibility and Setup Guide Read More »

esim activation failed

eSIM Activation Failed: What It Means and What to Do

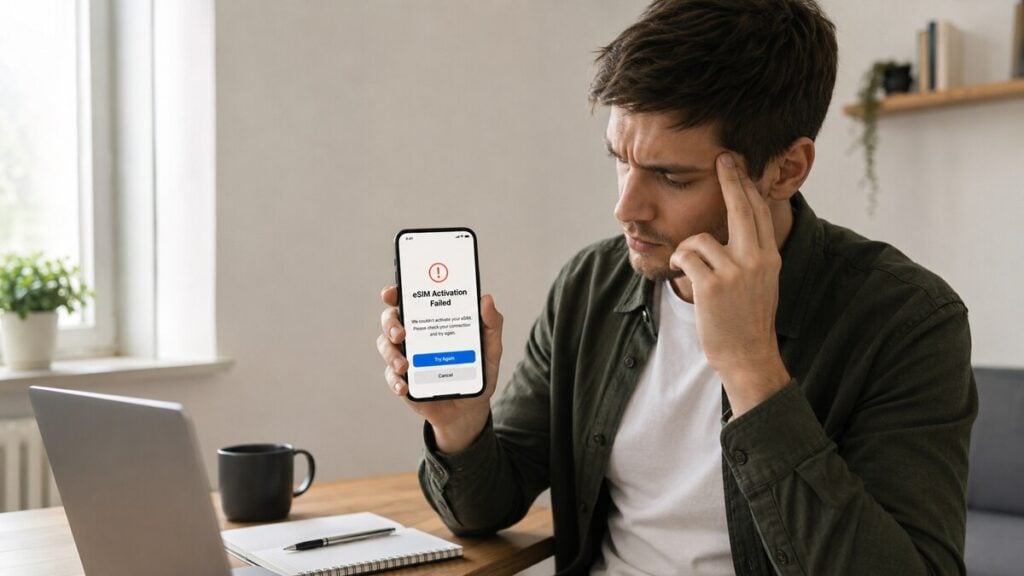
If your eSIM activation failed, the safest first step is to check whether the eSIM is already installed before rescanning or deleting it. An eSIM activation failed message can make a simple travel setup feel expensive fast. The QR code scans, the phone pauses, and suddenly the data line looks inactive, stuck, or unable to connect. For anyone who makes several overseas trips, travel eSIMs are a practical way to organise mobile data before departure without relying on airport arrival kiosks or standard roaming. But when activation fails, the next step should be calm and ordered, not random setting changes. Do This First: Do not delete the eSIM yet. Open your SIM, Mobile Service, Cellular or SIM Manager settings and check whether the eSIM profile is already visible. What eSIM Activation Failed Usually Means An eSIM activation failed message usually means the phone could not complete one of three steps: It does not automatically mean the eSIM is broken. For a travel eSIM, the message can appear before departure because the plan may need to connect to a supported overseas network before it fully starts. After arrival, it may point to mobile data settings, roaming settings, APN details, a carrier-locked phone, a weak signal, a QR code issue, or the wrong SIM being selected for data. What the Error Message Is Telling You Error What It Usually Means First Fix eSIM activation failed The phone could not complete download, installation or network activation Check Wi-Fi, restart, then check whether the eSIM is visible Unable to activate eSIM The profile may be installed but not connected to the right network yet Confirm destination coverage, turn on the eSIM line and enable roaming if required This code has already been used The QR code may have already installed the profile or been consumed Stop rescanning and contact support with a screenshot Invalid QR code The code may be expired, opened incorrectly, damaged or not meant for that device Use the original email and check for manual setup details No Service The eSIM may not have joined a supported network Try manual network selection after arrival SOS Only The phone may have emergency-only access but no active mobile data connection Check the selected data SIM, roaming and network selection Installed but no internet The eSIM is present but data is not flowing Check APN, VPN, Private Relay, Data Saver and Wi-Fi-off testing Hotspot not working The plan, phone or local network may not support hotspot Check the product details before changing unrelated settings Fix It Fast with this Quick Checklist Run through these quick checks before changing advanced settings: Before Departure vs. After Airport Arrival A travel eSIM can behave differently before and after reaching the destination. This is where many setup mistakes happen. Before Departure Before departure, focus on preparation rather than forcing a live connection. Check that the phone supports eSIM, is unlocked, and matches the product requirements. For someone using a Europe eSIM for instance, saving the installation email somewhere easy to access offline. Read the product instructions for activation timing, destination coverage, APN details, roaming settings and hotspot availability. If the instructions allow early installation, install on a stable Wi-Fi and stay on the setup screen until the phone finishes. Avoid locking the phone, switching apps repeatedly, moving between Wi-Fi networks, or scanning the same QR code again while setup is still processing. After Airport Arrival After airport arrival, focus on network connection. Turn on the travel eSIM, set it as the mobile data line, enable roaming on that eSIM if required, and wait a few minutes. If automatic network selection does not work, choose a supported local network manually where listed in the product instructions. Test with Wi-Fi off. Signal bars alone do not prove mobile data is working. Why Activation Can Fail Even When the eSIM Is Installed The wording is the confusing part. “Activation failed” sounds final, but eSIM setup has more than one stage. A phone may download and store the eSIM profile successfully, then fail to connect because the destination network is not available yet. That is common with an international eSIM installed before travel. The eSIM can sit on the phone, ready for use, while still showing inactive, activating, no service, or unable to activate. A different issue happens when the profile never installs properly. That can be caused by unstable Wi-Fi, an interrupted QR code scan, carrier lock, device incompatibility, too many stored eSIM profiles, or leaving the setup screen too early. A third issue happens after installation. The eSIM is on the phone, but mobile data is still assigned to the home SIM, roaming is off for the travel line, APN details are missing, or the phone has not joined a supported local network. A visible eSIM profile usually means the next job is settings and network checks. However, a missing eSIM profile usually means the installation stage needs attention. For extra setup context before choosing or installing a plan, our guide to how an eSIM works explains how to properly install your eSIM profile. If the eSIM Is Installed but Has No Data This is one of the most common travel eSIM problems: the eSIM appears in settings, but apps still do not load. Work through this order: iPhone eSIM Activation Failed Checks For iPhone, check these settings in order: Android eSIM Activation Failed Checks Android wording varies by brand, but the troubleshooting logic is similar. If the Android phone was bought overseas, imported, supplied by a carrier, or has a regional model variant, confirm eSIM support and carrier unlock status before assuming the plan has failed. QR Code, Manual Setup, and Already-Used Errors QR code problems need careful handling because many eSIM QR codes are designed for one installation. If the QR code will not scan, first check that the original email is open clearly on another screen. Increase brightness, avoid cropped screenshots, and make sure the phone camera can see the full code. And if the code

eSIM Activation Failed: What It Means and What to Do Read More »

how to fix no service esim

How to Fix No Service After Installing an eSIM

A phone showing No Service after an eSIM install can make any trip feel stressful, especially at the airport, in a rideshare queue, or just before needing maps. For travellers using travel eSIMs, the issue is usually not that the eSIM has failed. More often, the phone has not connected to the right network, the wrong SIM is selected for mobile data, roaming is off, or the APN/network settings need a quick check. Quick Overview of What You Should Do If an eSIM shows No Service after installation, start with these checks: Note: Avoid deleting the eSIM as the first fix. Some travel eSIM QR codes or activation details may not be reusable. Getting You Back Online  Try this fast sequence first: What to Check What to Do eSIM line Make sure the eSIM is turned on in mobile settings Mobile data Set mobile data to the travel eSIM Roaming Turn data roaming on for the travel eSIM line Flight mode Turn flight mode on for 10 seconds, then off Restart Restart the phone and wait 1–2 minutes Other SIMs Temporarily turn off the home SIM or other eSIMs Location Move outside, near a window, or away from basement/airport dead zones Wi-Fi test Turn Wi-Fi off and load a basic webpage using mobile data If the phone still shows “No Service,” continue with the full checklist below. No Service, SOS Only, or Bars With No Internet? These problems look similar, but they usually mean different things. What You See Most Likely Cause Try First No Service before departure The travel eSIM may only connect overseas Wait until arrival and check product instructions No Service after landing Wrong data line, roaming off, unsupported network or carrier lock Set mobile data to the eSIM, turn roaming on, restart SOS Only The phone cannot register on an allowed mobile network Try manual network selection and check coverage Signal bars but no internet APN, mobile data line, VPN, plan status or roaming issue Check APN, disable VPN, test mobile data only QR code already used The eSIM may already be installed or the code may be single-use Avoid deleting it; contact support “No Service” is usually a network registration problem. Signal bars with no internet usually points more towards mobile data, APN, roaming, VPN or plan-status issues. Why eSIM No Service After Installation Happens A travel eSIM is a digital SIM profile. As such, it does not create mobile coverage by itself but rather lets a compatible, unlocked phone connect to supported partner networks in the destination country. For instance, if you are relying on a Japan eSIM to access high-speed local data, ensure you are in an area covered by the partner network. If your travels take you elsewhere, such as using an Indonesia eSIM data plan while navigating local markets, the same troubleshooting logic applies.  No Service after installation usually happens when: For a data-only eSIM, the main goal is mobile data. Messaging apps, maps, rideshare apps, email, banking apps and browser access can work once the data connection is active. Standard calls and SMS may still depend on the main SIM, an app-based service, or a plan that clearly includes voice and text. Emergency calling can vary by country, device, local network and SIM state, so a data-only travel eSIM should not be treated as the only emergency option. Troubleshooting Flow: Start Here Use this order before changing advanced settings. Step-by-Step Checklist to Fix No Service 1. Check the Destination and Timing Some travel eSIMs can be installed before departure but only connect after arrival in a supported destination. For example, travellers using products in our Europe eSIM category should confirm that their specific regional plan covers the exact countries on their itinerary before attempting to connect.  If the phone is still in Australia before departure, No Service on the travel eSIM line may simply mean there is no supported overseas network available yet. Also check: 2. Move to a Better Signal Area Poor indoor coverage can make an eSIM look broken even when the setup is correct. Move outside, near a window, or away from basement areas, airport corners, lifts, underground train platforms, thick concrete buildings or remote hotel rooms. Wait one to two minutes after moving. 3. Turn Flight Mode Off After Landing Airport arrival is a common failure point. The phone may still be holding an old network state. Turn flight mode on for 10 seconds, turn it off, then wait one to two minutes. If No Service remains, restart the phone. 4. Confirm the eSIM Line Is Switched On Open the phone’s SIM or mobile network settings and check that the installed eSIM profile is enabled. On iPhone, this is usually under Settings > Mobile Service or Settings > Cellular. On Android, look for SIMs, Mobile Network, Connections, or SIM Manager. The exact wording depends on the phone brand. 5. Set Mobile Data to the Travel eSIM The phone may still be using the home SIM for data. Set Mobile Data or Cellular Data to the travel eSIM. Turn off automatic mobile data switching while testing so the phone does not silently jump back to the home SIM. 6. Enable Data Roaming on the eSIM Line For many international eSIM products, data roaming must be on for the travel eSIM because the service connects through partner networks. Make sure roaming is turned on for the travel eSIM line, not accidentally on the home SIM. 7. Temporarily Disable the Home SIM or Other eSIMs Dual-SIM settings can cause confusion when the phone keeps trying to use the wrong line. Temporarily turn off the home SIM or any other eSIMs, then test the travel eSIM by itself. Once mobile data works, turn the other SIMs back on if needed. 8. Check for a Carrier Lock A carrier-locked phone may reject other SIM or eSIM services. On iPhone, go to Settings > General > About > Network Provider Lock. It should show No SIM restrictions. On Android, check the

How to Fix No Service After Installing an eSIM Read More »