Esim Guides

telkomsel bali sim card

Telkomsel Bali SIM Card: What Tourists Should Know Before Sharing Passport Details

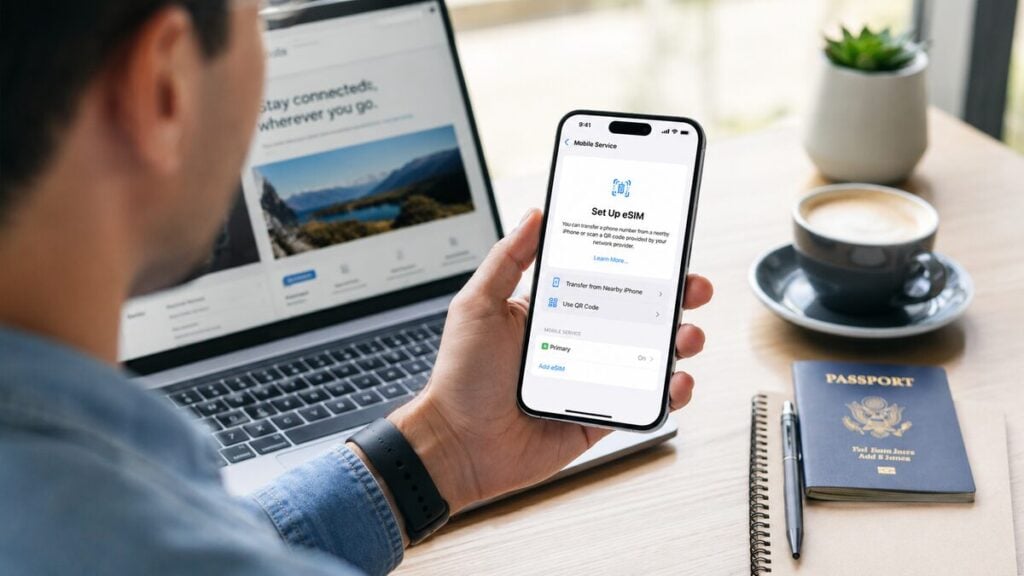
Before uploading your passport to buy a Telkomsel Bali SIM, stop and check who will actually handle that data. That small moment at the airport, in a local shop, or on a third-party Bali SIM website can involve more than choosing a data plan. For short Bali holidays centred on mobile data usage, choosing our Bali eSIM options eliminates the need for last-minute airport logistics, ensuring you are connected the moment you land. Besides, you’ll need data to access maps after landing at Ngurah Rai, WhatsApp for a villa host in Canggu or Seminyak, Grab or Gojek for transport, an Ubud pin saved in Google Maps, ferry details for Nusa Penida, tour pickup messages, booking confirmations and sometimes bank OTPs. The question isn’t just which SIM is the cheapest, but how much personal data you must surrender to get online. Should You Buy a Telkomsel Bali SIM? A Telkomsel Bali SIM can be a legitimate option, especially through official operator channels, airport counters or reputable stores where activation happens in person. The concern is not Telkomsel itself, but rather the unnecessary passport sharing required through extra upload forms, resellers, delivery partners, WhatsApp checks, or manual verification steps when all you need is mobile data. That isn’t the case with our TravelKon Bali eSIMs, which don’t require local passport registration. Plus, they can be set up before you travel, ensuring your phone is ready for maps, rideshare apps, WhatsApp, and booking confirmations the moment you arrive. However, the phone still needs to be unlocked and eSIM-compatible. Why Buying a Bali SIM Can Involve Sensitive Personal Data Buying a Bali Telkomsel SIM is not the same as buying a bottle of water at the airport. SIM registration can involve identity checks, passport details, passport scans, phone numbers, and, depending on the local SIM route or device process, device or IMEI-related checks. We can all agree that a passport is not like an email address. It is a primary identity document which if mishandled, copied too widely or stored poorly, can contribute to identity-verification problems later. In Australia, organisations and agencies reported 1,113 data breaches in 2024, up 25% from 2023. In the second half of 2024, malicious or criminal attacks accounted for 69% of notifications. Those numbers should mean something to overseas travellers because travel SIM buying often happens fast. A tired traveller lands, opens a website, uploads a passport, sends an image over chat, or hands documents to a counter without checking the privacy policy, seller identity, storage period or deletion process. The Bali SIM card passport issue is not just whether passport details are required, but rather how many parties touch them. What Happens When You Buy a Telkomsel SIM in Bali? A Telkomsel tourist SIM Bali purchase usually follows a simple path. Choose a plan, provide the details required for registration, complete activation, and then test data before leaving the counter. The official foreigner SIM offer has included 25GB of data, 25 minutes of local voice calls, 25 minutes of international calls, 30-day validity and a price of Rp100,000, with pick-up available in Bali and Mandalika. That is a useful option for travellers who want a local number, have a non-eSIM phone,want an in-person setup, or are staying long enough to compare local prepaid plans. The safest practical habit is simple: when choosing a local SIM, prefer official counters, provider stores or reputable outlets. Test mobile data before walking away, keep passport handling visible, and avoid sending identity documents through casual channels unless the seller gives a clear reason and a clear privacy process. Airport Telkomsel SIM, Local Shop, Third-Party Website, and TravelKon eSIM Option Best For Passport or Device Handling Setup Confidence Support Privacy Confidence Main Watch-Out Telkomsel SIM at airport/operator counter Travellers who want in-person setup straight after landing Passport and device details may be required High, because setup can be tested before leaving Counter support at purchase Stronger when handled through official/operator channels Arrival time is spent at a counter; airport pricing may be higher Telkomsel SIM from a local shop Longer stays or travellers wanting local plan choice Passport and device handling is may still be required Varies by shop Varies by seller Depends on shop reputation and process Requires confidence choosing a reputable store Third-party Bali SIM website Travellers arranging a local SIM before arrival Passport or device uploads may be requested Varies by seller and delivery process Depends on seller Depends on privacy policy, storage and deletion practices More parties may touch the data TravelKon eSIM Short-stay Australian travellers who mainly need mobile data No local passport activation Set up before travel; plan starts when connected to a supported network Australian-based support Stronger for data minimisation Requires an unlocked, eSIM-compatible phone; many travel eSIMs are data-only Why Third-Party SIM Websites Deserve Extra Caution A third-party Bali SIM website can be convenient. That convenience can also add more data handlers. One upload form might pass through a seller, payment provider, delivery partner, support inbox, WhatsApp chat, manual activation team or cloud storage system. That does not mean every reseller is unsafe. However, every extra step increases the number of parties that must be trusted with passport data. Before uploading anything, check: If those answers are unclear, the cleanest move is to avoid unnecessary passport upload altogether. What the Law and Data-Breach History Tell You Indonesia has a personal data protection framework. The PDP Law was enacted on 17 October 2022, and data breach notification rules can require notice within 72 hours. Administrative fines can reach up to 2% of annual income or revenue for certain violations. That is a positive step. Still, it does not remove the traveller’s responsibility to choose trusted data handlers. Laws reduce risk after systems and processes are tested but better buying choices reduce risk before passport data leaves the traveller’s control. The caution is not theoretical. Indonesia has faced an alleged SIM-registration data leak involving 1.3 billion registration details. Separate reporting described an alleged 87GB dataset listed for

Telkomsel Bali SIM Card: What Tourists Should Know Before Sharing Passport Details Read More »

google pixel 9 esim compatibility

Google Pixel 9 eSIM Compatibility Guide

The Pixel 9 family is built for modern dual SIM use, but compatibility is still not a blind yes for every traveller. The exact model, region, carrier lock status, Android version, activation timing and data-line settings can all affect whether the eSIM connects smoothly overseas. If your phone shows an EID, has an eSIM setup option, is unlocked, and the chosen TravelKon plan covers the destination, the Pixel 9 should be ready for travel eSIM setup. For any traveller looking to use travel eSIMs, one missed compatibility check can turn airport arrival into a scramble for Wi-Fi, roaming settings, screenshots and support messages. Does Google Pixel 9 Support eSIM? Yes, the Google Pixel 9 supports eSIM. The Pixel 9, Pixel 9 Pro, Pixel 9 Pro XL and Pixel 9 Pro Fold are generally eSIM compatible and can usually use a TravelKon eSIM for mobile data overseas. Before buying or scanning a QR code, check five things: Compatibility Check What to Confirm Pixel model The phone is a Pixel 9, Pixel 9 Pro, Pixel 9 Pro XL or Pixel 9 Pro Fold. EID number The phone shows an EID in settings. Carrier lock The phone is unlocked and can use SIMs from other providers. Android version The phone has the latest available Android update. TravelKon plan The plan covers the destination and matches the trip dates. Pixel 9 eSIM Compatibility Table Google Pixel 9 Model eSIM Support TravelKon Readiness Check Google Pixel 9 Yes Check EID, unlock status, Android updates and destination coverage. Google Pixel 9 Pro Yes Check EID, unlock status, Android updates and destination coverage. Google Pixel 9 Pro XL Yes Check EID, unlock status, Android updates and destination coverage. Google Pixel 9 Pro Fold Yes Check EID, unlock status, Android updates and destination coverage. Always remember that a compatible model is only the first step. A locked phone, missing EID, old software version, unsupported destination or incorrect roaming setup can still stop the eSIM from working properly. What The Latest Statistics Say You Need To Know  Australian residents recorded 1,092,380 short-term overseas trip returns in April 2026, 19.2% above the April 2019 level. More travellers are leaving with phones that need maps, rideshare apps, airline updates, banking approvals, WhatsApp and email from the moment they land. Travel eSIM use is also growing quickly, with global travel eSIM provisioning expected to pass 280 million by 2030, up from about 70 million in 2024. That growth gives travellers more choice, but also more plan differences. Activation timing, hotspot support, APN details, data-only rules and supported networks can vary by destination and plan. Before You Buy a TravelKon eSIM Use this short checklist before checkout. Before Buying Why It is Important Confirm the destination A country or regional plan must cover every stop on the trip. Check the validity period Some of our plans start after installation, while others start after connecting overseas. Confirm data allowance Maps and messaging need less data than video, hotspot use or laptop work. Check hotspot support Hotspot is plan dependent and can use data quickly. Check whether calls/SMS are included Many travel eSIMs are data-only. Keep the QR code secure A QR code can be linked to one installation. For a deeper device check before buying, our guide on how to check phone eSIM support can help you get started. How to Check eSIM Support on Your Google Pixel 9 Step 1: Check the Exact Pixel 9 Model Open Settings > About Phone and confirm the model name. The phone should show one of these: This is important because imported, refurbished, replacement or carrier-sold devices can behave differently. A phone can look like a standard Pixel 9 and still have carrier restrictions or regional differences. Step 2: Confirm the Phone Has an EID Open Settings > About Phone > SIM Status and look for EID. An EID is the eSIM identifier. If the phone has an EID, the eSIM hardware is available at system level. A second check is to open the phone dialler and enter: *#06# Many Android phones show IMEI and EID details from this screen. If no EID appears after a restart and software update, check with the original carrier or TravelKon support before buying. Step 3: Check for the eSIM Setup Option Open: Settings > Network & Internet > SIMs > Add SIM A Pixel 9 that is ready for eSIM setup should show an option to download or set up an eSIM. If the option is missing, the cause may be: Step 4: Confirm the Phone Is Unlocked eSIM compatibility and network unlock status are not the same thing. A locked Pixel 9 can show an EID and still reject a TravelKon eSIM. The safest check is to test a SIM from another provider or ask the current carrier to confirm the phone is unlocked for other networks. Do this before departure. Fixing a carrier lock while overseas can involve account checks, identity verification and carrier processing times. Step 5: Update Android Before Installation Install available Android updates before scanning the TravelKon QR code. Then restart the phone. This reduces the chance of missing setup options, stalled installation, old carrier settings or network registration issues after arrival. How to Install a TravelKon eSIM on Pixel 9 Use this eSIM setup guide when the phone has passed the compatibility checks. Step 1: Open the Pixel 9 SIM Settings Go to: Settings > Network & Internet > SIMs > Add SIM Choose the eSIM setup option. Step 2: Scan the TravelKon QR Code Display the TravelKon QR code on another screen, such as a laptop, tablet or another phone. Scan it with the Pixel 9 camera when prompted. Keep the QR code safe. Do not post it publicly, forward it casually or delete the purchase email. Step 3: Label the eSIM Clearly After installation, label the eSIM with the destination or region. Examples: This helps avoid choosing the wrong SIM for mobile data later. Step 4: Follow the Plan’s Activation Timing

Google Pixel 9 eSIM Compatibility Guide Read More »

iphone17 esim compatibility

iPhone 17 eSIM Compatibility and Setup Guide

A travel data plan can be ready before departure, but the device you are using still has to pass the right checks first: model, region, carrier lock, mobile data settings and activation timing. If you have used a travel eSIM before, you must be aware that the safest setup starts before the QR code is scanned, not after the airport arrival screen says No Service. Does iPhone 17 Support eSIM? Yes. An Australian-bought iPhone 17, iPhone 17 Pro or iPhone 17 Pro Max supports eSIM and can use a TravelKon eSIM when the phone is unlocked, updated and set up correctly. The key detail is that iPhone 17 does not provide enough information by itself. Your region is equally important. Australian models support nano-SIM and eSIM, while models bought in some overseas markets are eSIM-only. Mainland China, Hong Kong and Macao models need extra checking before buying any travel eSIM. Use this quick rule before purchase: Device Situation TravelKon eSIM Readiness What to Check iPhone 17 bought in Australia Strong EID, No SIM Restrictions, iOS version and destination plan iPhone 17 Pro or Pro Max bought in Australia Strong Same checks, plus dual SIM settings iPhone Air bought in Australia Strong, but eSIM-only No physical SIM fallback, so install carefully iPhone 17 bought in the US or selected overseas markets Strong, but eSIM-only Unlock status and QR code setup details iPhone 17 bought in mainland China Not safe to assume Confirm EID and eSIM support before buying iPhone 17 bought in Hong Kong or Macao Needs extra checking Check EID, model number and SIM type An iPhone 17 eSIM setup is usually straightforward for Australian travellers, but only after the phone passes the region, lock and settings checks. Is iPhone 17 eSIM-Only? It depends where the iPhone 17 was bought. In Australia, iPhone 17, iPhone 17 Pro and iPhone 17 Pro Max support both nano-SIM and eSIM. That means an Australian traveller can usually keep a physical Australian SIM active and use a TravelKon eSIM for mobile data overseas. In selected overseas markets, iPhone 17 models are eSIM-only. Current SIM rules place iPhone 17, iPhone 17 Pro, iPhone 17 Pro Max, iPhone 17e and iPhone Air models bought in 12 markets into the eSIM-only group: the United States, United States Virgin Islands, Canada, Mexico, Japan, Guam, United Arab Emirates, Saudi Arabia, Bahrain, Kuwait, Qatar and Oman. For Australian travellers, the important point is simple: an Australian iPhone 17 is not eSIM-only, but many overseas iPhone 17 models are. iPhone 17 eSIM Compatibility by Region Where the iPhone 17 Was Bought SIM Type TravelKon eSIM Compatibility Australia nano-SIM + eSIM Yes, if unlocked United States eSIM-only Yes, if unlocked Canada, Japan, Mexico and selected Gulf markets eSIM-only Yes, if unlocked United States Virgin Islands and Guam eSIM-only Yes, if unlocked Mainland China iPhone 17, 17 Pro and 17 Pro Max should not be assumed eSIM-ready Check EID and eSIM settings before purchase Hong Kong and Macao Model-dependent; some models use two physical SIMs Check EID and model details before purchase Other countries Usually nano-SIM + eSIM Confirm model number and EID Do not confuse iPhone 17 with iPhone 17e or iPhone Air. SIM and eSIM rules can differ by model and region. Whether you are planning a trip to a nearby hub like Europe or further afield, always verify your model’s regional support first.  Australian iPhone 17 Model Numbers to Check For an Australian-bought device, these are the key model numbers to check in Settings > General > About. Australian Model Model Number SIM Support iPhone 17 A3520 nano-SIM + eSIM; Dual eSIM support iPhone 17 Pro A3523 nano-SIM + eSIM; Dual eSIM support iPhone 17 Pro Max A3526 nano-SIM + eSIM; Dual eSIM support If the model number is different, the phone may still support eSIM, but the region rules should be checked before buying a travel eSIM. An Australian iPhone 17 is a good match for a TravelKon eSIM when the device shows EID, says No SIM Restrictions, and the TravelKon plan covers the destination. The main setup risk is not the iPhone 17 itself. It is usually carrier lock, overseas model variation, wrong mobile data line, roaming being off, or scanning the QR code at the wrong time. Why This Matters for Australian Travellers Australian residents recorded 12,261,080 short-term overseas returns in 2024–25. Holidays made up 60.0% of those trips, with a median trip length of 15 days. The eSIM market is growing quickly too. Global eSIM shipments reached 605 million in 2025, and consumer eSIM profile downloads rose 43%. That growth makes eSIM compatibility a normal pre-travel check, not a technical afterthought. How to Check Whether Your iPhone 17 Supports eSIM Start with the phone in hand. Do not rely only on the box, a marketplace listing or the words “unlocked iPhone” in a reseller description. Check the Model and Region Go to Settings > General > About and review: The EID is the clearest quick sign that the phone has eSIM hardware available to iOS. If the EID does not appear, stop and confirm the exact model before buying a travel eSIM. Check the Carrier-Lock Status Under Settings > General > About, look for Service Provider Lock or Carrier Lock. The safe result is No SIM Restrictions. If the phone is locked to a carrier, a TravelKon eSIM may not activate or connect, even when the iPhone itself supports eSIM. Carrier unlocking must be handled by the original provider. Update iOS Before Departure Install the latest available iOS update before travel. An outdated iOS version can affect eSIM installation screens, transfer options and mobile service behaviour. Avoid major system updates during a layover or at airport arrival unless the phone has stable Wi-Fi, battery and time. Use the EID Check Before Buying For the fastest “does my phone support eSIM” check: If EID is visible and the phone shows No SIM Restrictions, the device is usually ready for a TravelKon eSIM, subject to destination coverage

iPhone 17 eSIM Compatibility and Setup Guide Read More »

esim activation failed

eSIM Activation Failed: What It Means and What to Do

If your eSIM activation failed, the safest first step is to check whether the eSIM is already installed before rescanning or deleting it. An eSIM activation failed message can make a simple travel setup feel expensive fast. The QR code scans, the phone pauses, and suddenly the data line looks inactive, stuck, or unable to connect. For anyone who makes several overseas trips, travel eSIMs are a practical way to organise mobile data before departure without relying on airport arrival kiosks or standard roaming. But when activation fails, the next step should be calm and ordered, not random setting changes. Do This First: Do not delete the eSIM yet. Open your SIM, Mobile Service, Cellular or SIM Manager settings and check whether the eSIM profile is already visible. What eSIM Activation Failed Usually Means An eSIM activation failed message usually means the phone could not complete one of three steps: It does not automatically mean the eSIM is broken. For a travel eSIM, the message can appear before departure because the plan may need to connect to a supported overseas network before it fully starts. After arrival, it may point to mobile data settings, roaming settings, APN details, a carrier-locked phone, a weak signal, a QR code issue, or the wrong SIM being selected for data. What the Error Message Is Telling You Error What It Usually Means First Fix eSIM activation failed The phone could not complete download, installation or network activation Check Wi-Fi, restart, then check whether the eSIM is visible Unable to activate eSIM The profile may be installed but not connected to the right network yet Confirm destination coverage, turn on the eSIM line and enable roaming if required This code has already been used The QR code may have already installed the profile or been consumed Stop rescanning and contact support with a screenshot Invalid QR code The code may be expired, opened incorrectly, damaged or not meant for that device Use the original email and check for manual setup details No Service The eSIM may not have joined a supported network Try manual network selection after arrival SOS Only The phone may have emergency-only access but no active mobile data connection Check the selected data SIM, roaming and network selection Installed but no internet The eSIM is present but data is not flowing Check APN, VPN, Private Relay, Data Saver and Wi-Fi-off testing Hotspot not working The plan, phone or local network may not support hotspot Check the product details before changing unrelated settings Fix It Fast with this Quick Checklist Run through these quick checks before changing advanced settings: Before Departure vs. After Airport Arrival A travel eSIM can behave differently before and after reaching the destination. This is where many setup mistakes happen. Before Departure Before departure, focus on preparation rather than forcing a live connection. Check that the phone supports eSIM, is unlocked, and matches the product requirements. For someone using a Europe eSIM for instance, saving the installation email somewhere easy to access offline. Read the product instructions for activation timing, destination coverage, APN details, roaming settings and hotspot availability. If the instructions allow early installation, install on a stable Wi-Fi and stay on the setup screen until the phone finishes. Avoid locking the phone, switching apps repeatedly, moving between Wi-Fi networks, or scanning the same QR code again while setup is still processing. After Airport Arrival After airport arrival, focus on network connection. Turn on the travel eSIM, set it as the mobile data line, enable roaming on that eSIM if required, and wait a few minutes. If automatic network selection does not work, choose a supported local network manually where listed in the product instructions. Test with Wi-Fi off. Signal bars alone do not prove mobile data is working. Why Activation Can Fail Even When the eSIM Is Installed The wording is the confusing part. “Activation failed” sounds final, but eSIM setup has more than one stage. A phone may download and store the eSIM profile successfully, then fail to connect because the destination network is not available yet. That is common with an international eSIM installed before travel. The eSIM can sit on the phone, ready for use, while still showing inactive, activating, no service, or unable to activate. A different issue happens when the profile never installs properly. That can be caused by unstable Wi-Fi, an interrupted QR code scan, carrier lock, device incompatibility, too many stored eSIM profiles, or leaving the setup screen too early. A third issue happens after installation. The eSIM is on the phone, but mobile data is still assigned to the home SIM, roaming is off for the travel line, APN details are missing, or the phone has not joined a supported local network. A visible eSIM profile usually means the next job is settings and network checks. However, a missing eSIM profile usually means the installation stage needs attention. For extra setup context before choosing or installing a plan, our guide to how an eSIM works explains how to properly install your eSIM profile. If the eSIM Is Installed but Has No Data This is one of the most common travel eSIM problems: the eSIM appears in settings, but apps still do not load. Work through this order: iPhone eSIM Activation Failed Checks For iPhone, check these settings in order: Android eSIM Activation Failed Checks Android wording varies by brand, but the troubleshooting logic is similar. If the Android phone was bought overseas, imported, supplied by a carrier, or has a regional model variant, confirm eSIM support and carrier unlock status before assuming the plan has failed. QR Code, Manual Setup, and Already-Used Errors QR code problems need careful handling because many eSIM QR codes are designed for one installation. If the QR code will not scan, first check that the original email is open clearly on another screen. Increase brightness, avoid cropped screenshots, and make sure the phone camera can see the full code. And if the code

eSIM Activation Failed: What It Means and What to Do Read More »

how to fix no service esim

How to Fix No Service After Installing an eSIM

A phone showing No Service after an eSIM install can make any trip feel stressful, especially at the airport, in a rideshare queue, or just before needing maps. For travellers using travel eSIMs, the issue is usually not that the eSIM has failed. More often, the phone has not connected to the right network, the wrong SIM is selected for mobile data, roaming is off, or the APN/network settings need a quick check. Quick Overview of What You Should Do If an eSIM shows No Service after installation, start with these checks: Note: Avoid deleting the eSIM as the first fix. Some travel eSIM QR codes or activation details may not be reusable. Getting You Back Online  Try this fast sequence first: What to Check What to Do eSIM line Make sure the eSIM is turned on in mobile settings Mobile data Set mobile data to the travel eSIM Roaming Turn data roaming on for the travel eSIM line Flight mode Turn flight mode on for 10 seconds, then off Restart Restart the phone and wait 1–2 minutes Other SIMs Temporarily turn off the home SIM or other eSIMs Location Move outside, near a window, or away from basement/airport dead zones Wi-Fi test Turn Wi-Fi off and load a basic webpage using mobile data If the phone still shows “No Service,” continue with the full checklist below. No Service, SOS Only, or Bars With No Internet? These problems look similar, but they usually mean different things. What You See Most Likely Cause Try First No Service before departure The travel eSIM may only connect overseas Wait until arrival and check product instructions No Service after landing Wrong data line, roaming off, unsupported network or carrier lock Set mobile data to the eSIM, turn roaming on, restart SOS Only The phone cannot register on an allowed mobile network Try manual network selection and check coverage Signal bars but no internet APN, mobile data line, VPN, plan status or roaming issue Check APN, disable VPN, test mobile data only QR code already used The eSIM may already be installed or the code may be single-use Avoid deleting it; contact support “No Service” is usually a network registration problem. Signal bars with no internet usually points more towards mobile data, APN, roaming, VPN or plan-status issues. Why eSIM No Service After Installation Happens A travel eSIM is a digital SIM profile. As such, it does not create mobile coverage by itself but rather lets a compatible, unlocked phone connect to supported partner networks in the destination country. For instance, if you are relying on a Japan eSIM to access high-speed local data, ensure you are in an area covered by the partner network. If your travels take you elsewhere, such as using an Indonesia eSIM data plan while navigating local markets, the same troubleshooting logic applies.  No Service after installation usually happens when: For a data-only eSIM, the main goal is mobile data. Messaging apps, maps, rideshare apps, email, banking apps and browser access can work once the data connection is active. Standard calls and SMS may still depend on the main SIM, an app-based service, or a plan that clearly includes voice and text. Emergency calling can vary by country, device, local network and SIM state, so a data-only travel eSIM should not be treated as the only emergency option. Troubleshooting Flow: Start Here Use this order before changing advanced settings. Step-by-Step Checklist to Fix No Service 1. Check the Destination and Timing Some travel eSIMs can be installed before departure but only connect after arrival in a supported destination. For example, travellers using products in our Europe eSIM category should confirm that their specific regional plan covers the exact countries on their itinerary before attempting to connect.  If the phone is still in Australia before departure, No Service on the travel eSIM line may simply mean there is no supported overseas network available yet. Also check: 2. Move to a Better Signal Area Poor indoor coverage can make an eSIM look broken even when the setup is correct. Move outside, near a window, or away from basement areas, airport corners, lifts, underground train platforms, thick concrete buildings or remote hotel rooms. Wait one to two minutes after moving. 3. Turn Flight Mode Off After Landing Airport arrival is a common failure point. The phone may still be holding an old network state. Turn flight mode on for 10 seconds, turn it off, then wait one to two minutes. If No Service remains, restart the phone. 4. Confirm the eSIM Line Is Switched On Open the phone’s SIM or mobile network settings and check that the installed eSIM profile is enabled. On iPhone, this is usually under Settings > Mobile Service or Settings > Cellular. On Android, look for SIMs, Mobile Network, Connections, or SIM Manager. The exact wording depends on the phone brand. 5. Set Mobile Data to the Travel eSIM The phone may still be using the home SIM for data. Set Mobile Data or Cellular Data to the travel eSIM. Turn off automatic mobile data switching while testing so the phone does not silently jump back to the home SIM. 6. Enable Data Roaming on the eSIM Line For many international eSIM products, data roaming must be on for the travel eSIM because the service connects through partner networks. Make sure roaming is turned on for the travel eSIM line, not accidentally on the home SIM. 7. Temporarily Disable the Home SIM or Other eSIMs Dual-SIM settings can cause confusion when the phone keeps trying to use the wrong line. Temporarily turn off the home SIM or any other eSIMs, then test the travel eSIM by itself. Once mobile data works, turn the other SIMs back on if needed. 8. Check for a Carrier Lock A carrier-locked phone may reject other SIM or eSIM services. On iPhone, go to Settings > General > About > Network Provider Lock. It should show No SIM restrictions. On Android, check the

How to Fix No Service After Installing an eSIM Read More »

esim transfer

How to Transfer an eSIM to a New Phone

Changing phones can be stressful if your mobile service depends on an eSIM. Carrier eSIMs are more likely to support transfer between phones. However, travel eSIMs are often more restricted and may be tied to the first device they were installed on. This guide explains how to transfer an eSIM to a new phone, when a transfer is possible, what happens to the old device, and what to do if the QR code does not work. Can You Transfer an eSIM to a New Phone? You may be able to transfer an eSIM to a new phone if it is a regular carrier eSIM. Many travel eSIMs should be treated as non-transferable unless the provider or setup notes confirm otherwise. A carrier eSIM linked to your normal mobile number may transfer through iPhone, Samsung, Google Pixel, or carrier activation tools. This depends on the phone model, operating system, carrier support, region, and whether the old phone is still available. A travel eSIM or international eSIM is usually more restricted. For instance, if you are moving a dedicated Europe eSIM between devices mid-trip, you might run into activation limits.  If this is a TravelKon travel eSIM that has already been installed, do not delete it from the old phone before checking the activation email, product page, or our support guidance. Situation What It Usually Means What to Do Next You are moving your normal phone plan Transfer may be available Use device settings or contact your carrier You are moving a travel eSIM Transfer may not be supported Check the activation email first You already deleted the eSIM Reinstallation may not work Contact support with your order details Your new phone will not scan the QR code The code may already be used Stop rescanning and ask support Your old phone is lost, wiped, or traded in Transfer may need provider help Contact the carrier or eSIM provider Important: Keep the eSIM installed on the old phone until the new phone is connected and working. If the eSIM is a travel eSIM, deleting it too early may prevent reinstallation. Quick Checklist Before Transferring an eSIM to a New Phone Before attempting an eSIM transfer, check the following: Carrier eSIM vs Travel eSIM vs Data-Only eSIM Feature Carrier eSIM Travel eSIM Data-Only eSIM Uses your normal phone number Usually Usually not Usually not Transfer supported Often Sometimes Depends on the provider QR code reusable Depends on the carrier Often no Depends on the provider Calls and SMS Usually Depends on the plan Usually no Carrier assistance available Yes Provider specific Provider specific Risk of losing access after deletion Lower Higher Medium As mentioned earlier, while a local carrier plan might allow multi-device shifting, a prepaid Japan travel eSIM bought for a short holiday is typically locked to the hardware of your initial device.  How to Transfer eSIMs Across Different Phone Brands Moving your eSIM profile to a new device varies significantly by manufacturer, so select your specific brand setup below: Transferring an eSIM from iPhone to iPhone If your carrier supports eSIM Quick Transfer, use these steps to move your profile across seamlessly. Prerequisites: Procedure: After a successful transfer, the eSIM is automatically deactivated or removed from the old device. If the option does not appear, your carrier, region, or iOS version may not support Quick Transfer. Do not delete your old eSIM before contacting your provider. How to Transfer an eSIM from Android to iPhone While cross-ecosystem transfers require specific software support, many major carriers allow direct Android-to-iPhone migration natively during device setup. Note: This direct feature requires a compatible Android device and an iPhone running iOS 26 or later. If your carrier or region doesn’t support native cross-platform switching, you will need to log into your carrier’s app or website to generate a traditional activation QR code. How to Transfer an eSIM from iPhone to Android Moving a profile from iOS to Android no longer requires a manual carrier intervention, provided both devices are updated and your network provider supports direct cross-platform migration. Travel eSIM Tip: Automated device-to-device switching is typically restricted to major post-paid consumer networks. If you are using a prepaid travel or roaming eSIM, do not attempt this method; you must check the provider’s app to see if your original activation profile can be reused. How to Transfer an eSIM Between Samsung Phones On Samsung Galaxy devices: Some carriers may require a new activation instead of a direct phone-to-phone transfer. If you are using a travel eSIM, treat SIM Manager as a settings area, not a guarantee that transfer is supported. Confirm transfer support before removing the old profile. How to Transfer an eSIM on Google Pixel On Google Pixel: Pixel eSIM transfer support depends on the phone model, Android version, carrier, and region. A transfer option for a regular carrier plan does not automatically apply to a travel eSIM. What is the Difference between eSIM Transfer and eSIM Reinstall?  Transferring an eSIM means moving an active profile from one phone to another through supported device, carrier, or provider tools. On the other hand, reinstalling means using the QR code or manual activation details again on another phone. With global eSIM adoption expanding by 30% this year alone, surging from 1.2 billion in 2025 to 1.5 billion active connections worldwide, understanding this distinction is more critical than ever. Many eSIM troubleshooting problems happen because travellers assume transfer and reinstall mean the same thing. For regular carrier eSIMs, transfer may be supported through phone settings or carrier activation. For many travel eSIMs, the QR code may be single-use. Step-by-Step Checklist Before You Transfer an eSIM Use this checklist before deleting, resetting, or rescanning anything. 1. Confirm What Type of eSIM You Have Start by identifying whether the eSIM is: 2. Check whether the New Phone Supports eSIM Do not rely only on the phone name. Different models, regions, and carrier variants can behave differently. Check for an EID in your phone settings. On many phones, this sits

How to Transfer an eSIM to a New Phone Read More »

somoene looking at their phone phone number safe

How to Keep Your Phone Number Safe While Travelling Overseas With an eSIM 

You can keep your usual phone number safe while travelling overseas by leaving your Australian SIM or eSIM installed, using a travel eSIM for mobile data, and keeping data roaming turned off on your home line unless your carrier plan includes suitable roaming. Maintaining this connection is crucial for overseas travellers, given that our phones now act as the primary gatekeepers for banking verification codes, WhatsApp, airline updates, and work logins. According to the ABS, Australians made more than 8.4 million overseas trips between 2024 and 2025, so ensuring your SIM setup is configured correctly before departure is beyond important. A Quick Overview of Travel Number Safety  To keep your phone number safe while travelling overseas: This setup keeps your regular number separate from your overseas data and reduces the risk of roaming charges, account lockouts, and avoidable setup issues. What Keeping Your Phone Number Safe Actually Means Keeping your phone number safe while travelling means two things. First, it means keeping the number working. You may need it for calls, SMS, WhatsApp, iMessage, banking apps, email, airline apps, accommodation bookings, and password recovery. Second, it means protecting the number from avoidable risks. These include accidental roaming charges, lost phone issues, SIM swap scams, carrier account takeover, account lockouts, public Wi-Fi risks, and deleting the wrong eSIM. Your phone number belongs to your home mobile service. A travel eSIM is usually a separate mobile data plan. If it is data-only, it gives your phone internet access but does not usually provide a normal phone number for calls and SMS. Item What it controls Home SIM or eSIM Your usual phone number, calls, SMS, and carrier account Travel eSIM Overseas mobile data Apps WhatsApp, iMessage, banking, email, password manager, airline apps Travel eSIM vs Roaming vs Local SIM Option Keeps the usual number? Data cost risk Best for Travel eSIM + home SIM kept installed Yes Low if set correctly Most travellers Home carrier roaming plan Yes Medium to high, depending on plan Short trips where convenience matters Local physical SIM Sometimes no, if the home SIM is removed Low for data, but number access can be harder Longer stays Wi-Fi only Yes, but only when connected Low Light users or backup only VoIP or number parking Depends on setup Low Long-term travellers or expats For most Australian travellers, the cleanest setup is: home SIM for your number, travel eSIM for data. Check out our guide to how an eSIM works to see exactly how easy it is to configure before you head to the departure gate.  Five-Minute Safety Check Before Departure Most eSIM problems are easier to fix before you leave than after you land. 1. Confirm Your Phone Supports eSIM Check that your exact phone model supports eSIM. Some devices vary by country, model version, or carrier. 2. Check That Your Phone Is Unlocked A carrier-locked phone may not accept a travel eSIM. If you are unsure, check with your Australian carrier before leaving. 3. Save Your Setup Details Offline Save: Take screenshots as well. Airport Wi-Fi is not the best time to discover your QR code is stuck inside an inbox that will not load. 4. Check whether the eSIM Is Data-Only If the eSIM is data-only, use it for internet access. Do not expect normal calls and SMS unless the product details clearly say they are included. This is a common feature for regional data packages, such as a multi-country Europe eSIM, which provides seamless internet across borders but can, at times, skip traditional voice minutes.  5. Check Banking and Account Recovery Open your banking apps, email, password manager, airline apps, accommodation apps, and two-factor authentication tools before departure. Where possible, add: Do not rely only on SMS codes if you are unsure whether your home number can receive SMS overseas. Safe Setup vs Risky Setup Safe setup Risky setup Travel eSIM used for mobile data Home SIM left on for roaming data The home number kept installed Home eSIM deleted by mistake QR code saved offline QR code is only stored in email Support contacted before deleting eSIM eSIM deleted during troubleshooting Banking recovery checked before departure SMS recovery assumed to work overseas Mobile lines labelled clearly Home and travel lines left unnamed Mobile data switching turned off Phone allowed to switch back to home data Carrier account protected with a PIN or secure login Carrier account left easy to access Most eSIM problems become harder when the wrong line is selected, the QR code cannot be accessed, or the eSIM is deleted too early. How to Set Up Your Phone iPhone Samsung Google Pixel and Other Android Phones Note: Menu wording varies by device, but the goal is to always use the travel eSIM for data and the home line is protected from roaming data. This setup is particularly useful when using US eSIM plans, as North American networks rely heavily on LTE and 5G data bands for app-based communication rather than older GSM lines.  App and Account Access While Travelling App or service Will it keep working? What to check WhatsApp Yes Keep your existing WhatsApp number. Do not re-register unless you want to change numbers. iMessage Usually yes Check Send & Receive settings before departure. Avoid changing number settings overseas. FaceTime Yes Confirm Apple ID and number settings before leaving. Banking apps Usually yes over data Check SMS code requirements and backup login options. Email Usually yes Make sure you know the password and recovery method. Airline and hotel apps Usually yes Log in before departure and save bookings offline. Two-factor authentication Depends on method Authenticator apps and backup codes are safer than SMS-only recovery. How to Protect Your Phone Number From Theft and Fraud Overseas As mentioned earlier, keeping your number safe is not only about mobile data settings. It also means protecting the phone, SIM, carrier account, and recovery methods linked to that number. Your phone number can also be targeted through SIM swap attempts or carrier account takeover, particularly

How to Keep Your Phone Number Safe While Travelling Overseas With an eSIM  Read More »

someone looking at their phone reinstall esim

Can I Reinstall an eSIM After Deleting It?

If you deleted your eSIM and the QR code now says already used, expired, or invalid, you may not be able to reinstall it without provider support. In some cases, a deleted eSIM can be reinstalled using the original QR code or manual activation details. In others, the installation credentials can only be used once, meaning a replacement eSIM may be required. This guide explains when you can reinstall a deleted eSIM, when you cannot, and the fastest way to get connected again. Once you are done here, check out our deep-dive blog on how an eSIM works to master the basics.  Quick Answer You may be able to reinstall an eSIM after deleting it, but you should never assume the original QR code will work again. Before attempting another installation: If the eSIM is still installed but not connecting, do not delete it. Most travel eSIM issues are caused by network selection, roaming settings, activation timing, or mobile data configuration rather than the eSIM itself. The Most Important Thing to Know Deleting an eSIM is not the same as restarting a connection. According to industry projections by the GSMA, 50% of all smartphones will rely on eSIM technology by 2028. However, while the technology is spreading rapidly, actual consumer understanding of how to manage digital profiles lags behind. If your eSIM is still installed on your device, troubleshooting your internal settings is always safer than removing the profile. The vast majority of travel connection failures are caused by minor setup oversights, including: Deleted Your eSIM at the Airport? Do This First If you have already landed and accidentally deleted your eSIM, follow these steps before buying another plan. Can I Reuse the Same eSIM QR Code? Whether the same QR code can be used again depends on the provider and plan. Situation Can You Reinstall? eSIM still installed but switched off Yes eSIM deleted and QR code supports multiple installs Yes eSIM deleted and QR code is single-use Usually no eSIM transferred to another phone Depends on the provider QR code says already used Support is usually required QR code says expired Support is usually required Plan has already finished Usually no Device is carrier-locked Usually no, unless unlocked first For many travel eSIMs, deleting the profile removes the installed mobile plan from the device. If you accidentally remove a single-use Bali eSIM while on holiday, you will likely need a replacement QR code from your provider to get back online.  Is the eSIM deleted or Just Turned Off? Before trying to reinstall anything, check whether the eSIM is actually gone. On iPhone, go to Settings > Mobile or Settings > Cellular. If the travel eSIM still appears as a line, it has not been deleted. It may simply be turned off or not selected for mobile data. On Android, check SIM Manager, Connections, Mobile Network, or Network & Internet. The wording varies by device. If the eSIM is still visible: Turning an eSIM off keeps the profile on the phone. Deleting it removes the profile from the device. Turning Off vs Deleting vs Removing After Travel Action What It Does Safe During Travel? Turning off the eSIM Keeps the eSIM profile on your phone but disables the line Yes, usually safe Deleting the eSIM Removes the eSIM profile from the phone No, avoid unless the plan is finished Removing after travel Deletes the profile once you no longer need the plan Yes, usually fine Resetting network settings Refreshes phone network settings without deleting the eSIM profile Usually safer than deleting How to Reinstall a Deleted eSIM on iPhone If your provider allows reinstallation, follow these steps: If the QR code says it has already been used, has expired, or cannot be activated, stop and contact support. Common iPhone Installation Errors This QR Code Is No Longer Valid This usually means the installation credentials have already been used or have expired. Unable to Complete Cellular Plan Change This can be caused by activation restrictions, network issues, or provider limitations. Cellular Plan Cannot Be Added Check device compatibility, carrier lock status, and whether the installation details are still valid. How to Reinstall a Deleted eSIM on Android Android settings vary by manufacturer, but the general process is: Depending on your device, the menu may appear under: If the phone cannot add the eSIM, check that the device supports eSIM and is not carrier-locked. Common Android Installation Errors Couldn’t add eSIM This may indicate a compatibility issue, poor internet connection, or expired credentials. Code Already Used This usually means the provider does not allow the installation details to be reused. Network Not Activated This often means activation has not completed or the supported destination network has not yet been reached. For example, an Indonesia eSIM may show this status until your flight lands and the device connects to a local Jakarta or Bali carrier.  Manual eSIM Installation Details Explained Some providers include manual installation details as well as a QR code. These may include: These details perform the same function as the QR code and allow the phone to download the eSIM profile directly. On iPhone, you can usually enter these details via Add eSIM > Use QR Code > Enter Details Manually. On Android, the option is typically available during the Add eSIM process. The exact wording varies by device. Manual installation may help if your camera cannot scan the QR code, but it will not always bypass single-use installation rules. What If the QR Code No Longer Works? QR Code Already Used This usually means the QR code has already been used to install the eSIM profile. Some providers allow reuse, but many travel eSIMs do not. QR Code Expired Some installation credentials expire after a certain period. If this happens, support may need to review the order and provide updated instructions. Unable to Add eSIM Possible causes include: Unsupported deviceCarrier-locked phoneIncorrect activation detailsTemporary activation issueExpired or already-used credentials eSIM Installed, but No Data If the eSIM installs

Can I Reinstall an eSIM After Deleting It? Read More »

somoene looking at their phone in frustration delete esim

What Happens If I Delete My eSIM?

Deleting an eSIM removes the mobile plan profile from your phone. Your phone is not damaged, and your photos, apps, contacts, messages, passwords, and files remain safe. The problem is connection loss. If the travel eSIM was providing mobile data, calls, or SMS, those services may stop working on that device until the eSIM is restored, reissued, reinstalled, or replaced. Even as eSIMs scale to 6.7 billion global connections by 2030, the technology remains somewhat restrictive. Some deleted travel profiles can be reinstalled, while others cannot, making it vital to check with your provider before making any moves.  eSIM Deletion Effects at a Glance  If you delete an eSIM: Important Warning Before You Troubleshoot Do not delete an active travel eSIM as a troubleshooting shortcut unless support specifically tells you to. Our guide to how an eSIM works can help you understand the setup, but if mobile data is not working, it is usually safer to check roaming, mobile data selection, network settings, and activation instructions first. Deleting the eSIM can make a fix harder if the activation link only works once. Deleting an eSIM vs Turning Off an eSIM Many people delete an eSIM when they only meant to turn it off temporarily. Action What Happens Can It Usually Be Reversed? Turn eSIM Off Profile remains stored on the phone but is inactive Yes Delete eSIM Profile is removed from the device Depends on the provider Expired eSIM Profile remains but the plan has ended Service generally cannot be used Factory Reset eSIM may be removed depending on reset choices Depends on device and provider If the eSIM still appears in your phone settings, it may only be switched off but if it has disappeared completely, it has likely been deleted. Will deleting an eSIM Cancel My Plan? Not necessarily. Deleting an eSIM removes the profile from your device, but it does not automatically cancel the service behind it. For example: Always treat phone settings and account billing as separate things. If charges are your concern, contact the provider directly. Can You Get a Deleted eSIM Back? Sometimes, but never assume it. If the eSIM can be reissued, the provider may send a replacement QR code, manual installation details, or a new activation link. If the eSIM was single-install only, the original activation method may no longer work. Before buying another plan, check the original installation email or order page. If the QR code or activation link says it has already been used, stop trying and gather the key details support will need: your order details, device model, destination, screenshots, and a short timeline of what happened. Will deleting an eSIM Delete My Phone Number? In most cases, no. Deleting an eSIM removes the mobile profile from the device, not the phone number itself. eSIM Type What Happens to the Number? Data-only travel eSIM Usually, no phone number is attached Carrier eSIM with mobile number The number remains with the carrier Business or enterprise eSIM The number remains active unless the service is cancelled If the deleted eSIM carried your primary mobile number, you may temporarily lose calls and SMS on that device until the profile is restored. This applies whether you are using a local carrier plan at home or a specific Indonesia eSIM that came bundled with a temporary local virtual number.  What If I Deleted the Wrong eSIM? First, do not delete any other SIM profiles. Check which line is still active in your phone settings. Look for labels such as Primary, Personal, Business, Travel, Secondary, or the destination name. If your home line is still installed, keep it active for calls or SMS where possible. And if you accidentally removed your Japan eSIM instead of an old expired profile, connect to Wi-Fi and verify which profile has been removed before making further changes. This is also why clear SIM labels are important before travelling.  Can I Transfer a Deleted eSIM to a New Phone? Usually not directly. An eSIM profile stored on one phone cannot always be moved like a physical SIM card. Some carriers support eSIM transfer between devices, but many travel eSIMs are designed for one device and one installation only. If you are changing phones, selling a phone, or replacing a damaged device, check the provider’s transfer rules before deleting the eSIM from the old device. For instance, if you upgrade your device while travelling with a US eSIM plan, you will typically need to contact support to reissue the profile for the new hardware.  That said, always assume you may need provider support or a replacement plan unless the instructions clearly say transfers are supported. What Happens If You Delete an eSIM Before or During Travel? Before Travel Deleting a travel eSIM before departure can remove the profile before it has ever connected overseas. This is risky because some travel eSIMs only activate properly after arrival, while the installation code may still be single-use. During Travel Deleting an eSIM overseas is more urgent. If the eSIM was your main data connection, maps, ride-share apps, translation tools, emails, banking checks, hotel bookings, messaging apps, and hotspot sharing may stop working unless you have Wi-Fi or another SIM available. After Travel Deleting an expired travel eSIM after your trip is usually low risk. Still, it can be worth keeping the profile for a few days after returning home in case you need support, receipts, usage checks, or order details. How to Check Whether an eSIM Is Deleted or Just Turned Off Before contacting support, confirm whether the eSIM has actually been removed. On iPhone On Android Note: Menu names vary between Android brands, operating system versions, and regions. What to Do After Deleting an eSIM Situation Likely Cause Recommended Action eSIM deleted before departure Profile removed before activation Check reinstallation eligibility eSIM deleted overseas Active travel profile removed Connect to Wi-Fi and contact support eSIM appears in settings Profile only disabled Turn the eSIM back on QR code says already used Single-use

What Happens If I Delete My eSIM? Read More »

someone holding a smartphone esim stuck activating

Why Is My eSIM Stuck Activating?

If your eSIM is stuck on activating, it does not always mean the eSIM has failed. In many cases, the eSIM has been installed correctly but has not connected to the destination network yet. This is common with travel eSIMs, especially when the plan only starts after the phone reaches a supported overseas network. The key is to work out whether the eSIM is still installing, waiting for activation, connected to the wrong data line, blocked by phone settings, or affected by a device or network issue. Quick Answer An eSIM is usually stuck activating because the eSIM profile has not finished installing, the phone has not connected to the destination network, or mobile data is still assigned to the wrong SIM. If the eSIM appears in your phone settings, do not delete it straight away. First, check: Always remember that most activation issues can be fixed without removing the eSIM. Do This First: The 5-Minute Fix Try these steps before changing advanced settings: If the eSIM is visible in settings, avoid deleting it unless the product instructions or support team tell you to. What You See and What It Usually Means What You See What It Usually Means First Thing to Check eSIM says activating before departure The plan may need the destination network before it fully starts Check the product instructions and wait until arrival eSIM is installed but has no data Mobile data, roaming, APN or network selection may be wrong Set mobile data to the travel eSIM QR code says already used The eSIM profile may already be installed or the QR code may be single-use Check SIM settings before rescanning No supported network appears The phone may not be connecting to the correct local carrier Try manual network selection Phone shows SIM not supported The device may be carrier-locked Check carrier-lock status Data works briefly then drops Network selection, APN, VPN, private DNS or automatic switching may be involved Turn off VPN/private DNS and check the selected data line eSIM line is visible but switched off The profile is installed but disabled Turn the eSIM line on iPhone still says activating but data works The label may not have refreshed properly Test data, then restart the phone Is the eSIM Actually Stuck? Not every activating message means something is broken. There are two different stages: A travel eSIM may install before departure but only activate properly once you arrive in the destination country. If you are still in Australia, your Europe eSIM profile won’t be able to connect to its required overseas network yet.  If the eSIM appears in your phone settings, it is usually installed. The issue is more likely to be mobile data selection, roaming, APN, network selection, local coverage or device compatibility. If the eSIM does not appear in settings, the installation may not have completed, as understanding how an eSIM works means knowing the digital profile must be fully downloaded to be visible. Return to the original setup instructions before scanning the QR code again.  Why This Matters for Overseas Travellers Travel eSIM setup is now a normal part of pre-flight planning. Australian residents recorded 910,450 short-term overseas return trips in March 2026, up 8.4% from March 2025, according to the Australian Bureau of Statistics. For travellers, the risk is simple. If the travel eSIM is not selected for mobile data, the phone may keep trying to use the home SIM, connect to expensive roaming, or fail to connect at all. Many travel eSIMs are data-only plans, meaning they are built for mobile data rather than standard calls and SMS unless the product clearly says otherwise. A data-only travel eSIM is usually suitable for maps, WhatsApp, Messenger, email, web browsing, and ride-share apps. This is incredibly handy whether you are using a Japan eSIM to navigate transit apps in Tokyo, or relying on a UK eSIM to map out London’s Tube network.  Australian telcos must provide international roaming usage alerts, including alerts at 50%, 85% and 100% of included roaming pack usage. A travel eSIM helps reduce accidental home-SIM data use only when mobile data is assigned to the correct eSIM line. Before leaving the airport, test maps, messaging, browser access, transport apps and banking apps on mobile data. It is much easier to fix eSIM setup while airport Wi-Fi is still available. Step-by-Step eSIM Troubleshooting Checklist Follow these steps in order. Change one setting at a time, then test mobile data before moving to the next step. 1. Check whether the eSIM Is Installed Open your phone’s SIM or mobile service settings. On iPhone, go to: Settings > Mobile ServiceorSettings > Cellular On Android, go to: Settings > Connections > SIM ManagerorSettings > Network & Internet > SIMs If the travel eSIM appears as a mobile line, it is installed. The issue is likely related to data settings, roaming, APN, destination coverage or network selection. If it does not appear, return to the original installation email and product instructions. 2. Connect to Stable Wi-Fi An eSIM usually needs a stable internet connection during installation. Airport Wi-Fi, hotel Wi-Fi or another phone’s hotspot can work, but the connection needs to stay active. If you are using public Wi-Fi, check whether there is a login page. Some airport, hotel and plane Wi-Fi networks will not provide full internet access until you accept the terms or complete sign-in. And if installation froze halfway through: 3. Turn the eSIM Line Off and Back On An installed eSIM can sometimes fail to refresh properly. Open the travel eSIM line in settings, turn it off, wait around 10 seconds, then turn it back on. On iPhone, this may appear as Turn On This Line.On Android, this may appear as a SIM toggle. Label the line clearly, such as “TravelKon” or “Travel Data”, so it is not confused with the home SIM. 4. Set Mobile Data to the Travel eSIM This is one of the most common missed steps. Go to mobile data settings and choose

Why Is My eSIM Stuck Activating? Read More »